


newsuser guides
Online Event Management with Cisco Webex
Create your Webex meeting rooms without ever leaving the backend of idloom.
product releases
June Product Release 2025
Dynamic registration forms, registration track management and e-invoicing 2.0! Discover everything packed into our latest release.

product releases
May Product Release 2025
Smarter discounts, dynamic forms, e-invoicing 2.0, and a brand-new image upload tool! Discover everything packed into our latest release.
user guides
Unlock more registrations with early bird pricing, coupons, and volume discounts
Learn how to configure and use idloom’s built-in discount tools to boost attendance, drive early registrations, and offer flexible pricing…

blognews
Integrating event registration with membership management systems
Integrating event registration with membership management systems (MMS) helps associations streamline operations, reduce manual work, and…
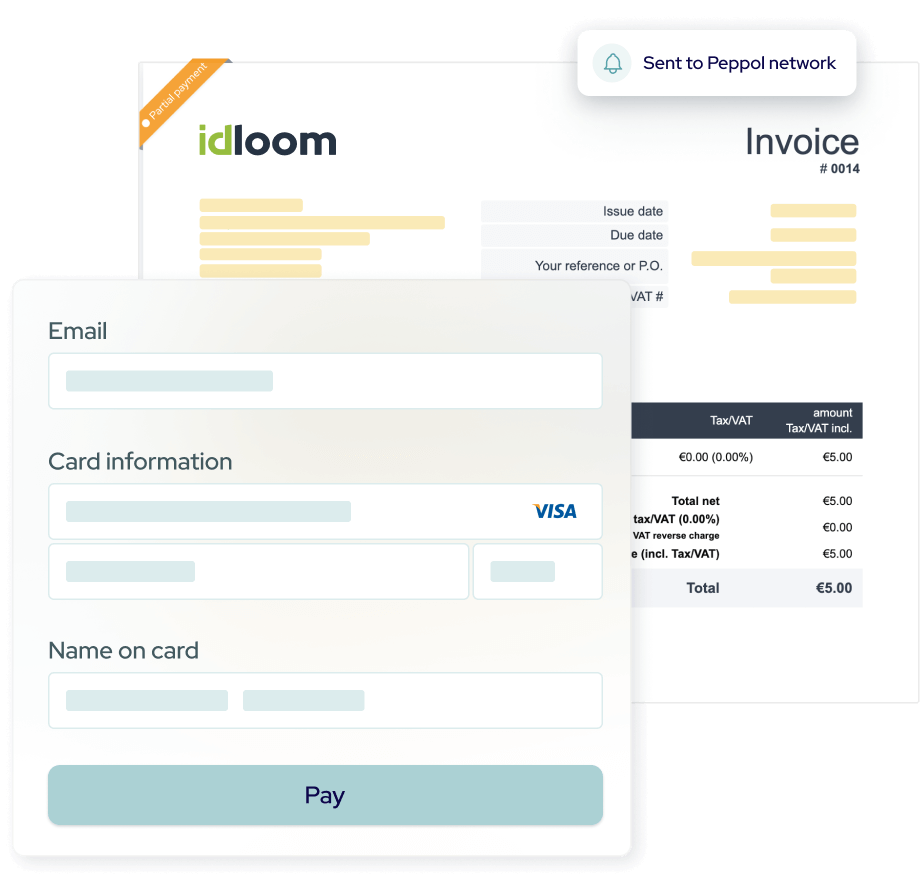
user guides
Mastering E-invoicing with idloom
Learn how to activate and manage e-invoicing with idloom, including Peppol network setup, VAT validation, and seamless e-invoice tracking.
product releases
April Product Release 2025
Streamline your event management with idloom’s latest product updates: global invoicing search and new content capabilities added to our…

blognews
idloom is a winner at the 2025 Eventex Awards
idloom honored at Eventex Awards 2025 for best-in-class event registration software.
product releases
March Product Release 2025
New accessibility contrast checker, footer control in the navigation menu builder for better event management.
blognews
New event website design template
idloom’s new event website template meets EAA standards and offers a sleek, accessible experience for event registration and attendee…
product releases
February Product Release 2025
Enhance your event website with idloom’s content and new navigation menu builder, and offer your audience a centralized platform for event…

case studies
EPTDA’s Event Management Evolution: From Frustration to Automation
Discover how EPTDA transformed its event planning process with idloom, eliminating manual tasks and improving efficiency.
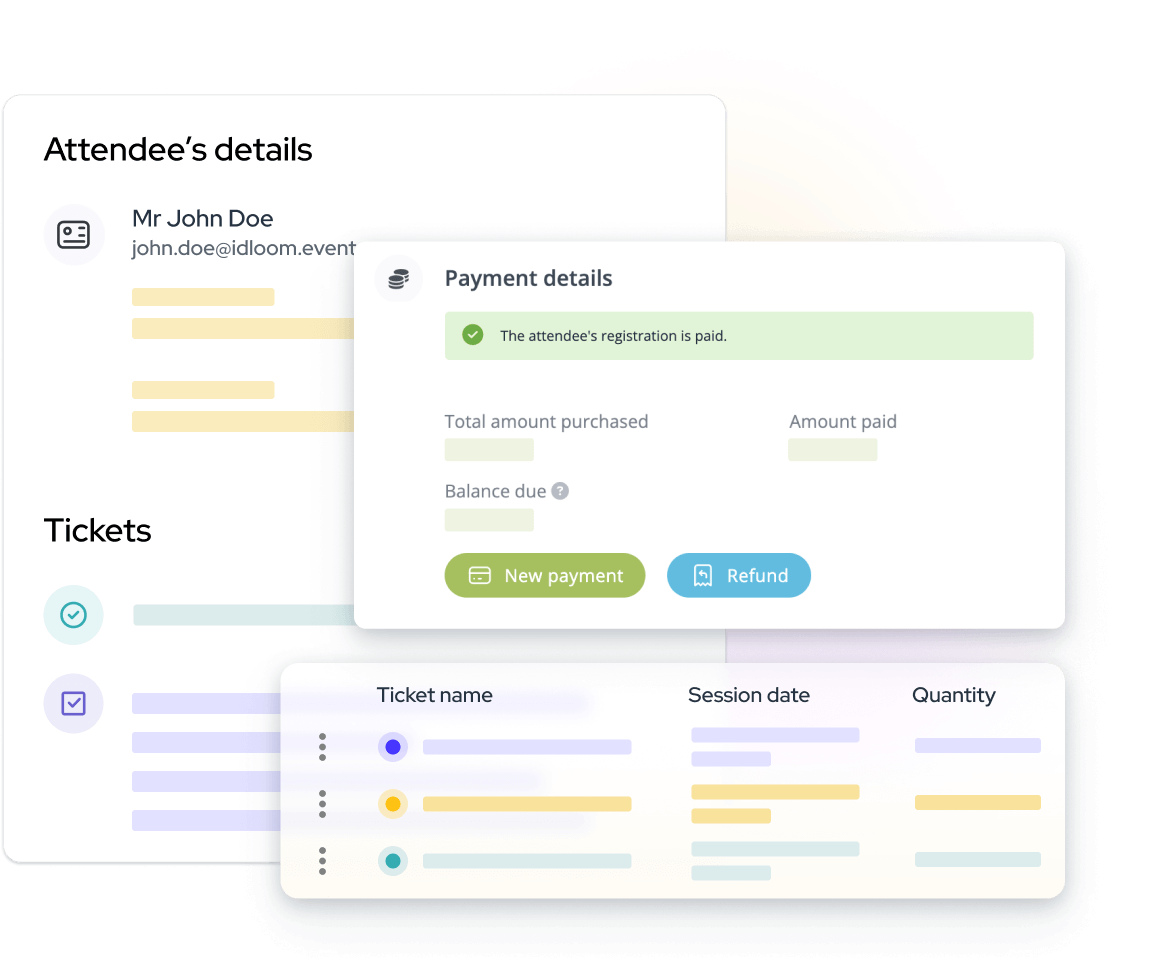
user guides
A centralized solution for attendees to manage event registrations
Attendee hub simplifies event registration by providing a centralized space for attendees to manage their events, update registrations, and…
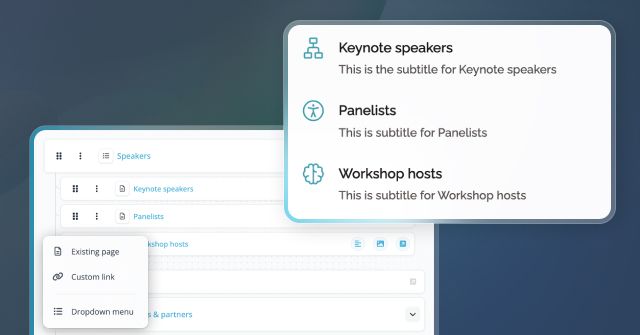
user guides
Structure your event website content & navigation for the ultimate browsing experience
Structure and navigate your event website with idloom’s enhanced content and menu builder. Add pages, links, and dropdowns for a seamless…