


How are Customers created?
Customers are automatically created when an attendee registers for an event. The system identifies and creates a new customer in the invoice module. A customer is created per registration, this means that if the same attendee registers multiple times, multiple Customers will be created.
What information is linked to a Customer?
A Customer contains all the financial information from the Attendee form and associated financial documents ensuring you have comprehensive data.
In the Customer Overview you will find the most useful information:
- First the Name
- Company name
- VAT number
- Country
If any of these fields are not included in the registration form, the corresponding column will be left blank. To ensure all entries are complete, please use the default fields provided. You can find instructions on how to do this in the next section.
How to differentiate default fields from custom ones?
In your event:
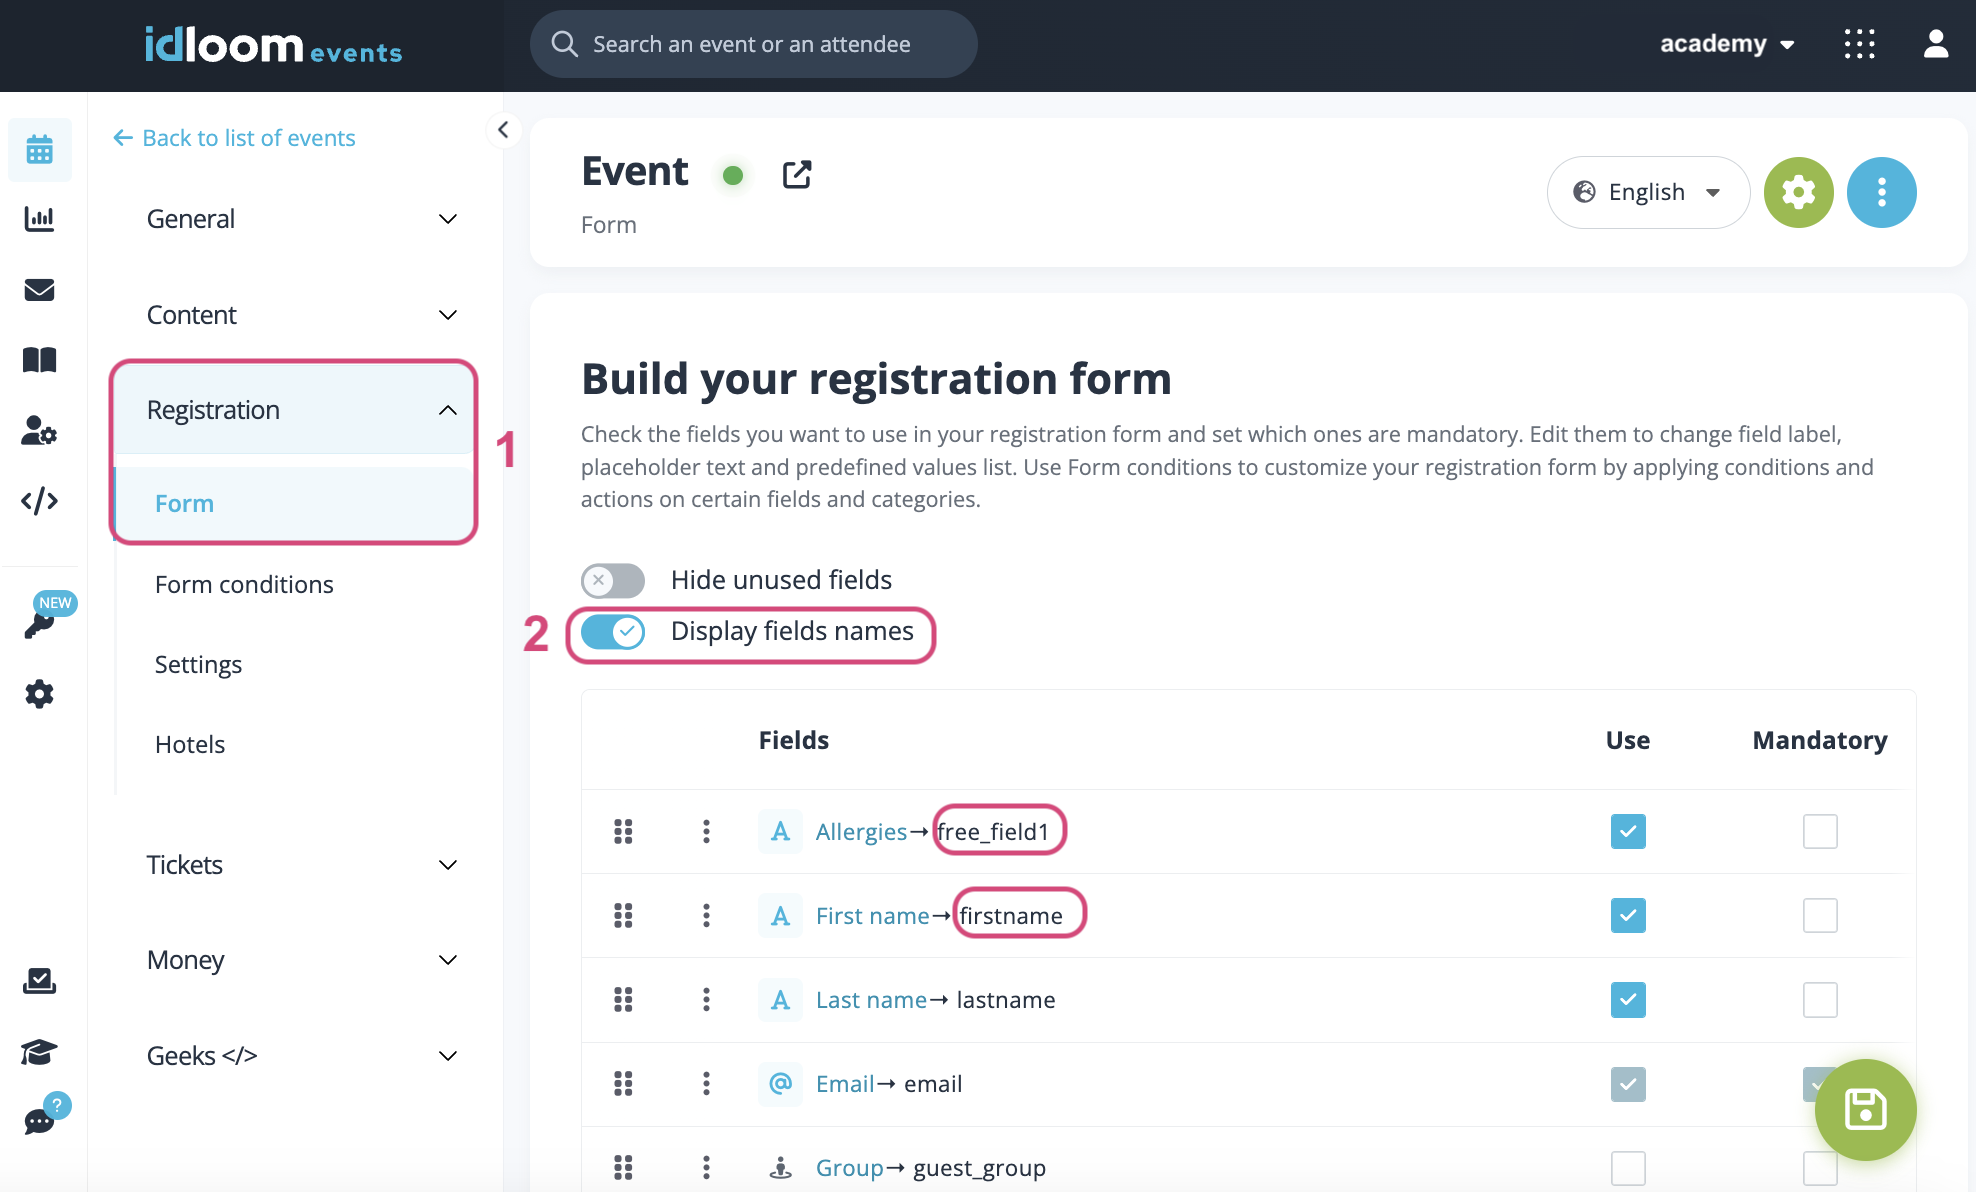
- Navigate to your form (Registration > Form link).
- Click on the “Display fields names" toggle.
- Next to the label, you will see the field name.
- Identify the default fields from the custom ones. Custom fields always contain the entry “free_field”. Default fields contain a value, like “firstname” for the First name field.
- Make sure that all the default fields from the Customer table have been activated if you want them all to be displayed in the table. The fields from the table are:
- Name - firstname & lastname
- Company Name - cpy_name
- VAT Number - cpy_vat_number
- Email - email
- Company Country - cpy_country
Manage Customers
Filter your Customer overview
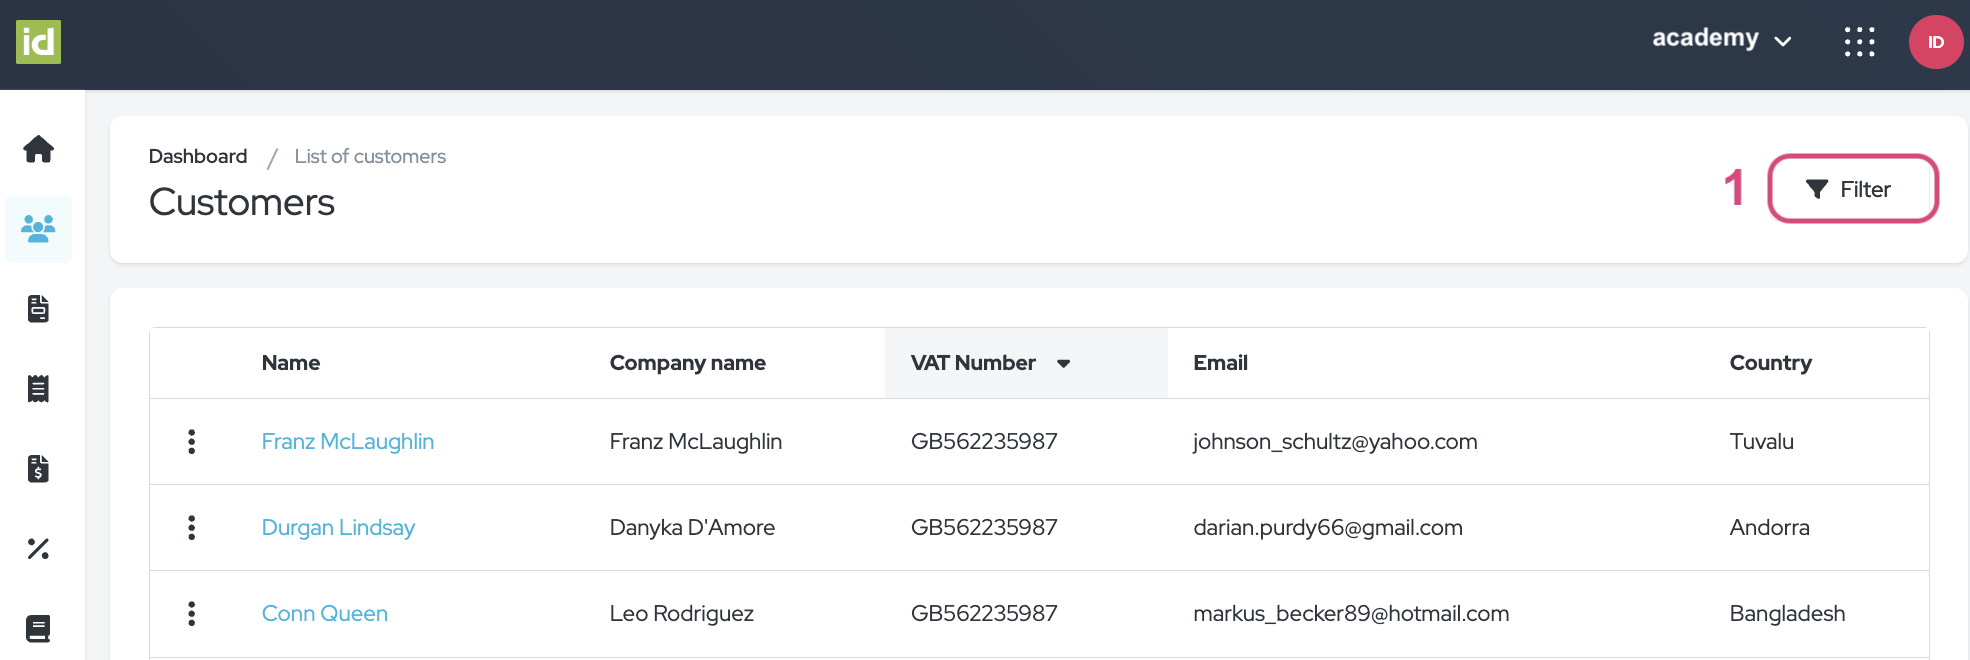
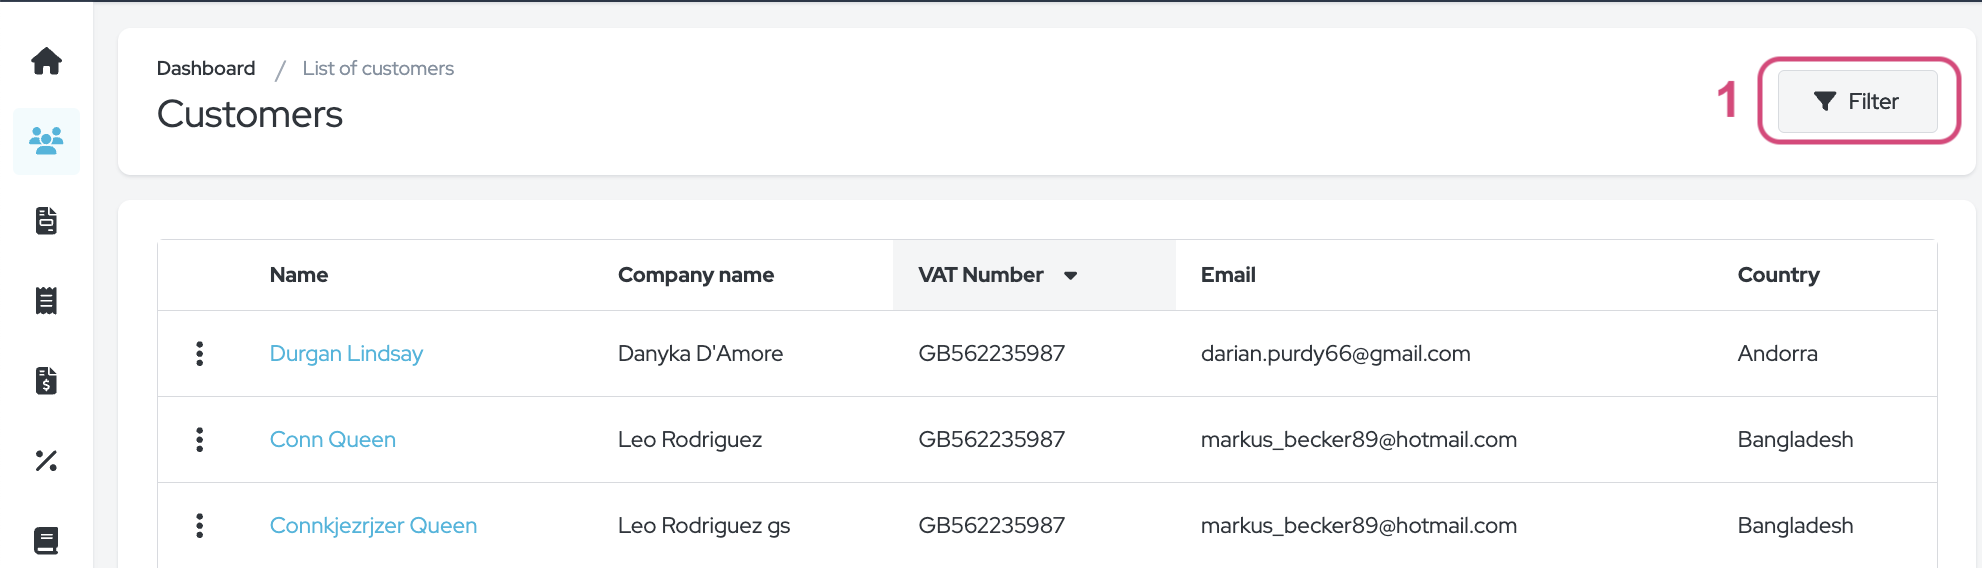
Navigate to the Invoice Module > Customer Section.
- Click on the “Filter” button.
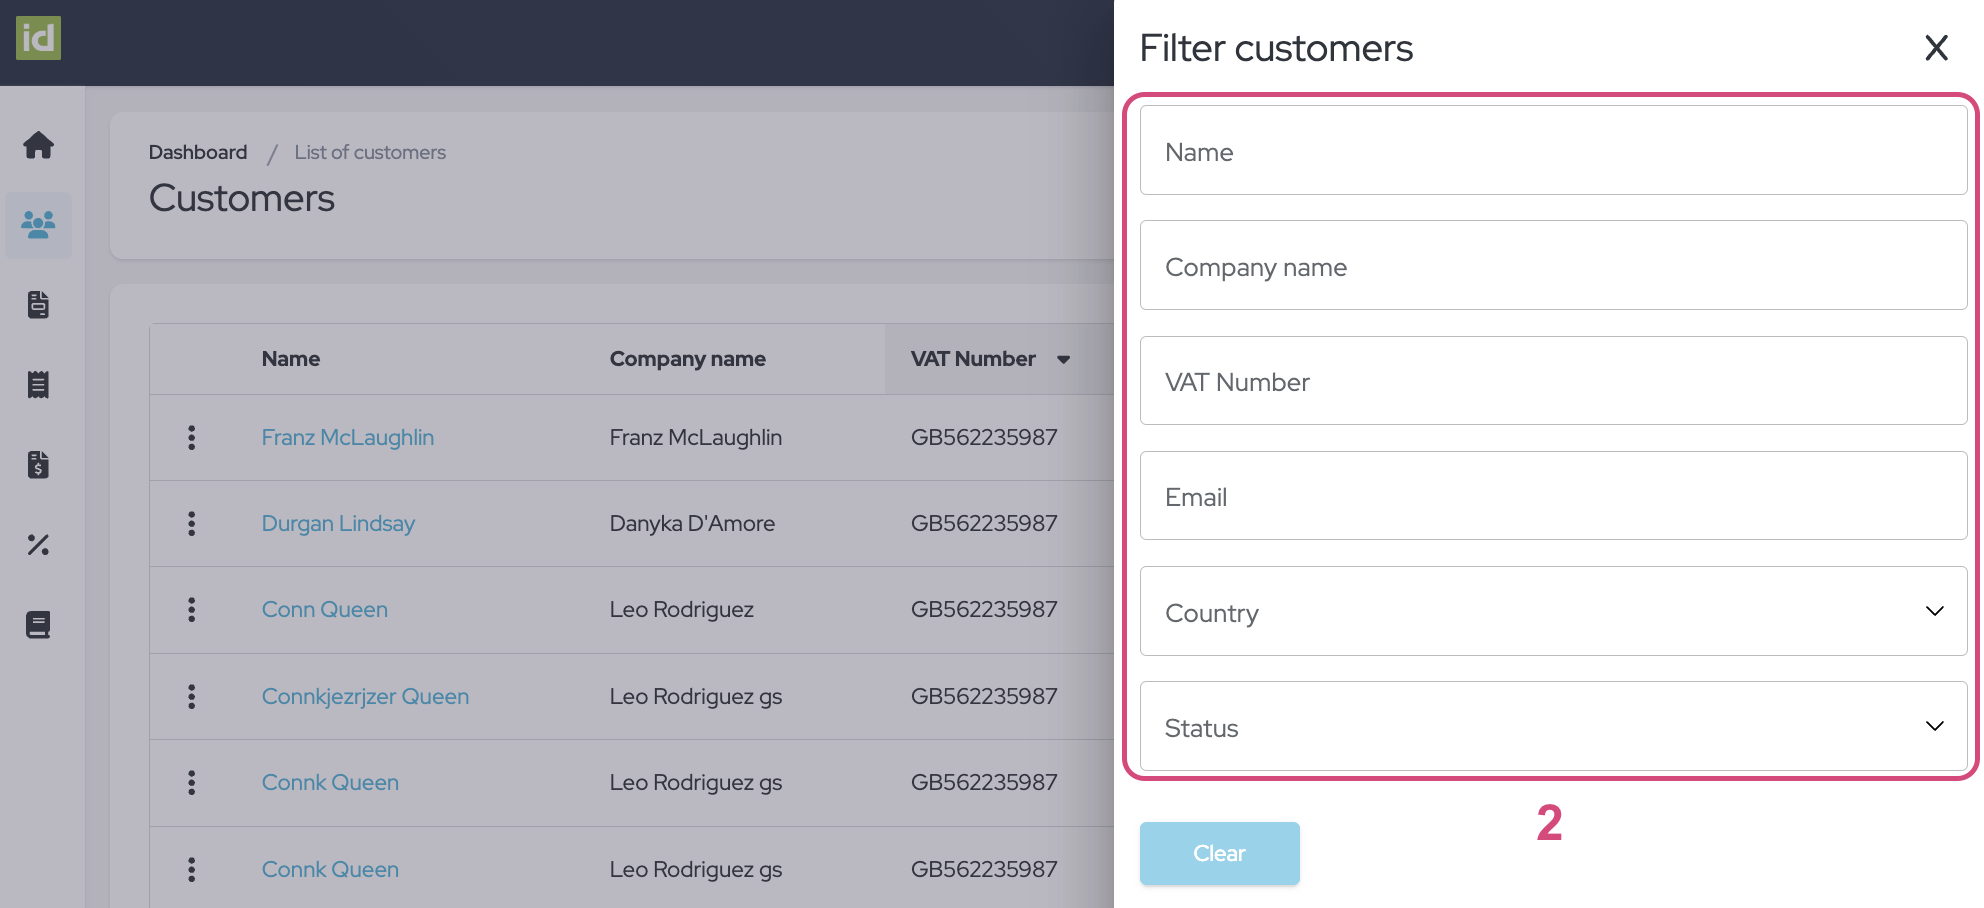
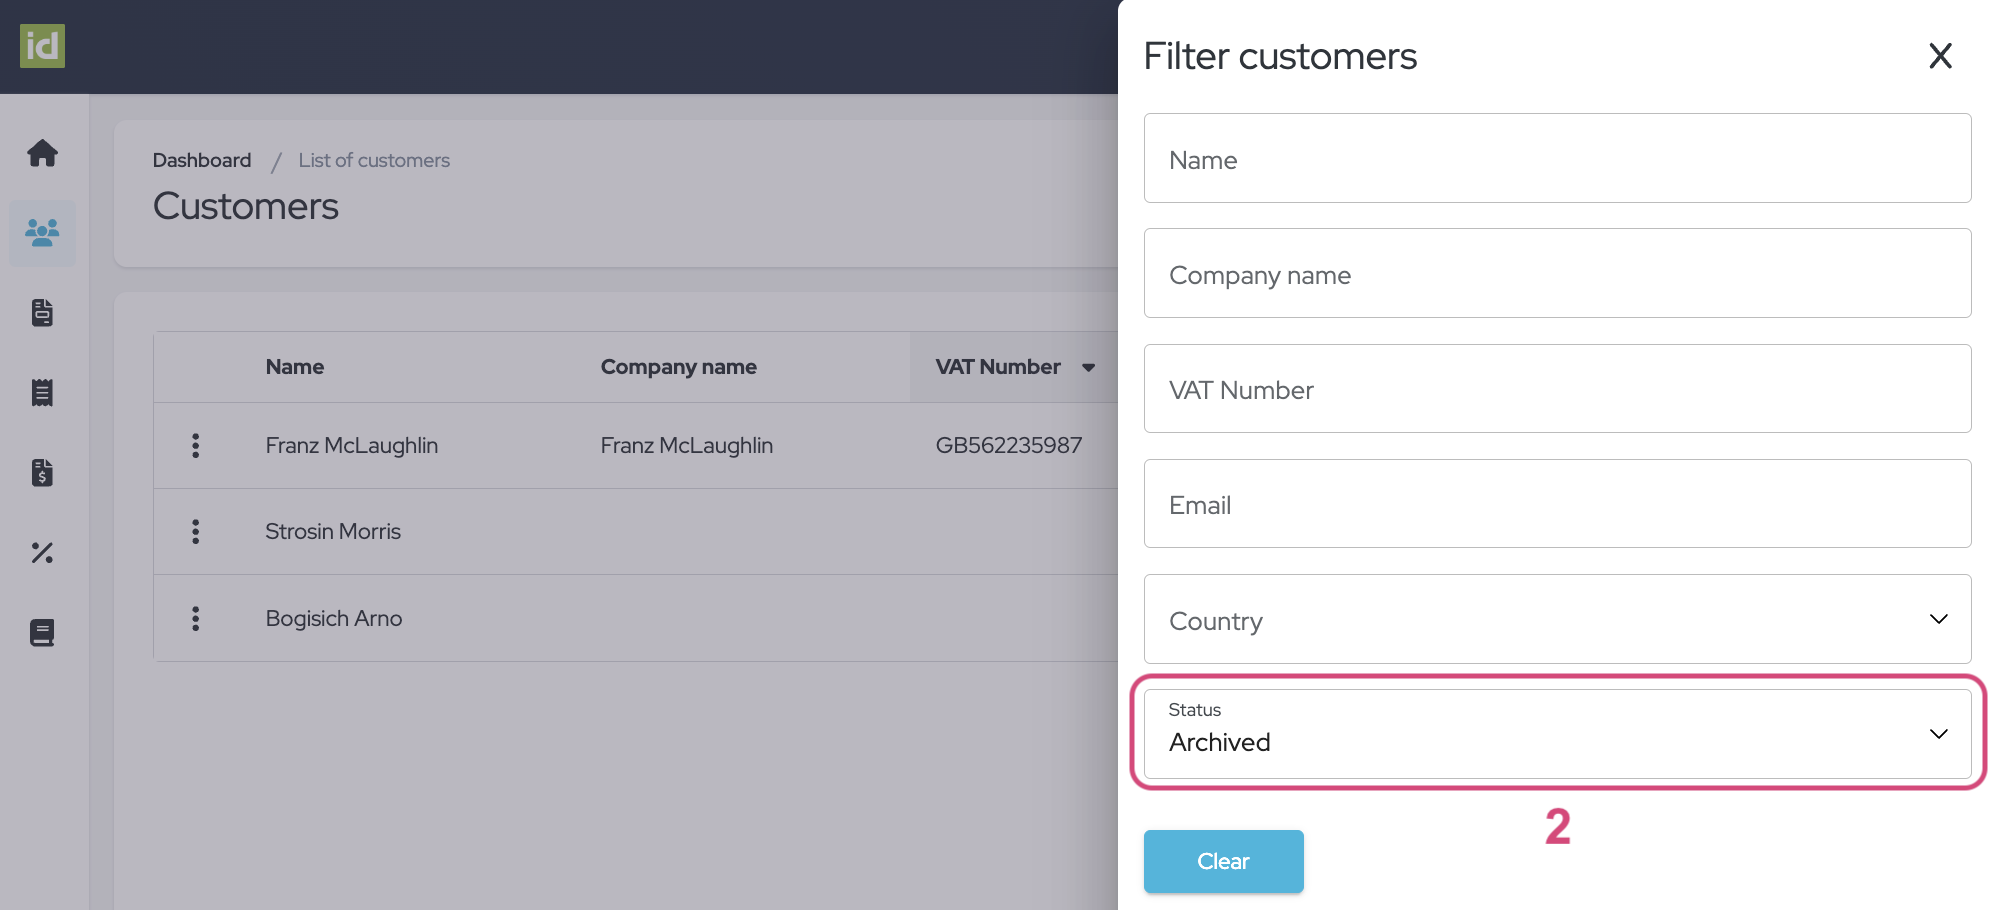
- Specify what criteria you would like to filter on. You can filter on one or multiple criteria.
- Name - This allows you to filter on the Name of the Customer
- Company name - this allows you to filter on the Company name of the Customer - VAT number - this allows you to filter on the VAT number of the Customer
- Email - this allows you to filter on the Email of the Customer
- Country - this allows you to filter on the Company Country of the Customer
- Status - this allows you to filter the Status of the Customer
All fields are free fields, except for the Company Country and the Status which are choice lists, meaning that you can type in letters for your research. For the choice lists, you need to select an entry that you would like to filter on.
No need to save, your changes are directly applied.
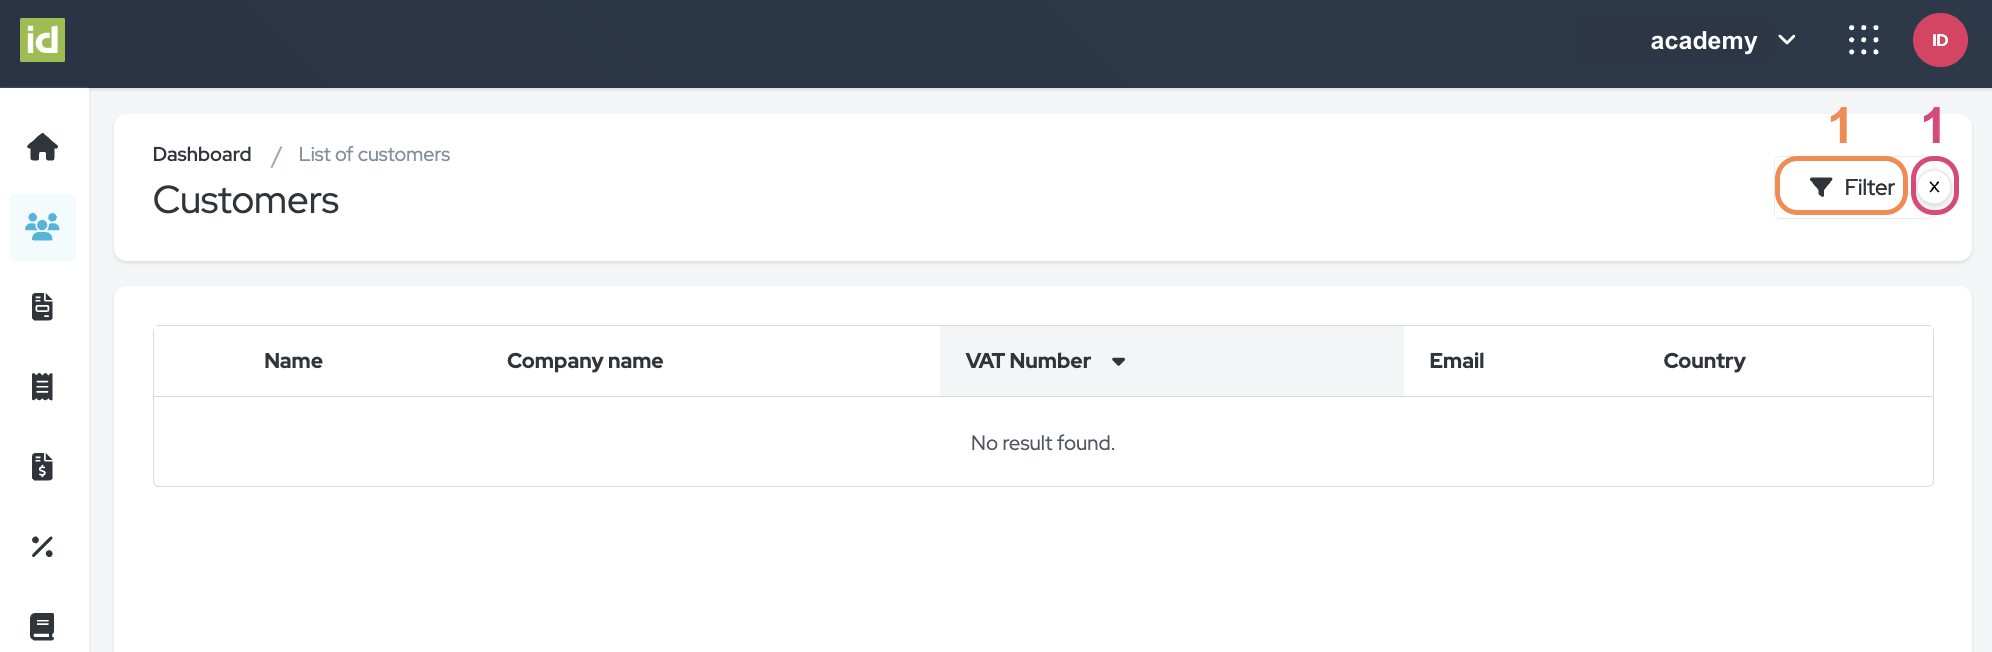
Remove filters
- Click on the cross next to the filter button.
OR
- Click on the “Filter” button.
- Then on the “Clear” button to clear your filters and to display the complete list of Customers.

View Customer Details
- Navigate to the Invoice Module > Customer Section.
- Click on a Customer to view their details.
OR
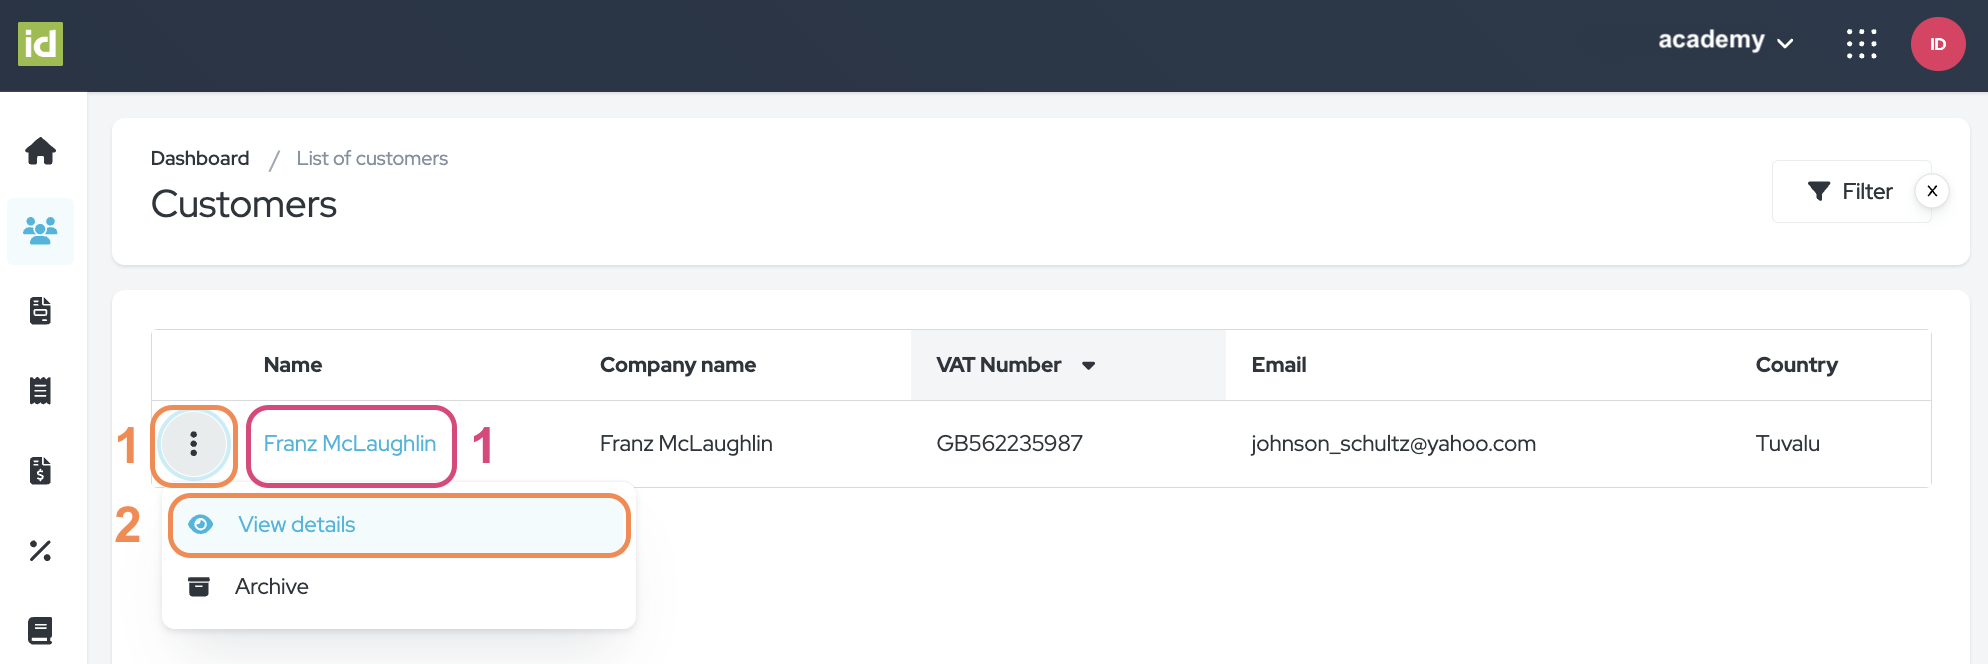
- Navigate to the Invoice Module > Customer Section.
- Click on the three-dot menu next to the desired customer.
- Select “View details”.
You will find all the financial details and documents that you need: the invoices, credit notes, and proformas linked to the Customer.
Change a Customer's Status
Organizing your customer records is made easier with our ‘Archive Customer’ feature. This feature lets you store customers that are not currently active, but whose details might be needed in the future, in an archived list. Whenever you need to access their details again, you can easily restore them to their active status. Additionally, we have introduced a new feature that allows you to permanently delete archived customers. This ensures that your records are always up-to-date and clutter-free.
Archive Customers
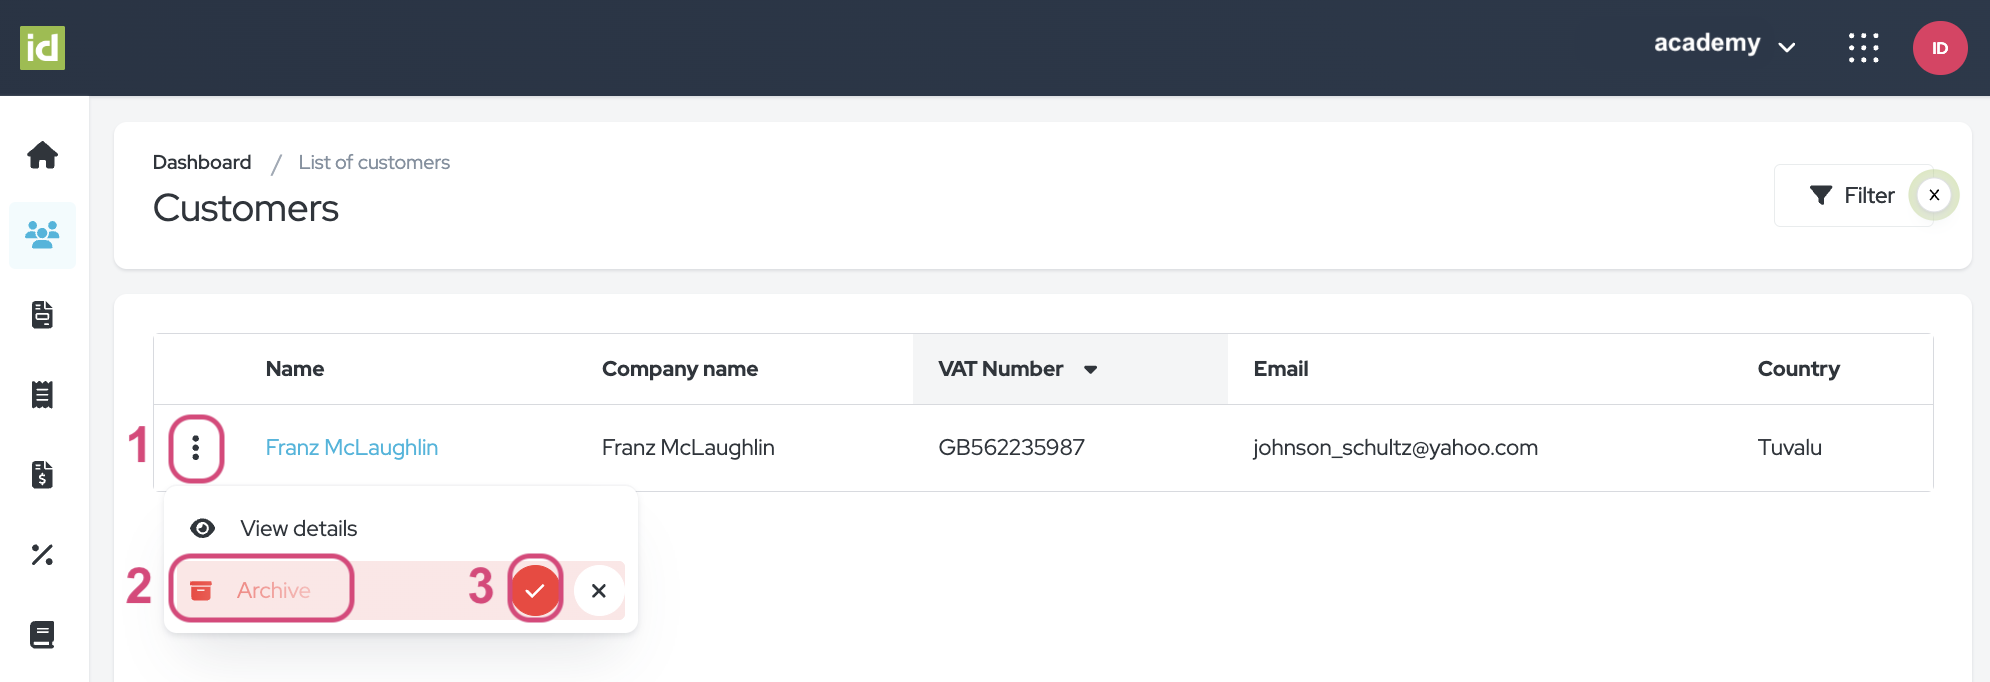
Navigate to the Invoice Module > Customer Section.
- Click on the three-dot menu next to the desired customer.
- Select “Archive”.
- Click on the red checkmark to confirm.
Restore Customers
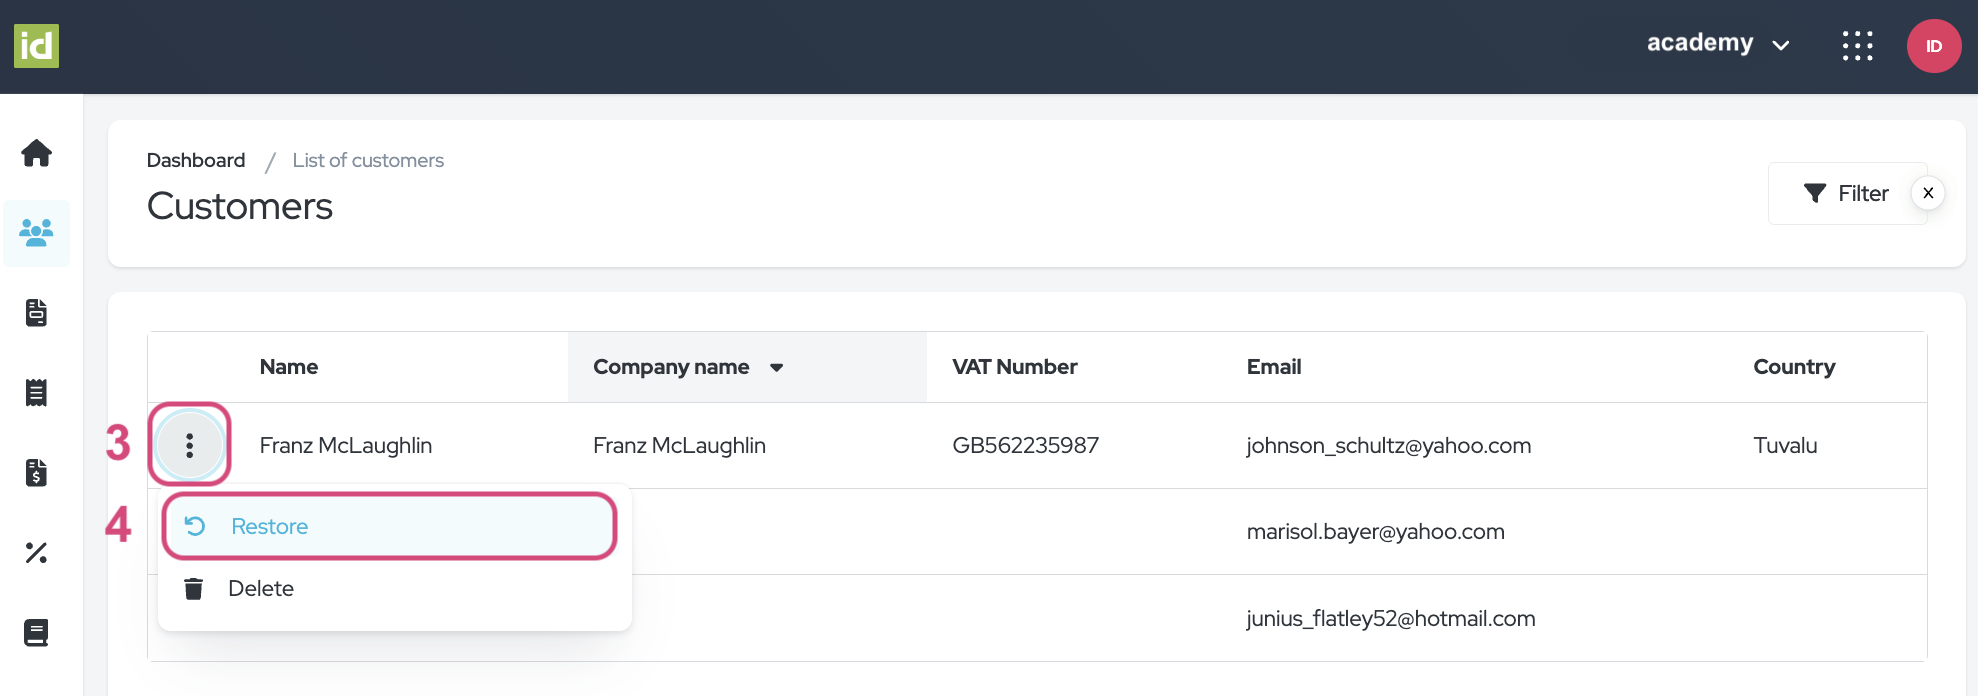
Navigate to the Invoice Module > Customer Section.
- Click on the “Filter” button.
- Filter on the “Archived” status.
- Click on the three-dot menu next to the desired customer.
- Select “Restore”.
Delete Customers
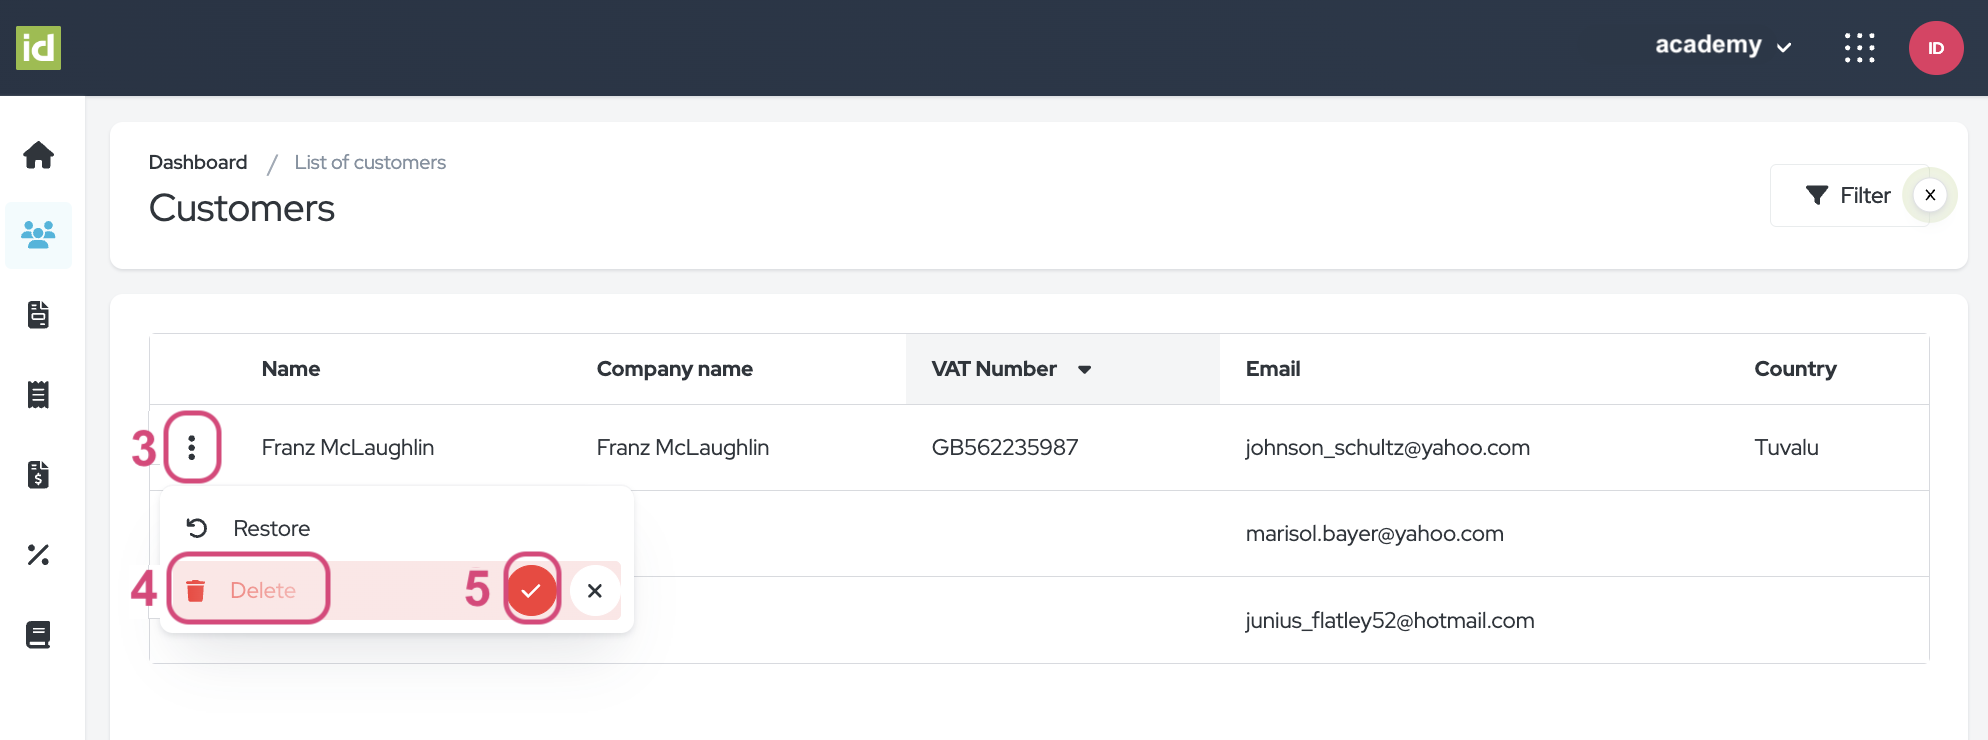
Navigate to the Invoice Module > Customer Section.
- Click on the “Filter” button.
- Filter on the “Archived” status.
- Click on the three-dot menu next to the desired customer.
- Select “Delete”.
We wish you a lot of success with your Customers!
Discover related user guides. You might also be interested in…
The idloom.events team