


What are the benefits of idloom's Profiles for your Account?
-
Distinct Brandings for Each Profile:
- With idloom Profiles, it seems you can create unique branding experiences for different user profiles. This can be particularly valuable if your organization hosts events or has interactions with various types of stakeholders who may have different expectations or affiliations.
-
Exclusive Access Permissions:
- Profiles may enable the fine-tuning of access permissions. This means that different profiles can have different levels of access or permissions within the idloom platform. This is essential for maintaining security and ensuring that individuals only have access to the information or features relevant to their roles.
-
Seamless Differentiation of Event Types:
- If your organization manages multiple types of events, the idloom Profiles could help in efficiently categorizing and managing these events. Each profile may have settings or preferences that are specific to the type of event they are associated with.
1. Profiles
Discover the key to personalized brand experiences within a single account with the idloom Profiles. Craft distinct brandings for each profile, curate exclusive access permissions, and seamlessly differentiate event types. Elevate your organizational prowess and make every interaction uniquely tailored with the versatile capabilities of Idloom profiles.
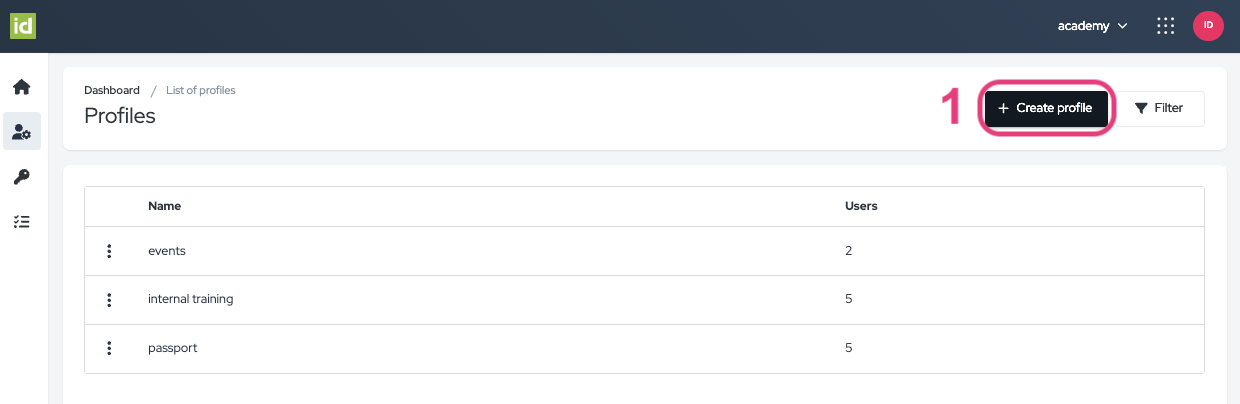
Create a new Profile
Navigate to the Profiles section of the Identity Module.
- Click on the “Create profile” button.
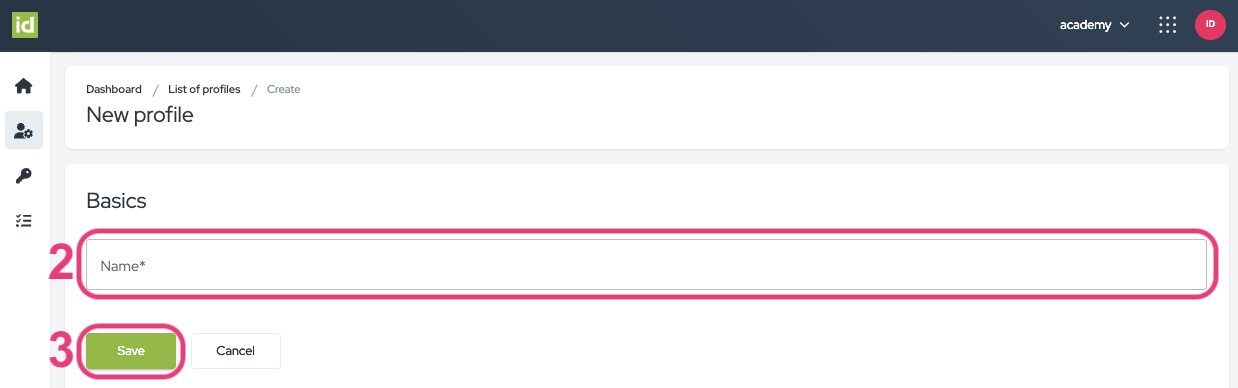
- Fill in the Name field: This field is mandatory. Enter the name you would like to give your Profile.
- Click on the “Save” button.
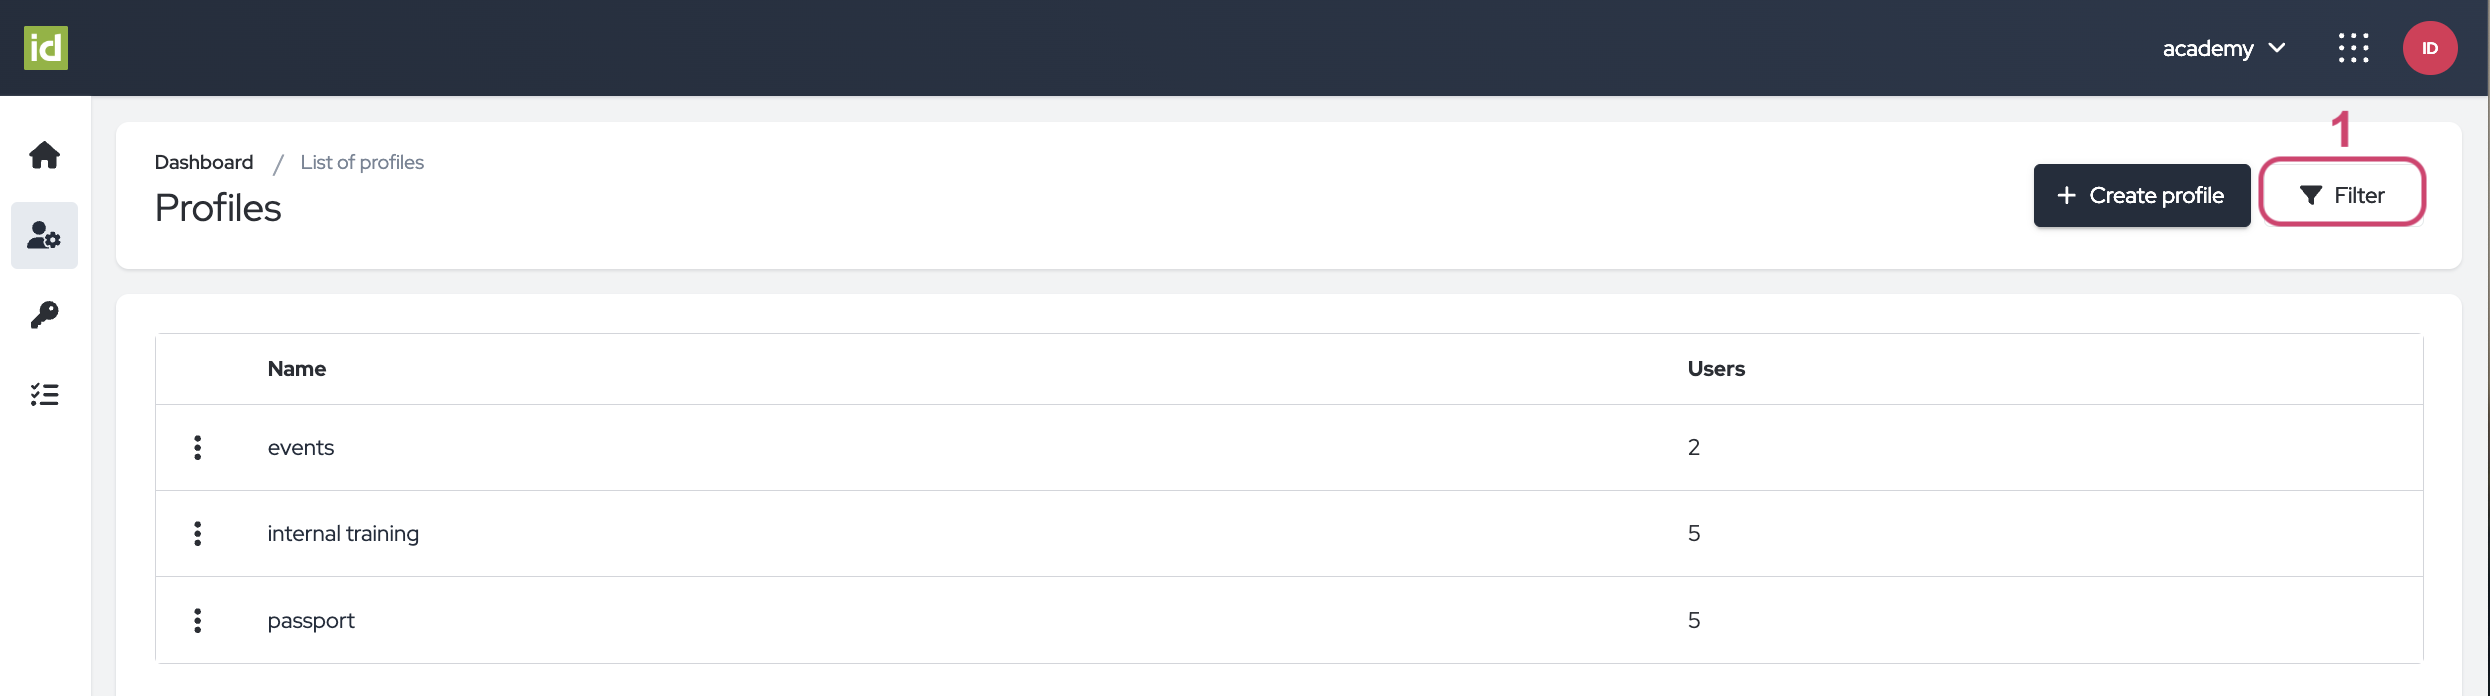
Manage your Profiles
Navigate to the Profiles section of the Identity Module. Here, you'll find a comprehensive list of the available profiles on the account, along with the corresponding number of users assigned to each profile.
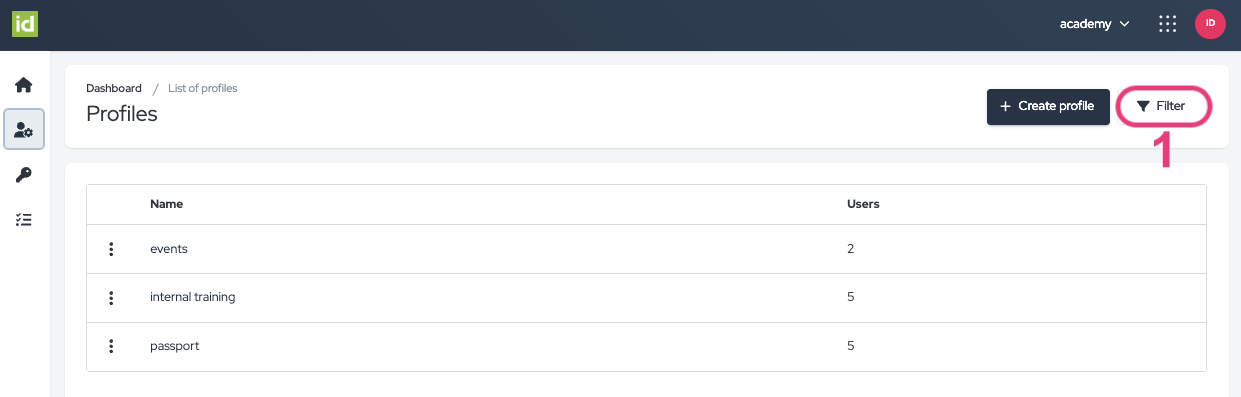
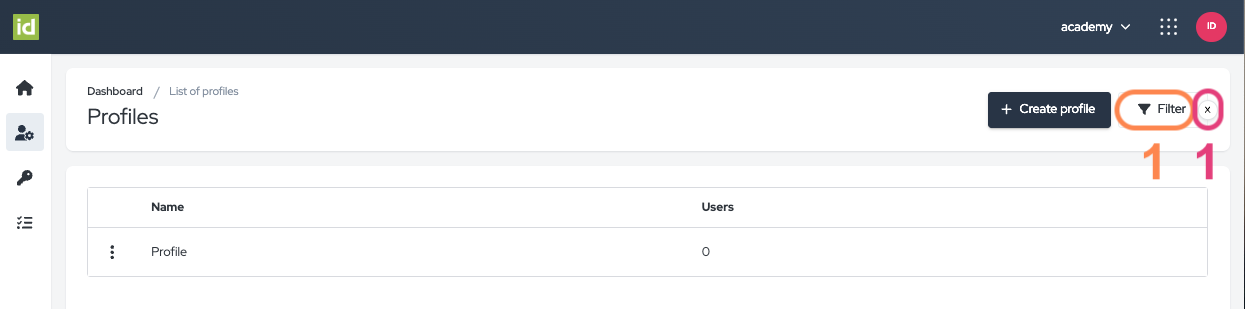
Filter your Profiles
- Click on the “Filter” button.
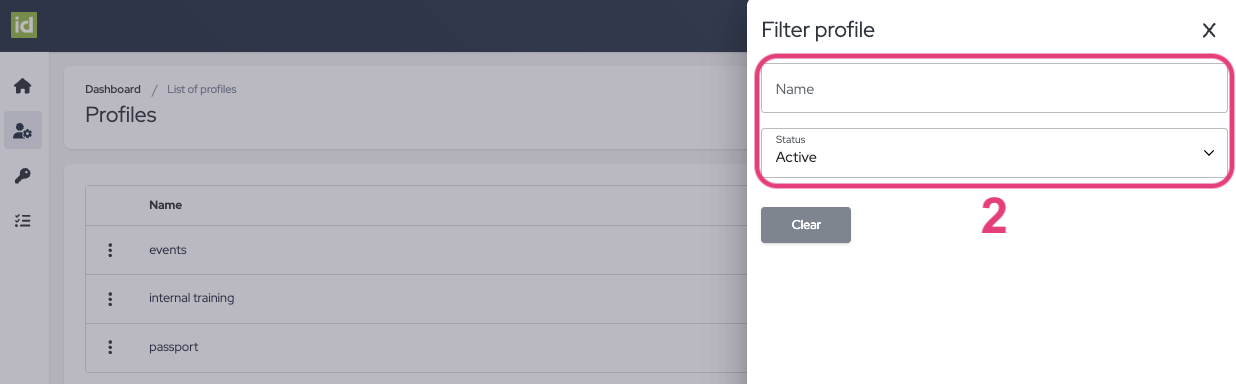
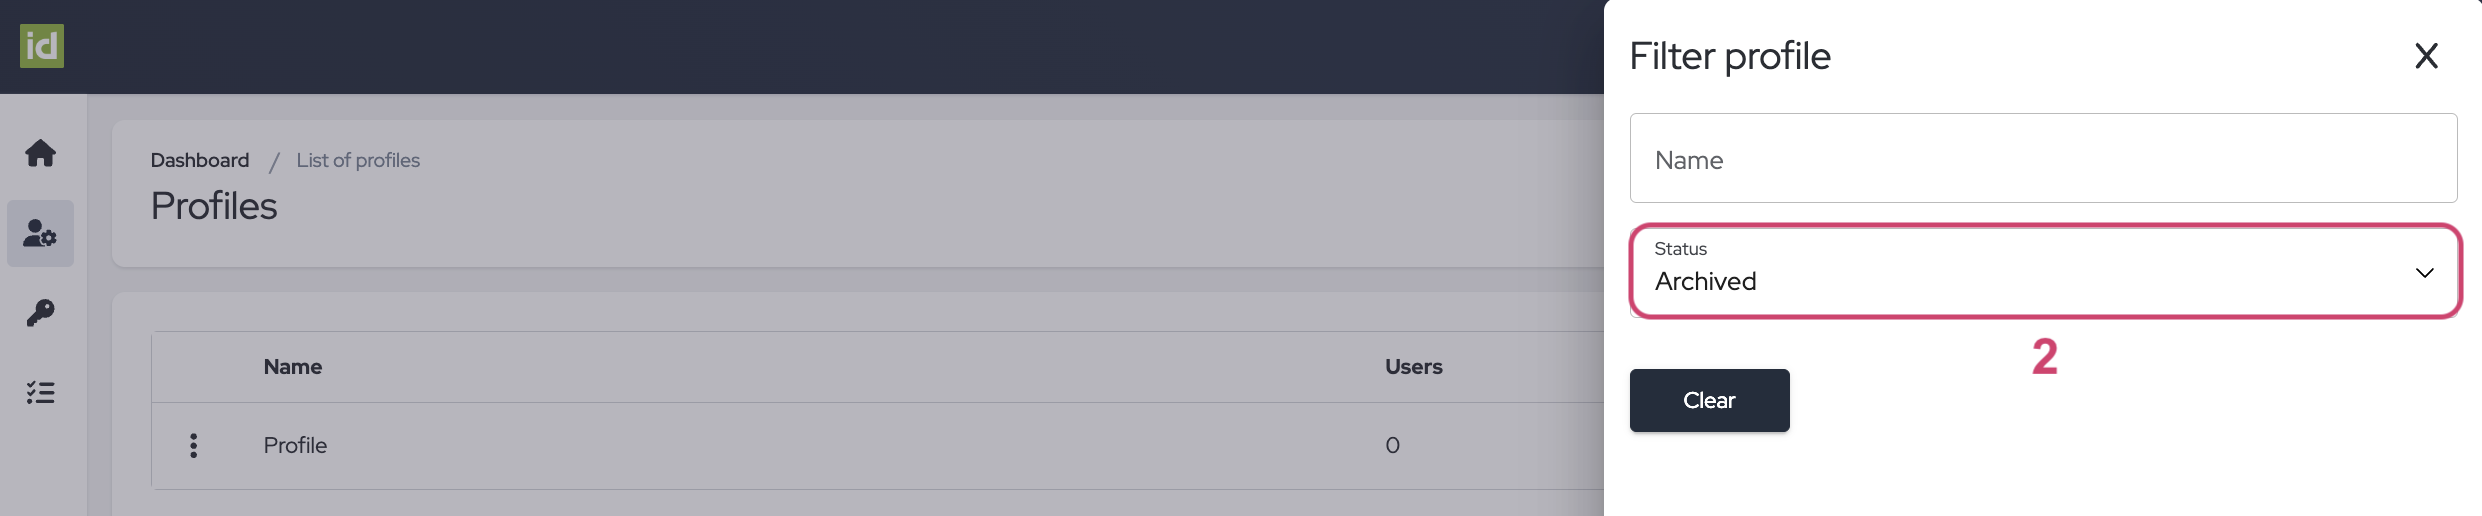
- Specify what criteria you would like to filter on. You can filter on one or multiple criteria.
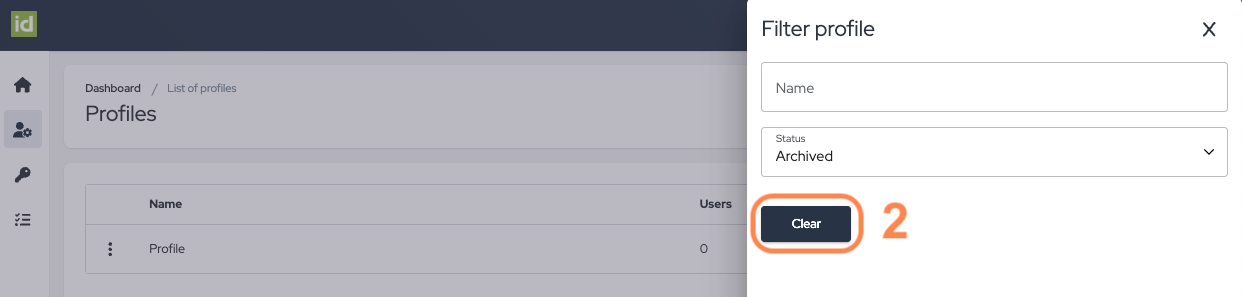
- Name - This allows you to filter on the Name of the Profile. The name field is a free field, meaning that you can type in letters for your research.
- Status - this allows you to filter on the Status of the Profile. The Status can be “Archived” or “Active”.
No need to save, your changes are directly applied.
Remove your filters
- Click on the cross next to the “Filter” button.
OR
- Click on the “Filter” button.
- Then on the “Clear” button to clear your filters and to display the complete list of Profiles.
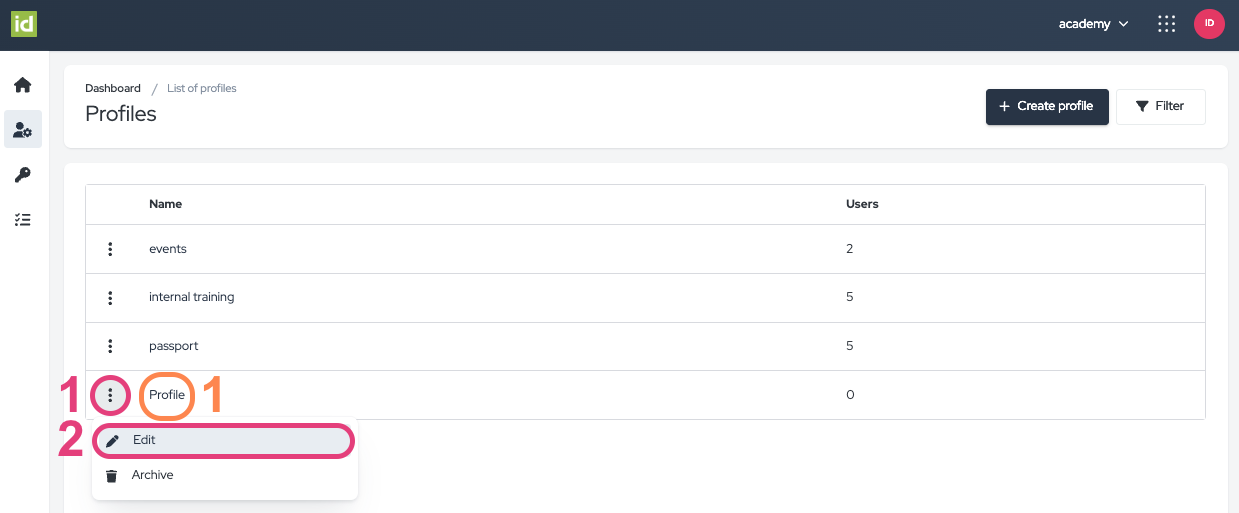
Edit a Profile
Navigate to the Profiles section of the Identity Module.
- Click on the name of your Profile.
OR
- Click on the three-dots menu.
- Click on “Edit".
 There are three sections in your Profile:
Essentials
- Name of the Profile - View and modify
- Profile ID - View and copy
- Logo - View and modify, this image will be displayed on your Event page, Financial documents, and Emails.
- Favicon - View and modify, this image will be displayed in the browser tab.
- Click on the “Save” button to keep your changes.

- Address - The footer of all Profile's Financial documents incorporates information from the "Address" section.
- Name
- Street
- Street number
- Stree box
- Zip code
- City
- State
- Country
- Bank information - The footer of all Profile's Financial documents features the inclusion of bank information.
- Click on the “Add field” button to add a new bank information field.
- Select up to 5 of the following bank information fields – the fields are not mandatory:
- Bank account number
- Bank name
- BIC/Swift
- IBAN
- Wire routing number
- Sort code
-
You can delete fields by clicking on the delete button.
-
Click on the “Save” button after applying your modifications.
- Contact information - Contact information is seamlessly integrated into the footer of all Profile Events, Automatic Emails, and Financial documents. You have the flexibility to fill in and customize the following fields, as they are not mandatory.
-
VAT (number)
-
Email
-
Phone
-
Fax
-
Website
-
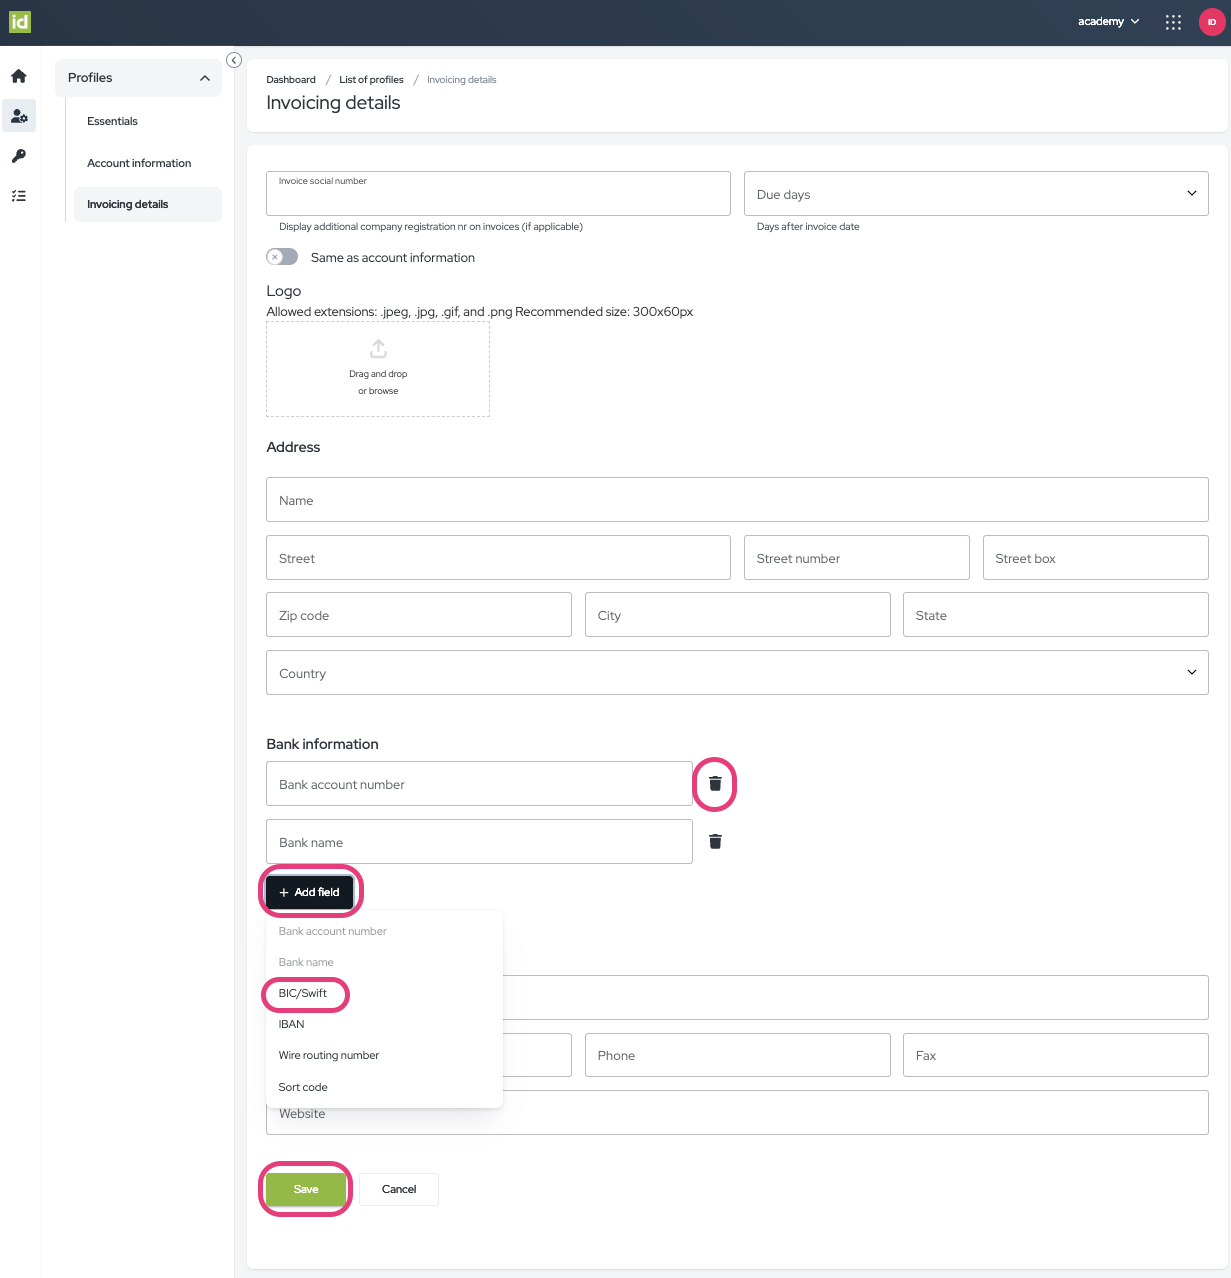 Invoicing details
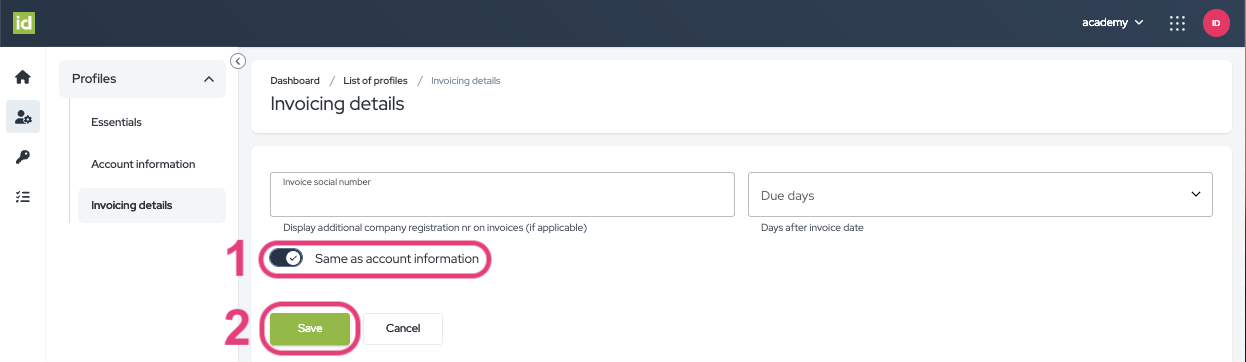
Invoicing details are presented on all financial documents.
- Invoice Social Number - View and modify the Invoice social number if applicable.
- Due Days - View and modify the invoice payment terms in the “Due Days” field.
If your account information corresponds to the invoicing information.
- Leave the “Same as account information” toggle as is.
- Click on the “Save” button to update your information.
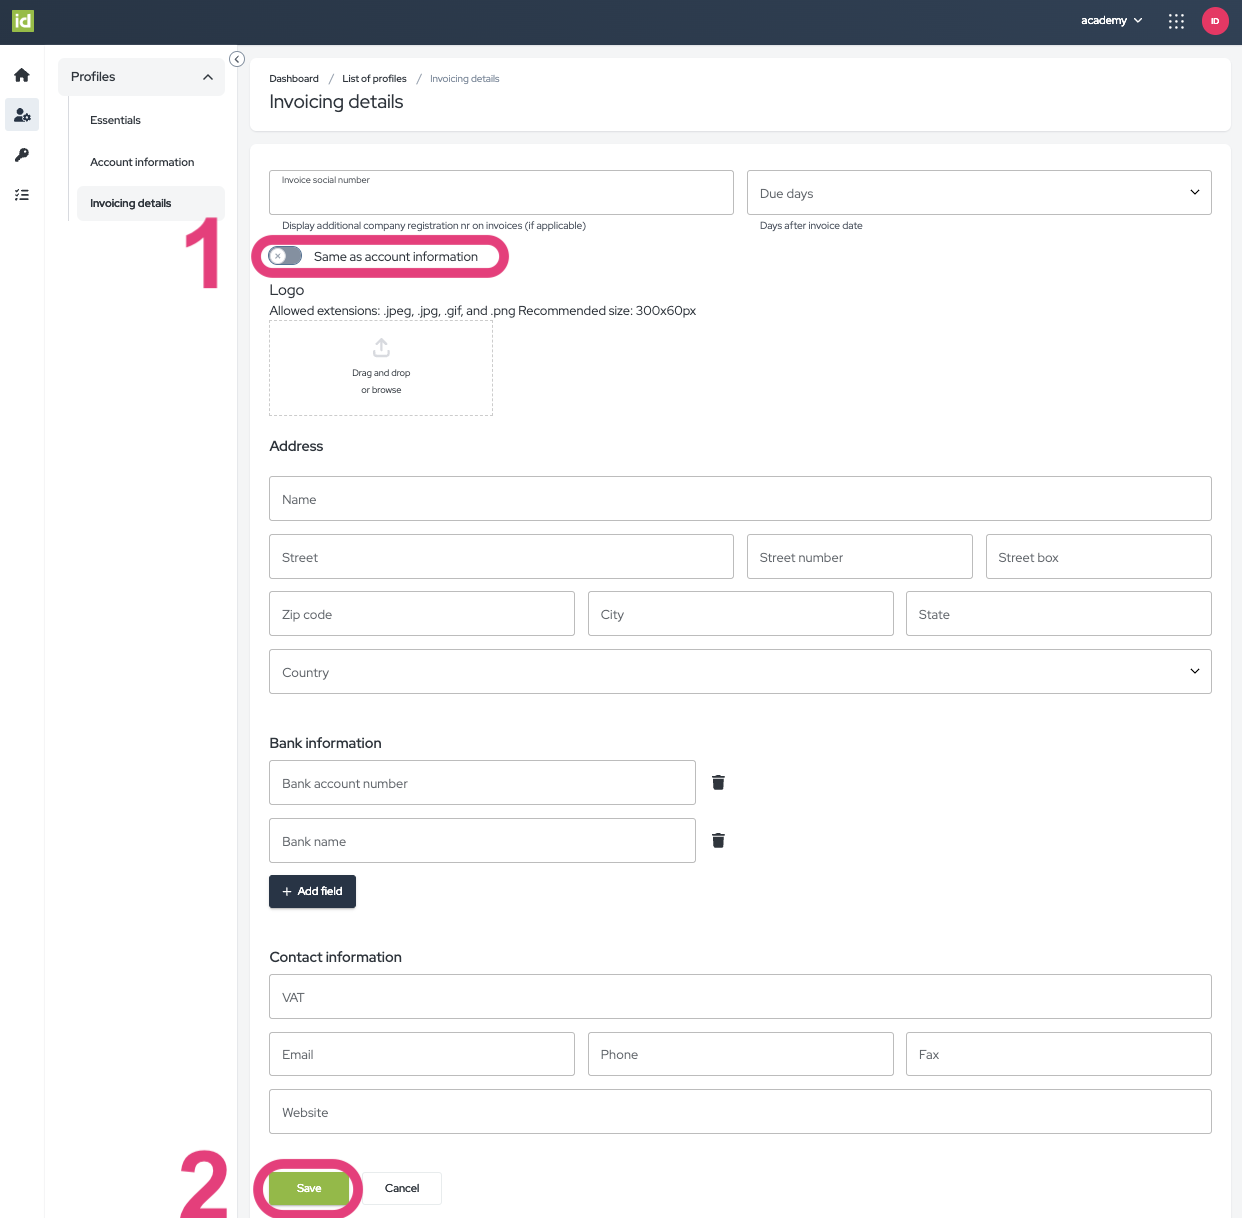
If your account information defers from your invoicing information:
- Click on the “Same as account information” toggle.
- Drag and drop or browse a Logo.
- Fill in the Address information – the fields are not mandatory. Follow the above steps to configure your Address information section.
- Fill in the Bank information – the fields are not mandatory. Follow the above steps to configure your Bank information section.
- Fill in Contact information – the fields are not mandatory. Follow the above steps to configure your Contact information section.
- Click on the “Save” button.
Archive a Profile
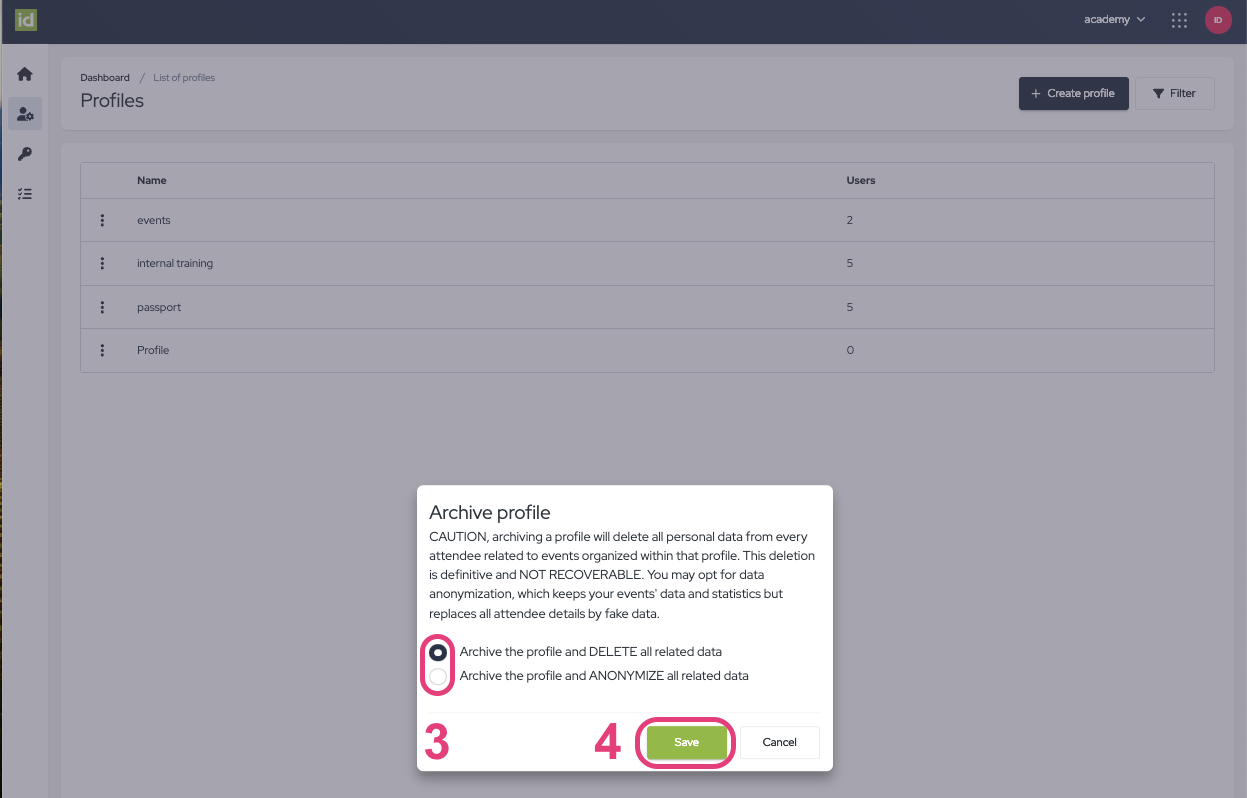
Archiving a profile will permanently remove all personal data associated with attendees for events organized within that profile. This action is irreversible and cannot be undone. Alternatively, you can choose to anonymize the data, which will retain your event information and statistics while replacing all attendee details with fictitious data.
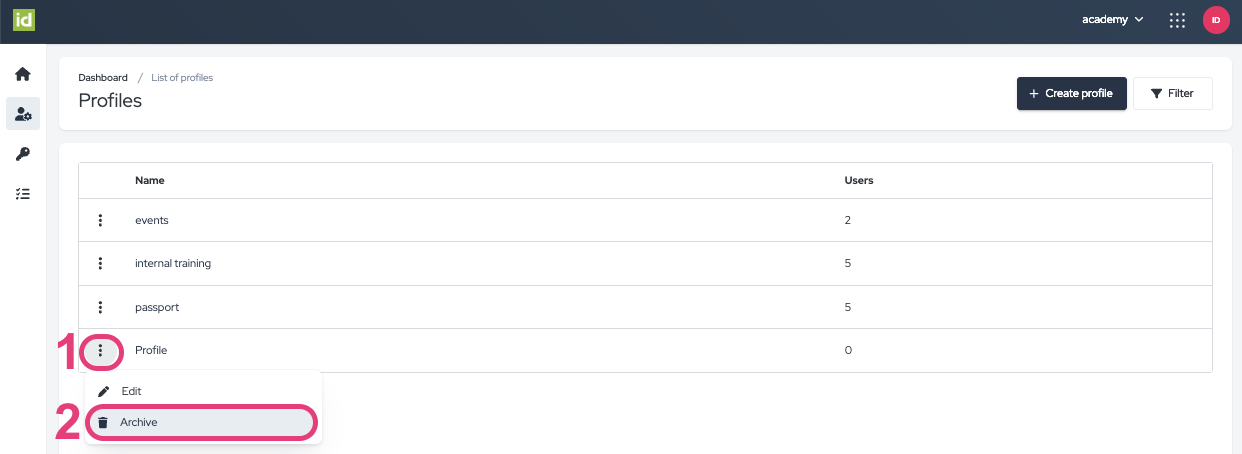
Navigate to the Profiles section of the IAM Module.
- Click on the three-dots menu.
- Click on “Archive”.
- Select “Archive the profile and DELETE all related data” or “Archive the profile and ANONYMIZE all related data”. Deleting the data is unrecoverable.
- Click on “Save”.
Your Profile has now been archived.
Restore an archived Profile
Navigate to the Profiles section of the IAM Module.
- Click on the “Filter” button.
- Filter on the “Archived” Status. Your archived Profiles will appear.
- Click on the three-dots menu of the Profile you would like to delete.
- Select “Restore”.
Your Profile has now been restored, you will find it in your list of Profiles under the “Active” status.


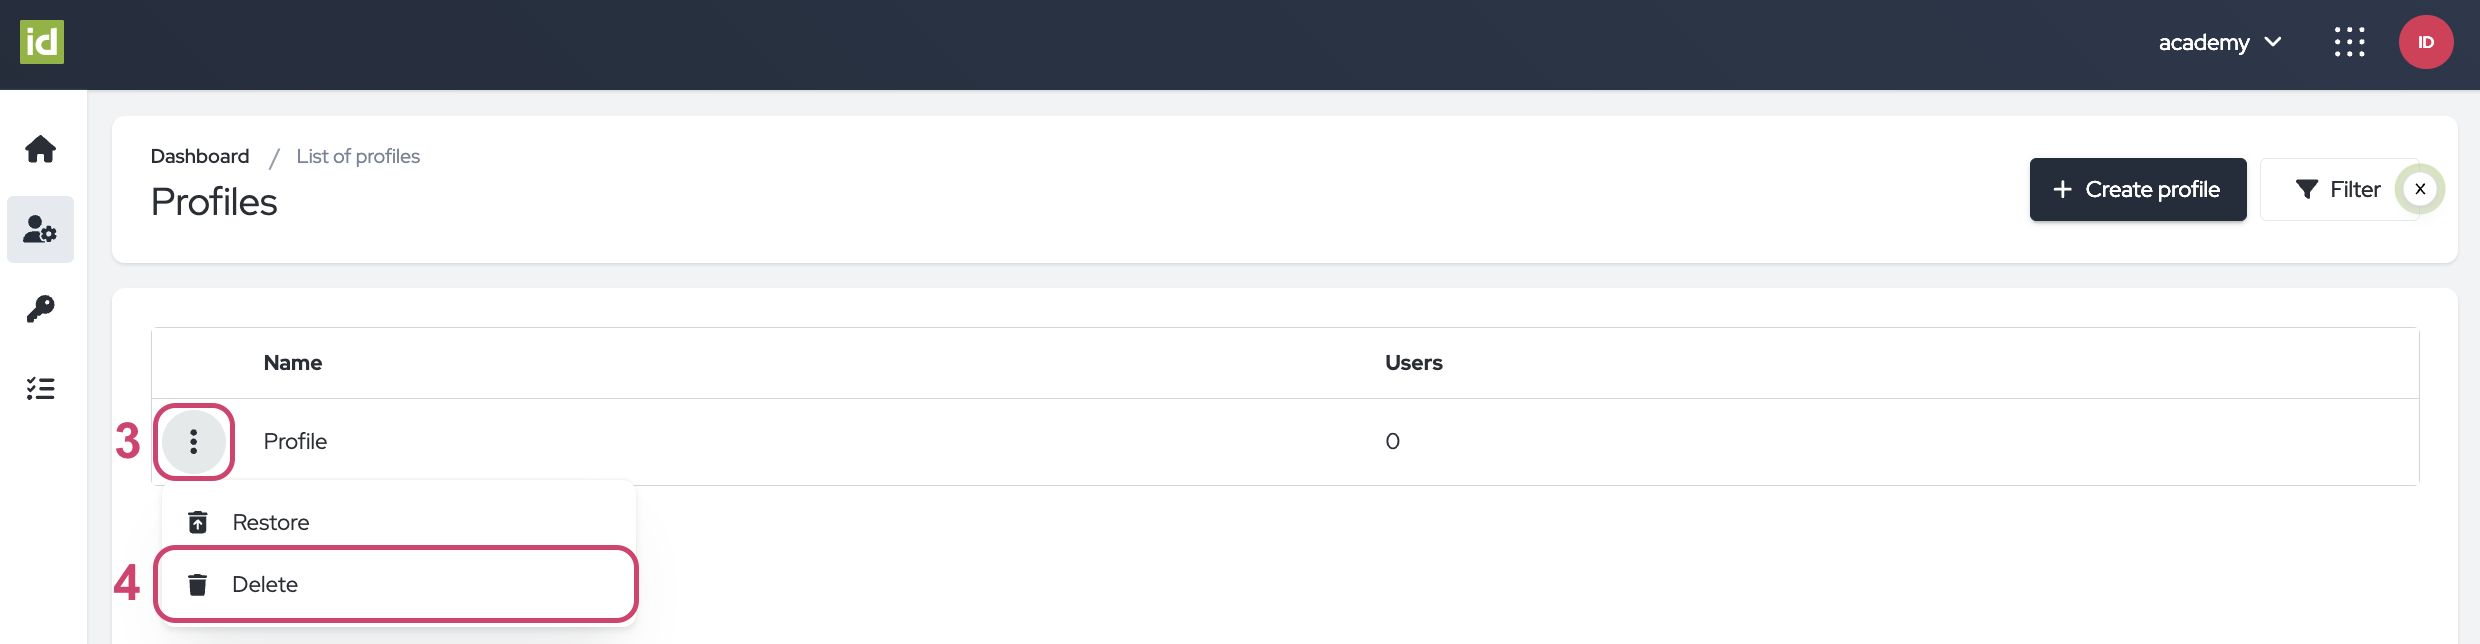
Delete a Profile
The deletion of a Profile in idloom is permanent, the Profile will not be restorable anymore.
Navigate to the Profiles section of the IAM Module.
- Click on the “Filter” button.
- Filter on the “Archived” Status. Your archived Profiles will appear.
- Click on the three-dots menu of the Profile you would like to delete.
- Select “Delete”.
- Click on the red “Confirm” button.
Your Profile has now been deleted.
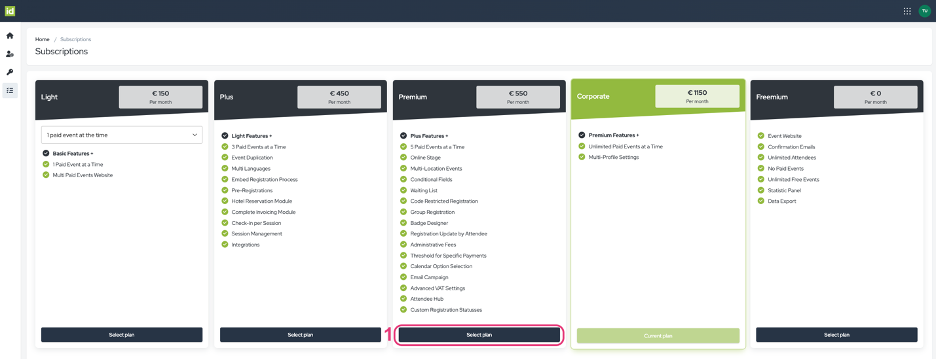
2. Manage your Subscription
Navigate to the Identity Module.
The subscription that is currently active is the one highlighted in green. You will find a list of features included in each license in the corresponding section. You can easily find a comprehensive list of our features and licenses on our website as well.
- Click on the “Select plan” button below the desired new Subscription.
We wish you a lot of success with idloom's Profiles and Users configured to your preference.
Discover related user guides. You might also be interested in…
Identity - Module navigation and Identity management
Identity - Permissions
The idloom.events team