


What are the benefits of customizable Roles and Permissions?
🌟 Adapt our Roles to your Needs
Roles aren't just labels; they correspond to permissions that can be allocated to your users. From the leading organizer to the backstage wizard, customize roles for all members of your organization. In the world of event management, there's no room for compromises, this is why idloom lets you create customizable Roles.
🛡️ Limit Access and guarantee Security
Your event's success is our priority! Manage your events smoothly using our security measures as your best allies.
Create and Manage your Permissions
Users
Invite Users
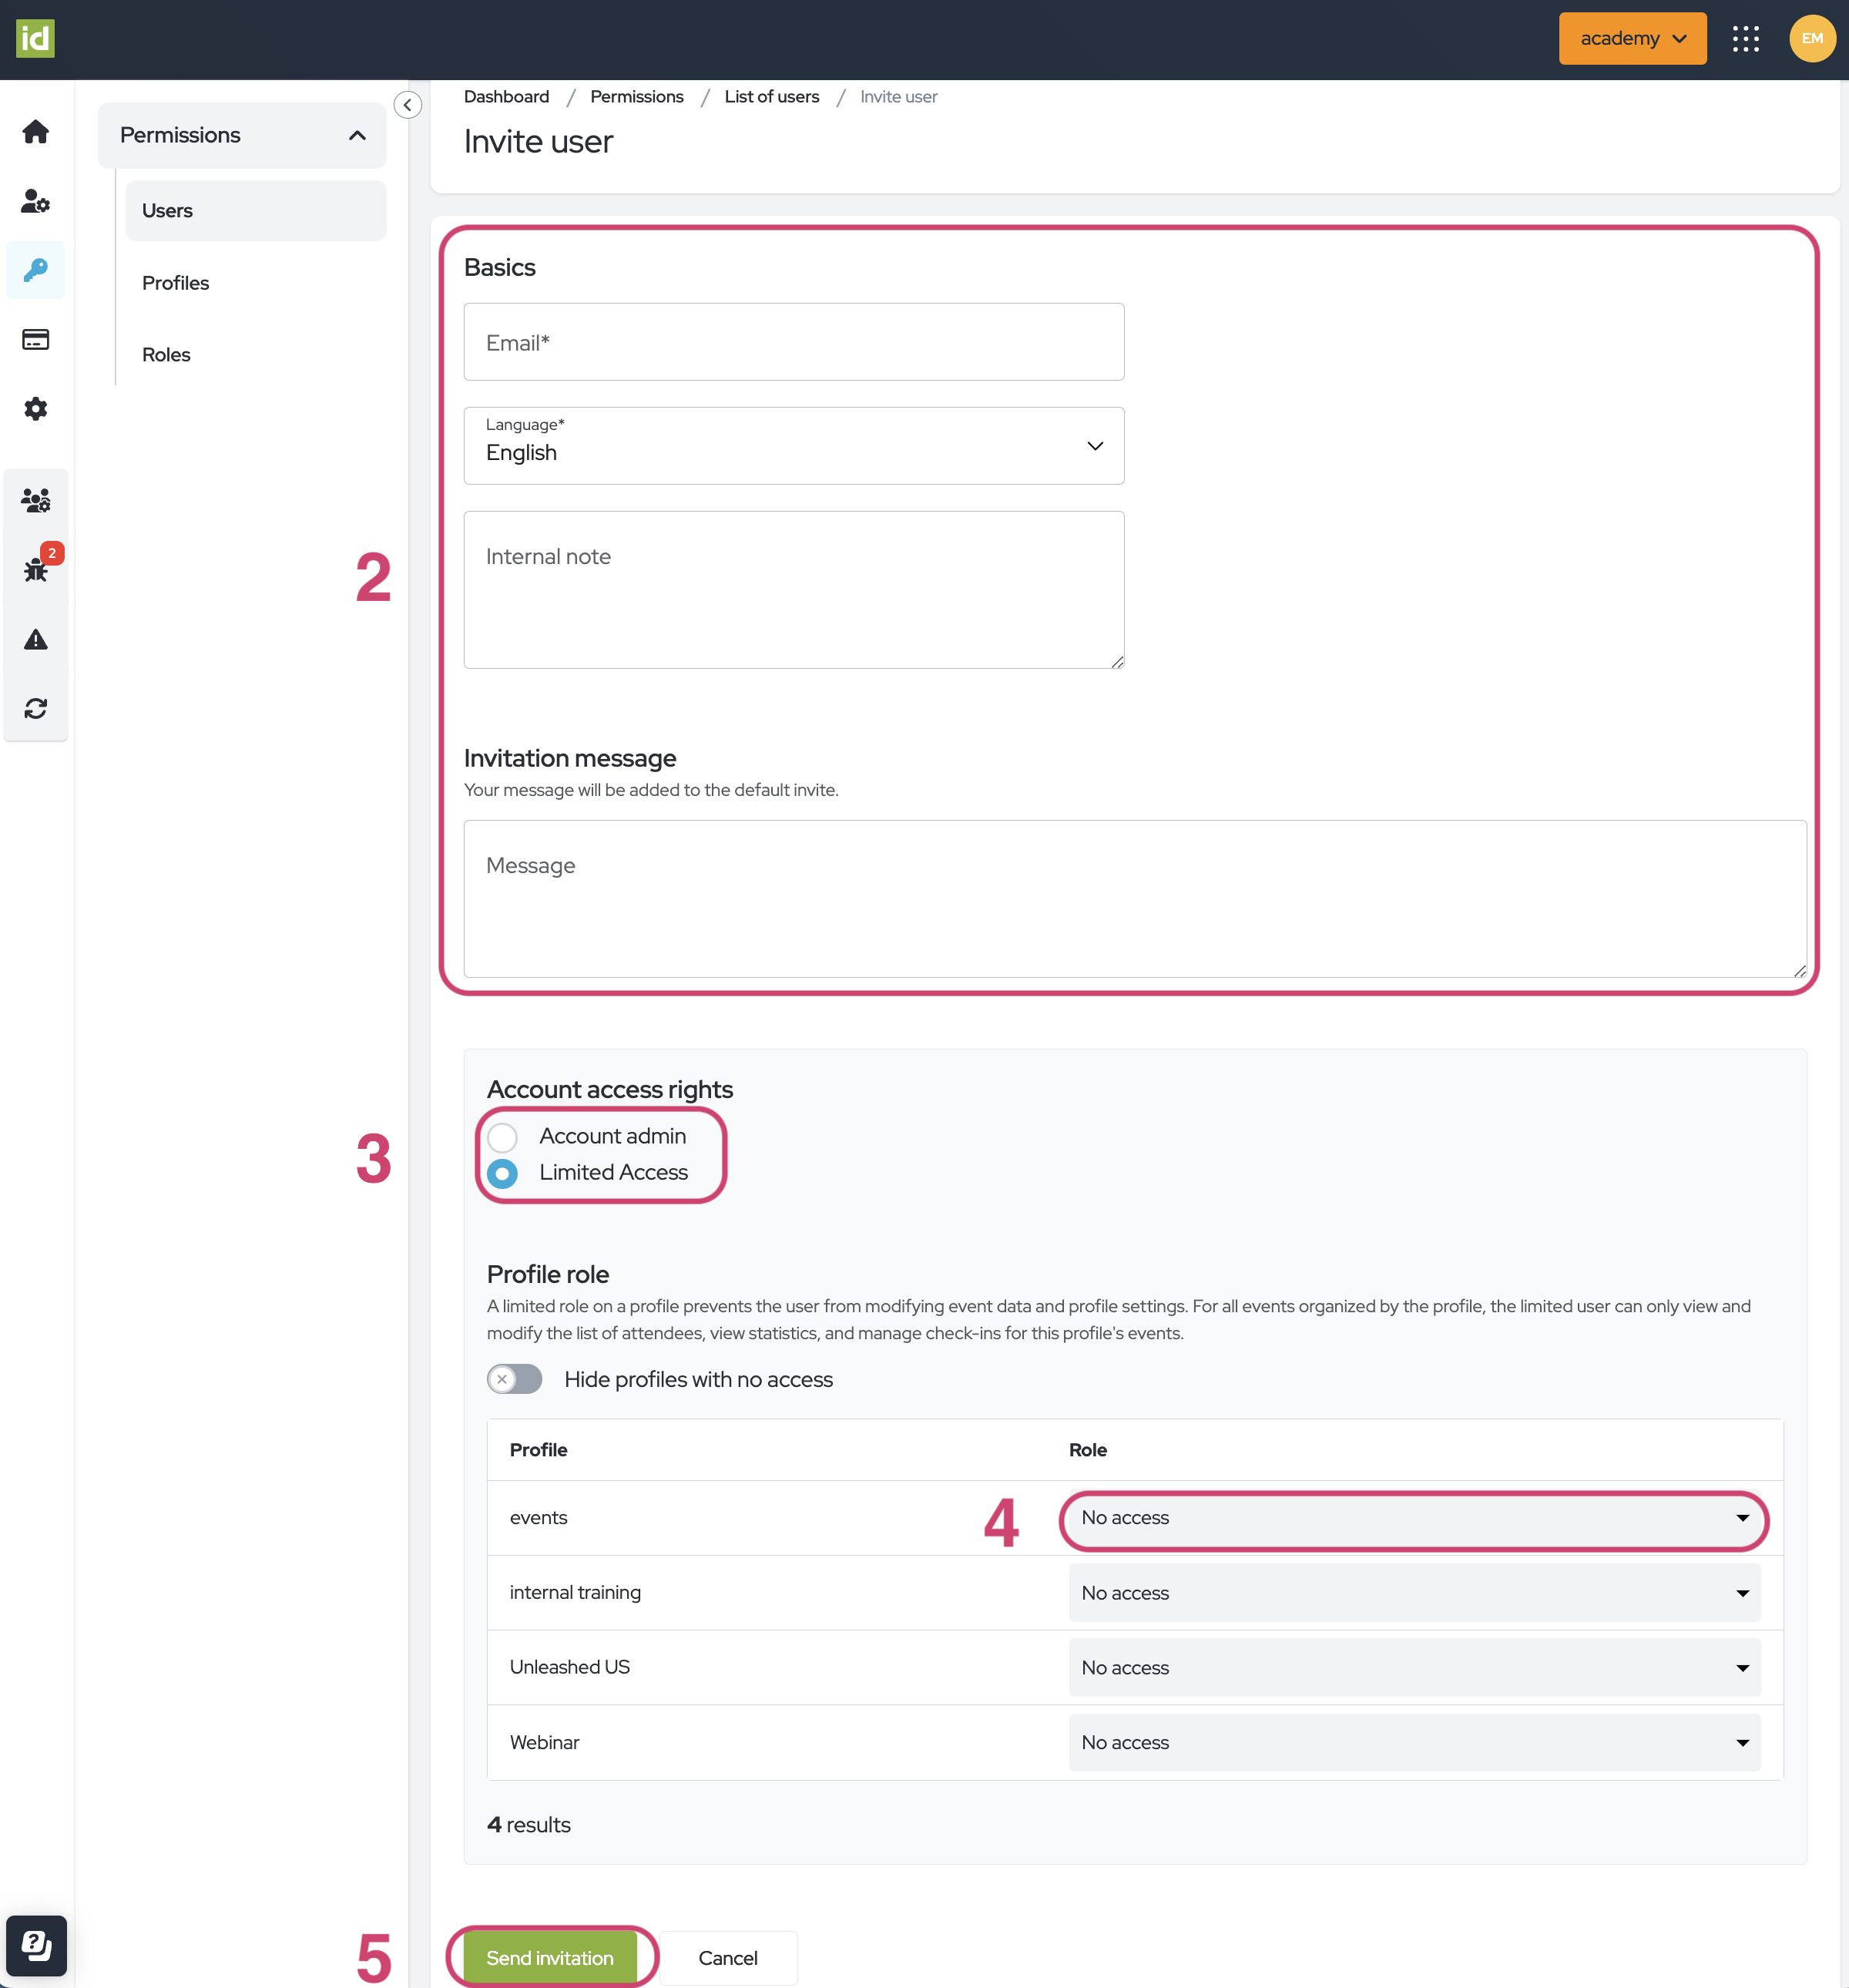
Navigate to the Permissions > Users section of the Identity Module.
- Click on the “Invite user” button.

- Fill in the form with the Contact information of the User:
- Email: This field is mandatory. Enter the email address of the new User.
- Language: This field is mandatory. Select the backend language for the new User.
- Internal note: This field is not mandatory. You can enter some notes about the user that will be visible to all Users of the Profile.
- Invitation message: This field is not mandatory. You can enter a personalized text that will be displayed in the invitation email.
- Set up the Account access rights. You can choose between:
- Selecting the Account admin checkbox: the invited user will have access to all Profiles of the Account.
- Selecting the Limited access checkbox: the invited user will have access to the Profiles where a role has been allocated to them only.
If you selected “Account admin”, skip the next step (4). Otherwise, you now have a view of all the existing Profiles in the Account.
- Select the Role you would like to give them on the Profiles.
- Click on the “Send invitation” button. The new User will automatically receive a welcome email.
Existing user
If the user already has had access to idloom before, he will receive an invitation email and will have to accept the invitation. His details will then automatically be filled out.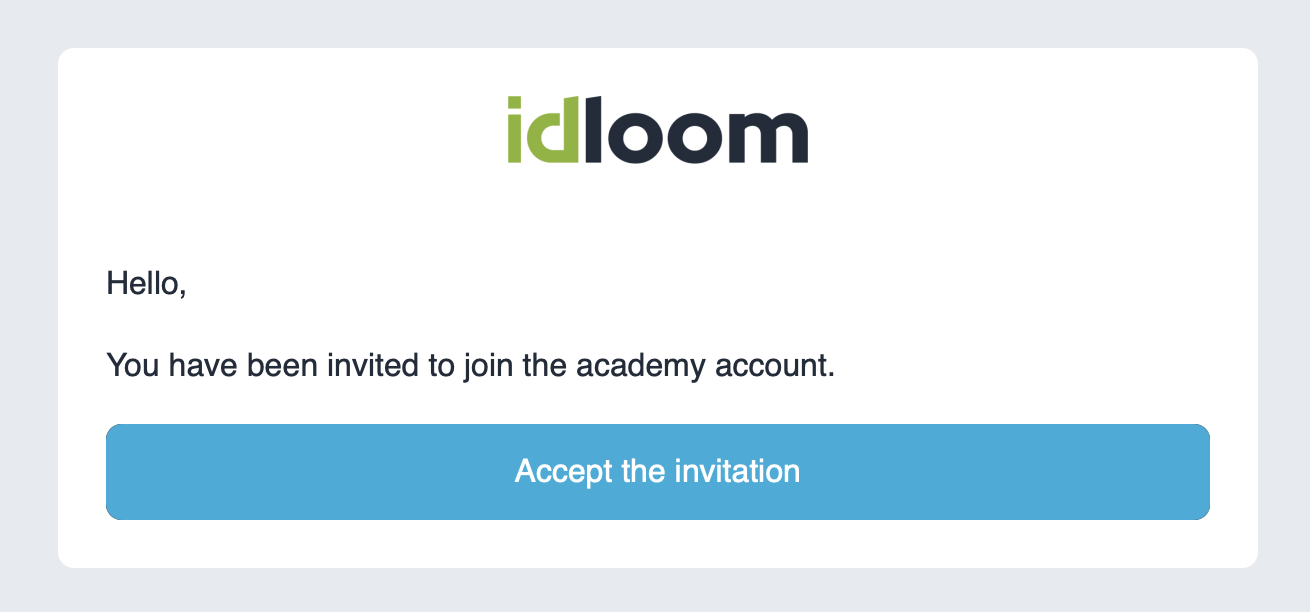
New user
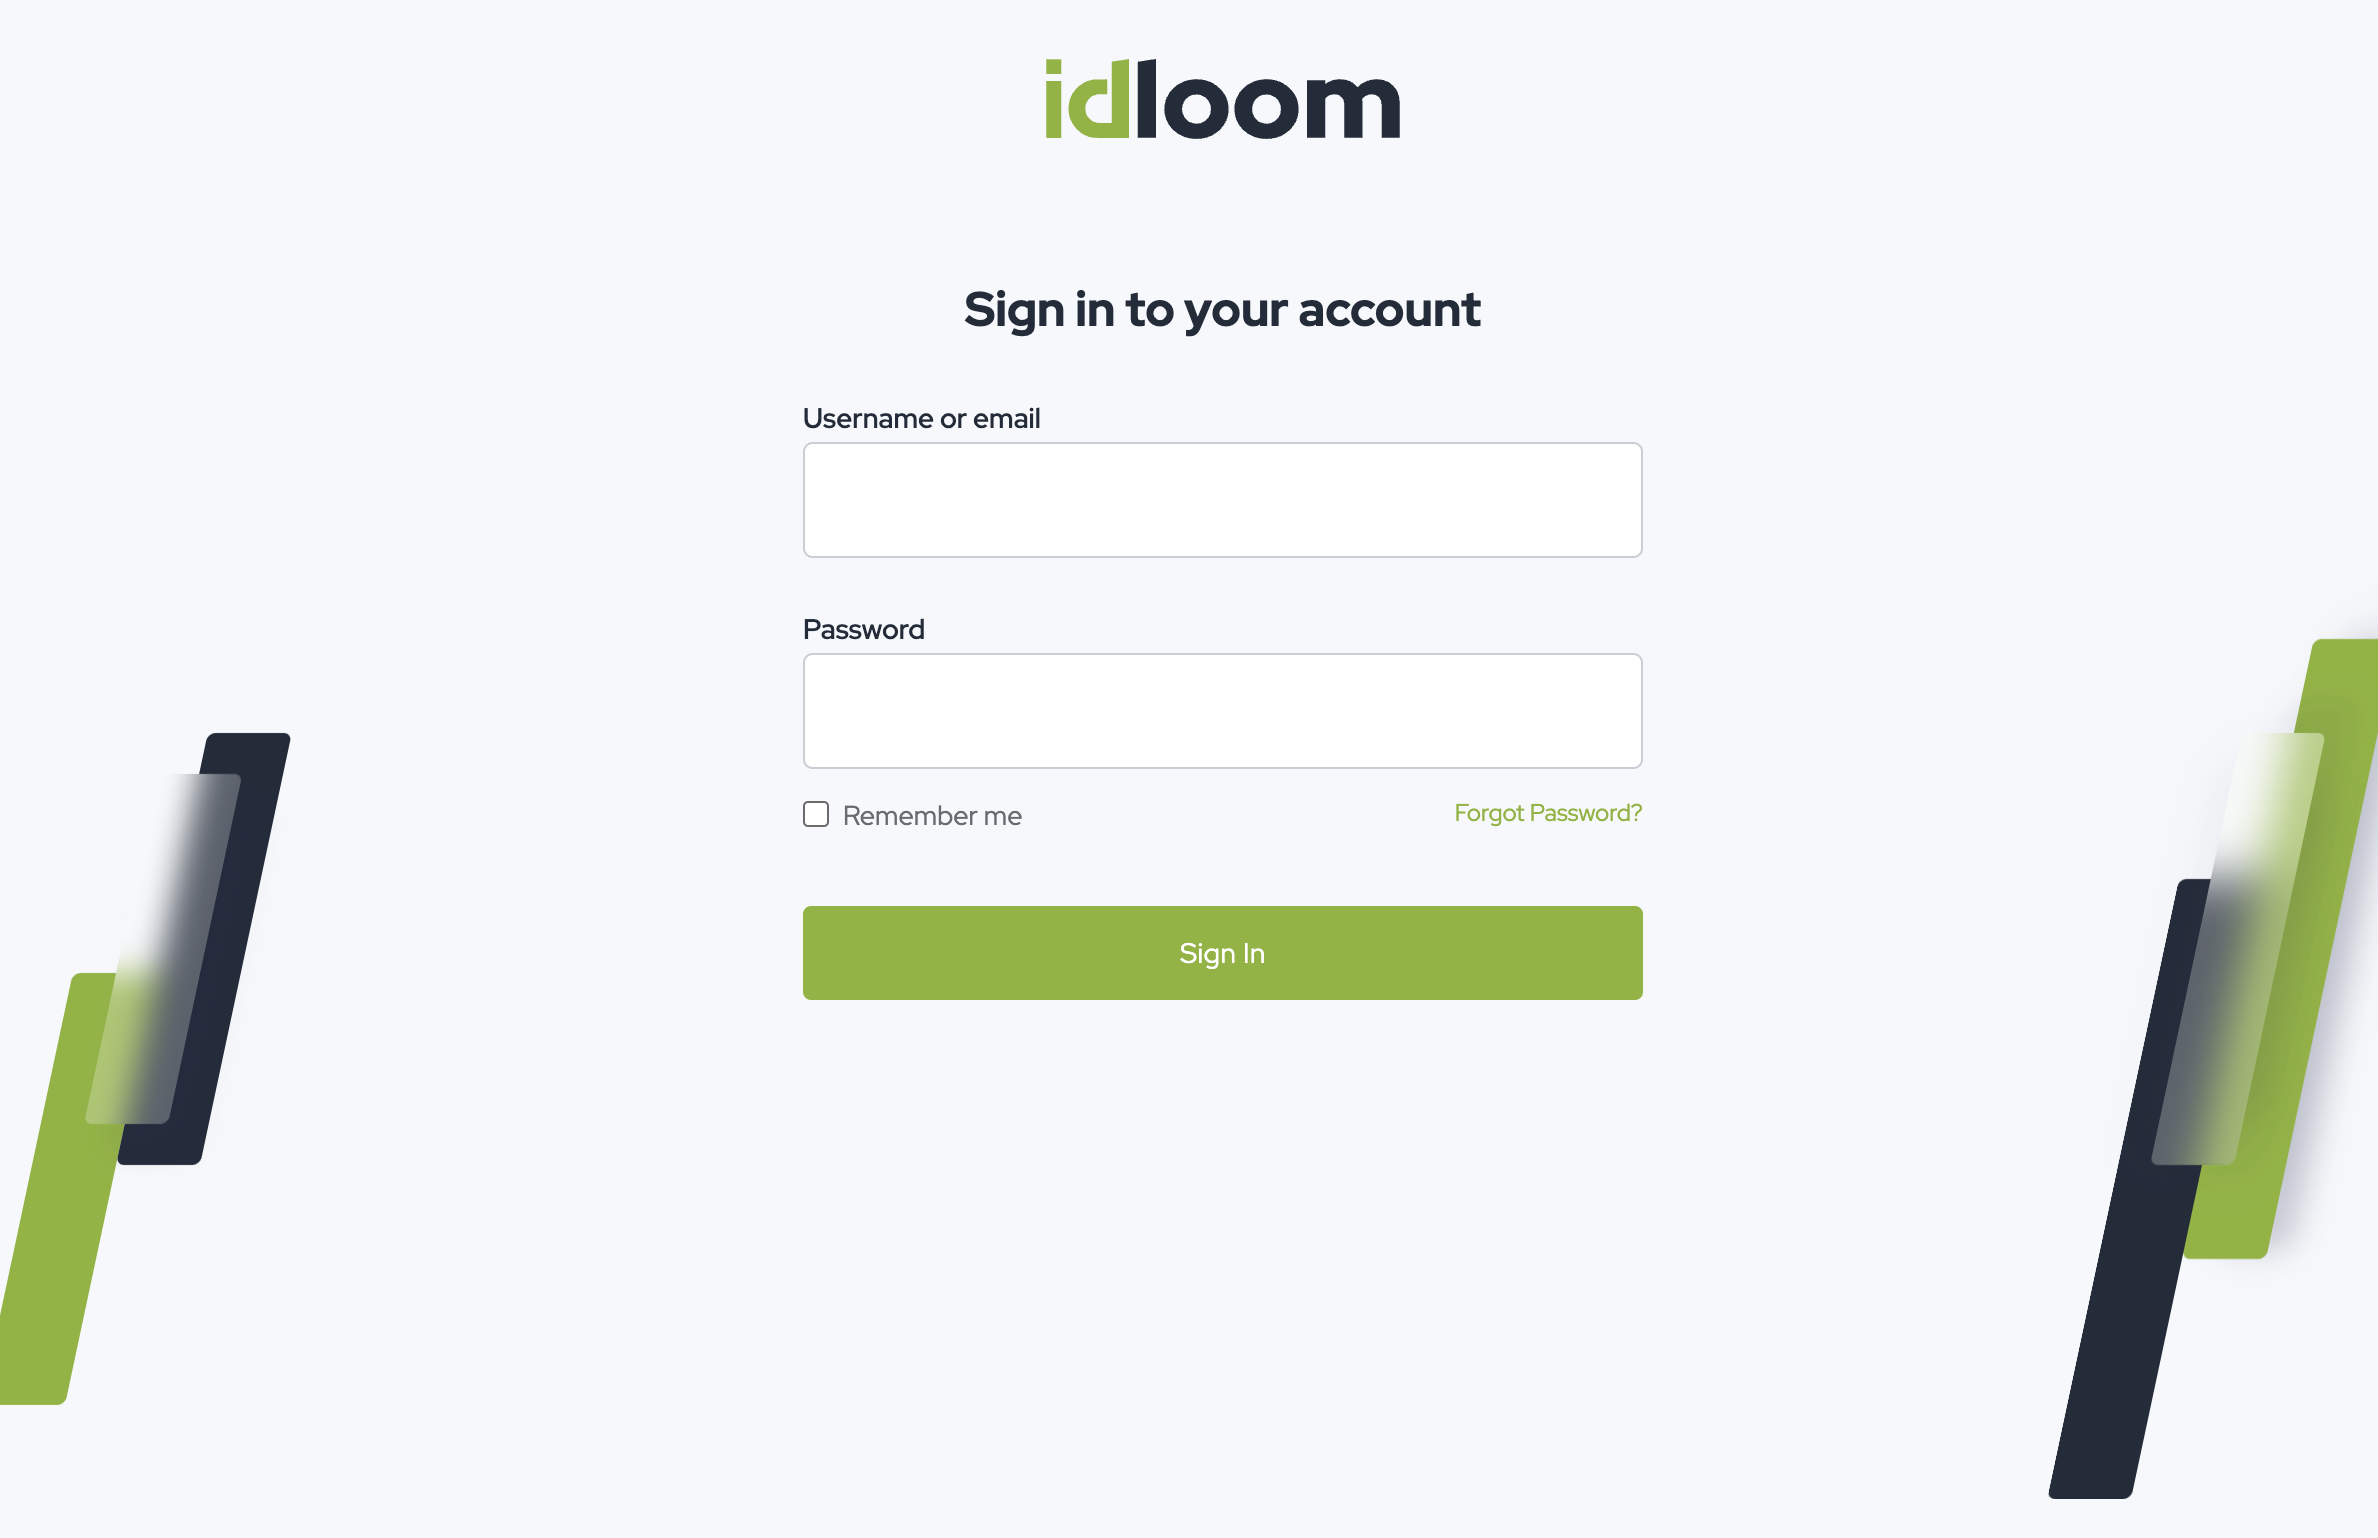
If the user is new to the platform, he will receive an invitation email with a temporary password for his first connection.

- Enter your login email and the temporary password provided.
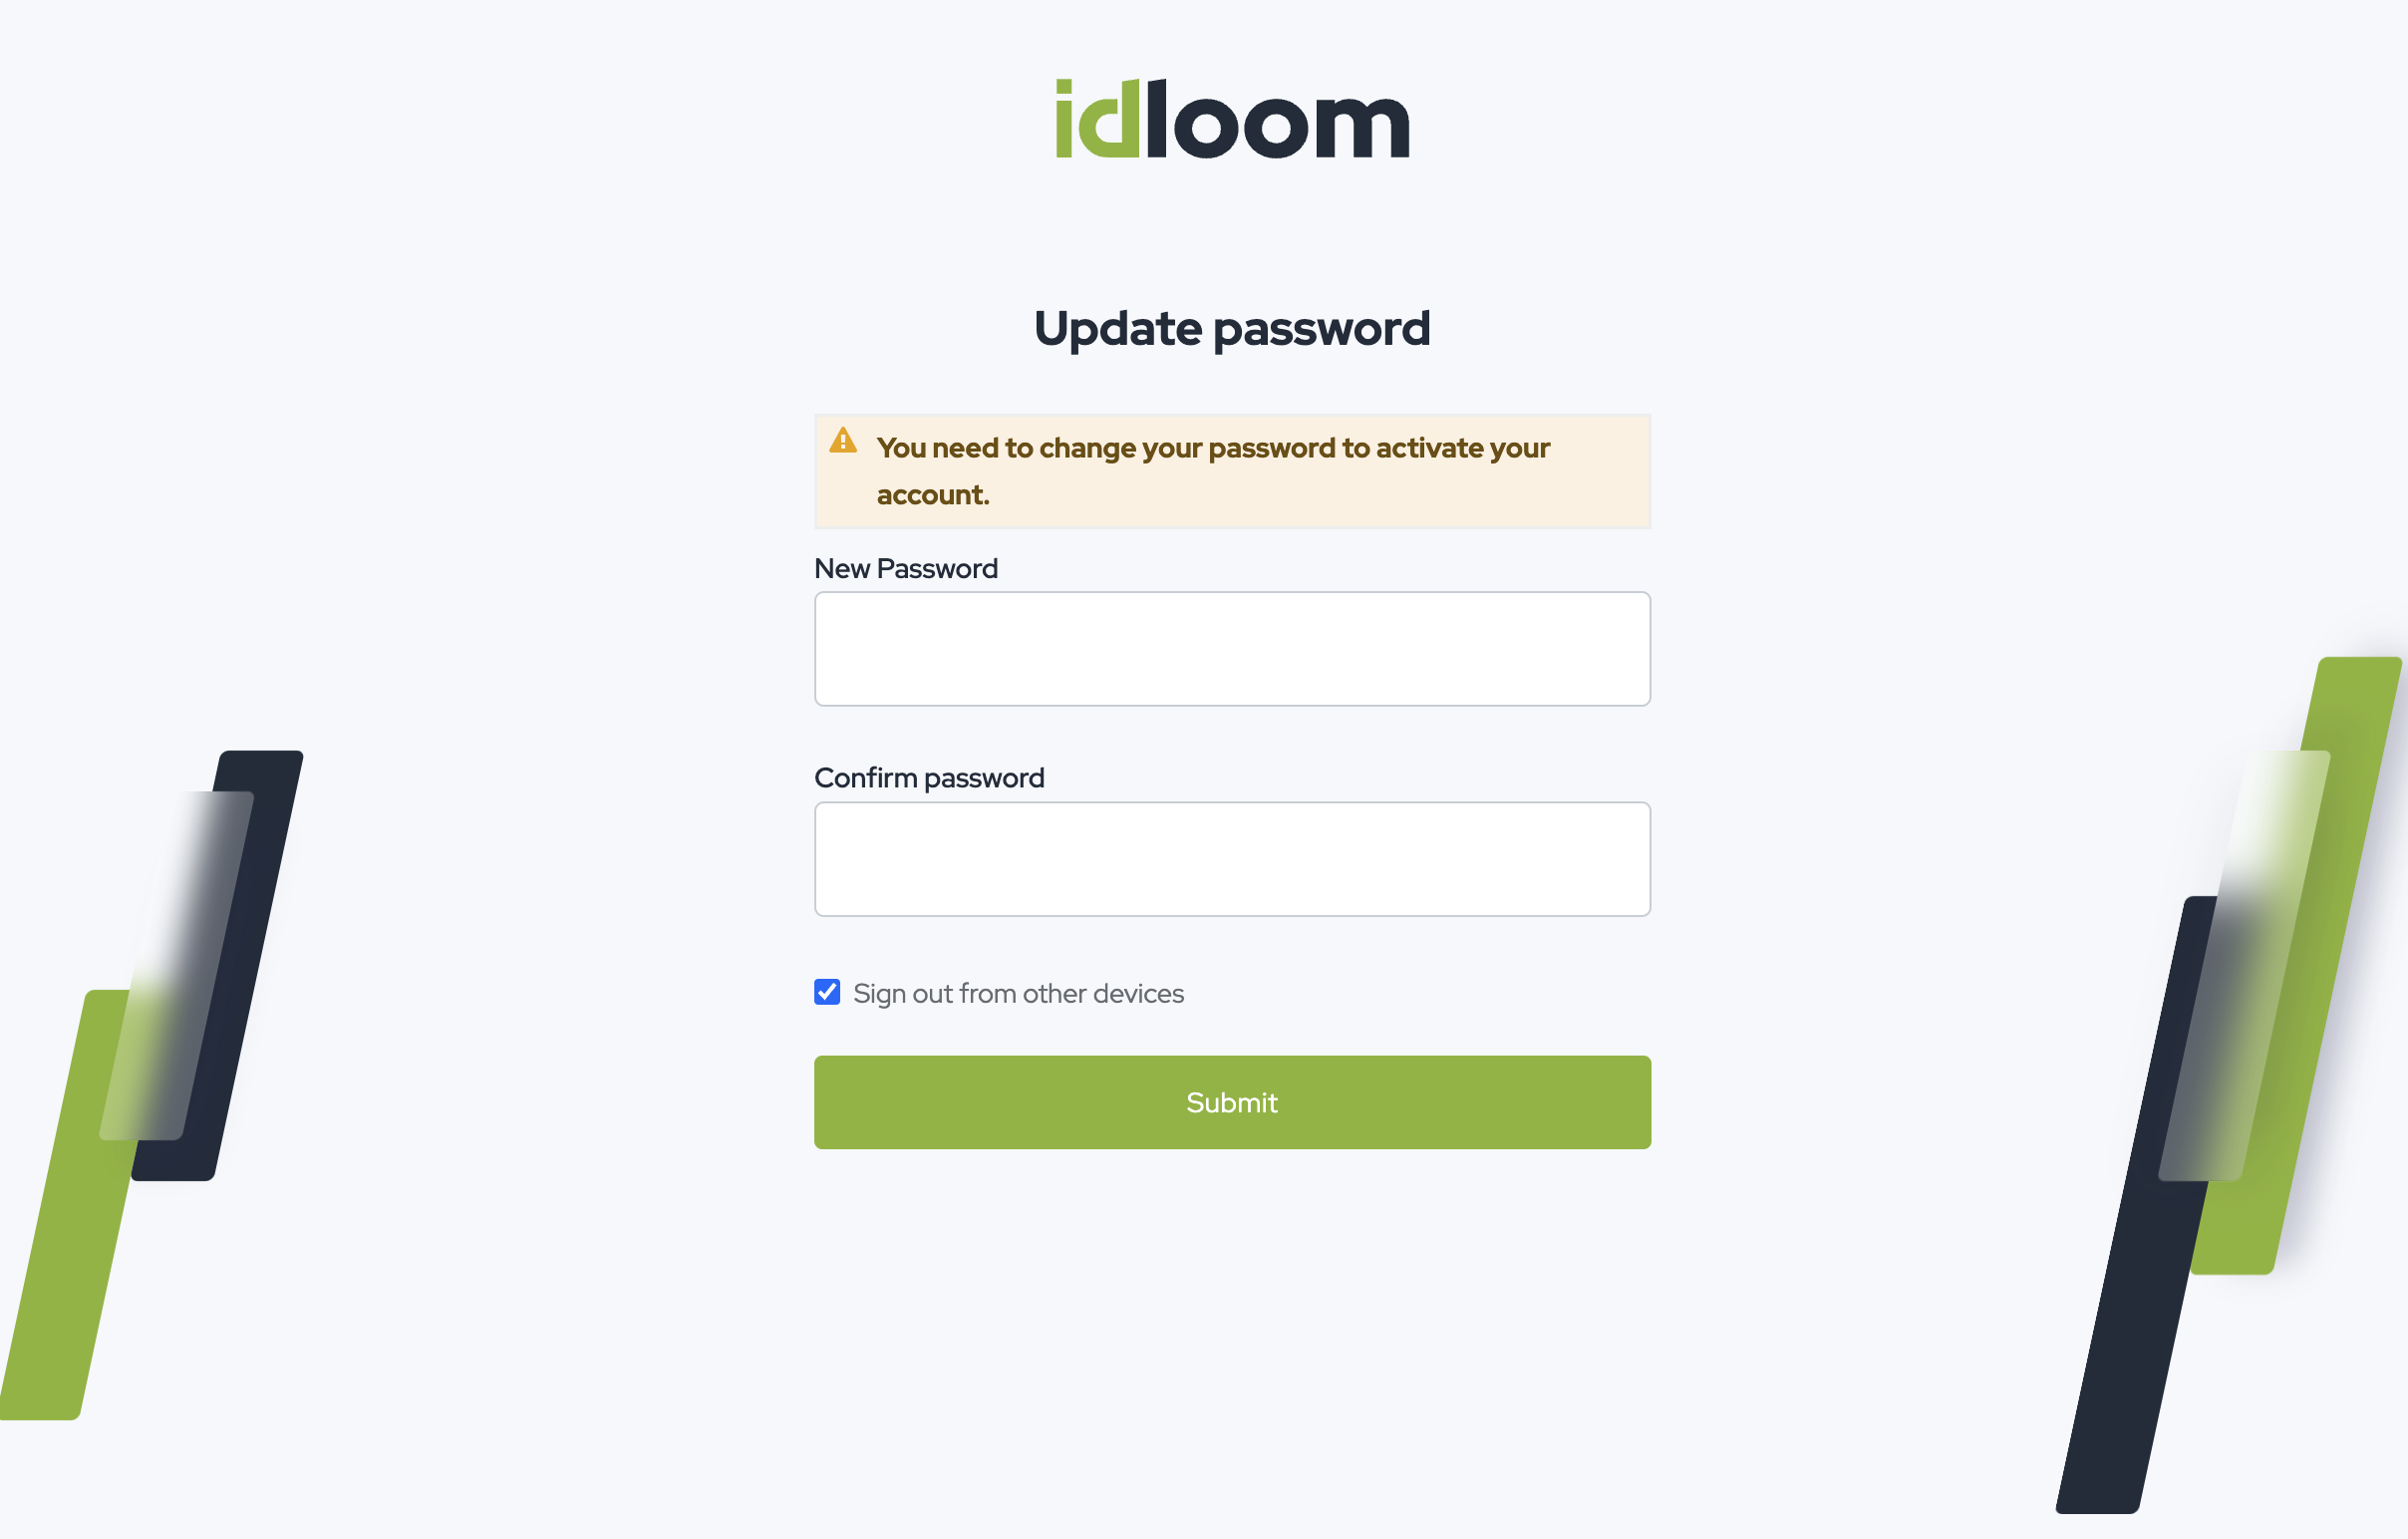
- Enter a new password and confirm it.
- Fill in the form with your contact information on the welcome page:
- First name: This field is mandatory. Enter your first name.
- Last name: This field is mandatory. Enter your last name.
- Daily digest: If you activate the checkbox, you will receive email summaries of key updates, including new registrations, payment statuses, and event milestones. Stay informed about your event’s progress without logging in.
- Language: This field is prefilled with the information provided during the invitation process. Select the backend language you would like to use.
- Regional format: Select the format you would like to use for dates and currencies.
- Measurement system: Select the measurement system you would like to use.
- Time zone: Select the timezone you are located in.

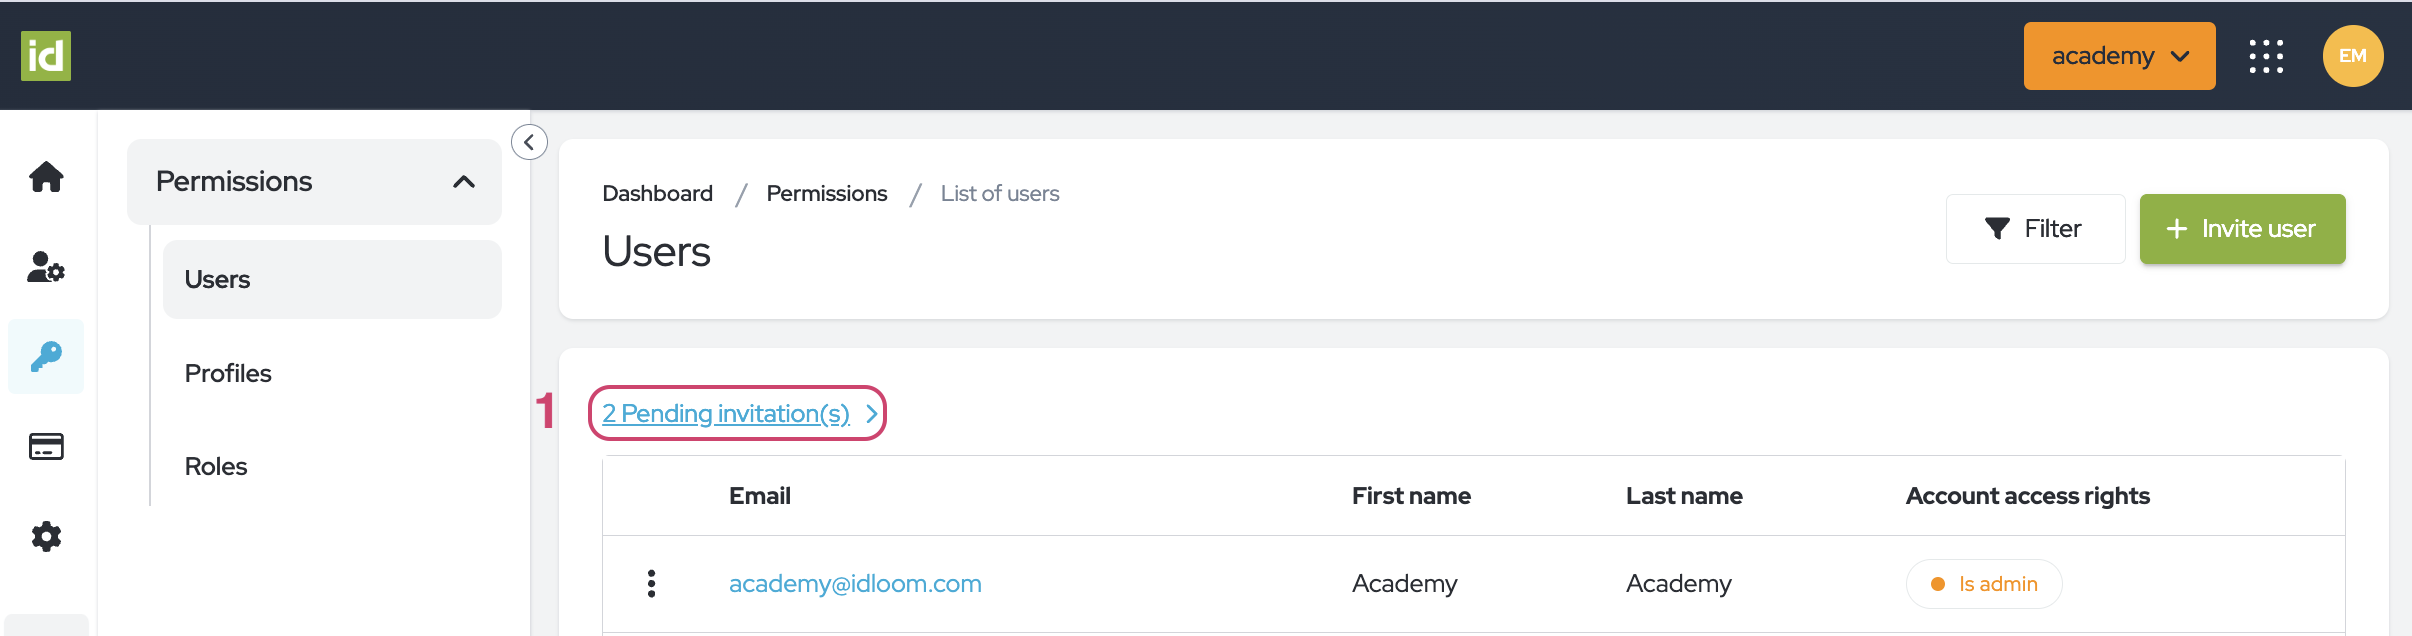
Manage invited Users
A welcome email is automatically sent to a User that has been added to a Profile. However if for some reason the User did not receive it, you can resend it as explained below.
You can also delete an existing invitation.
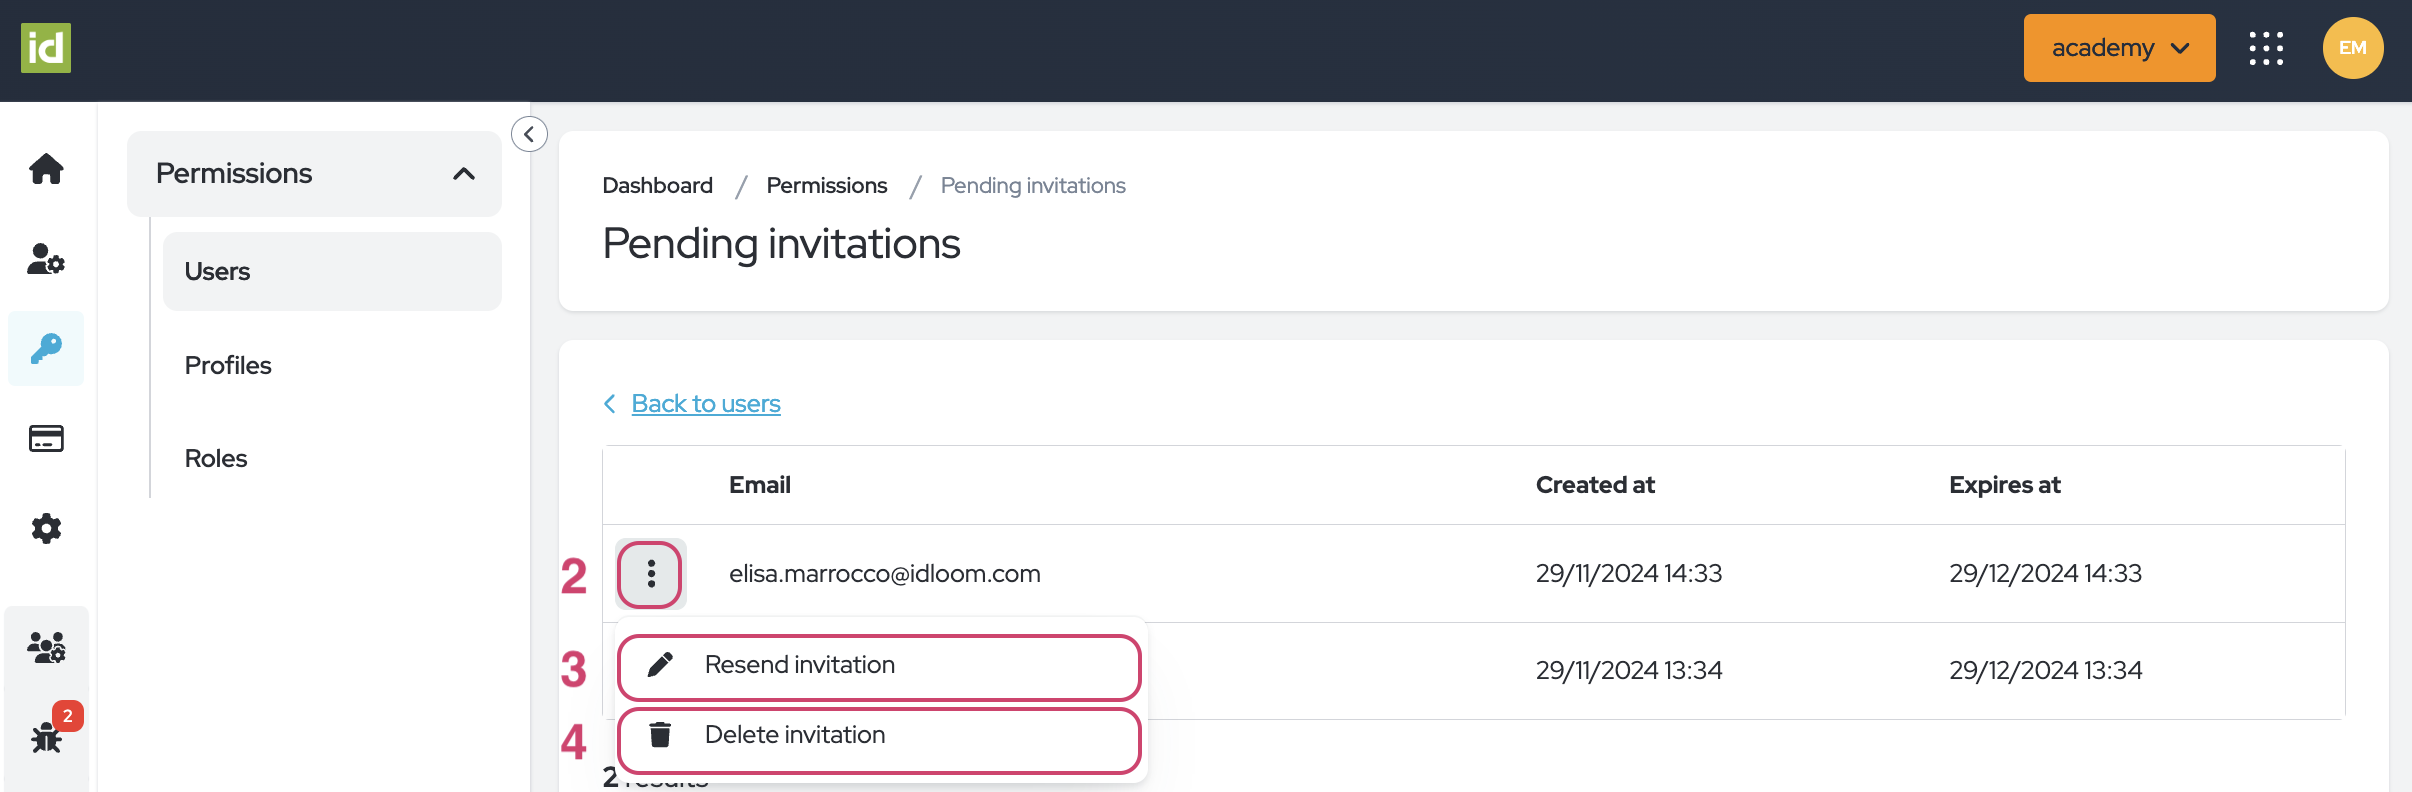
- Click on "Pending invitation(s)" to view the list of invited users and the expiry dates of the invitation links.
- Click on the three dots menu.
- Click on "resend invitation" for the user to receive a new invitation email.
- Click on "delete invitation" so that the user cannot user the invitation link anymore.
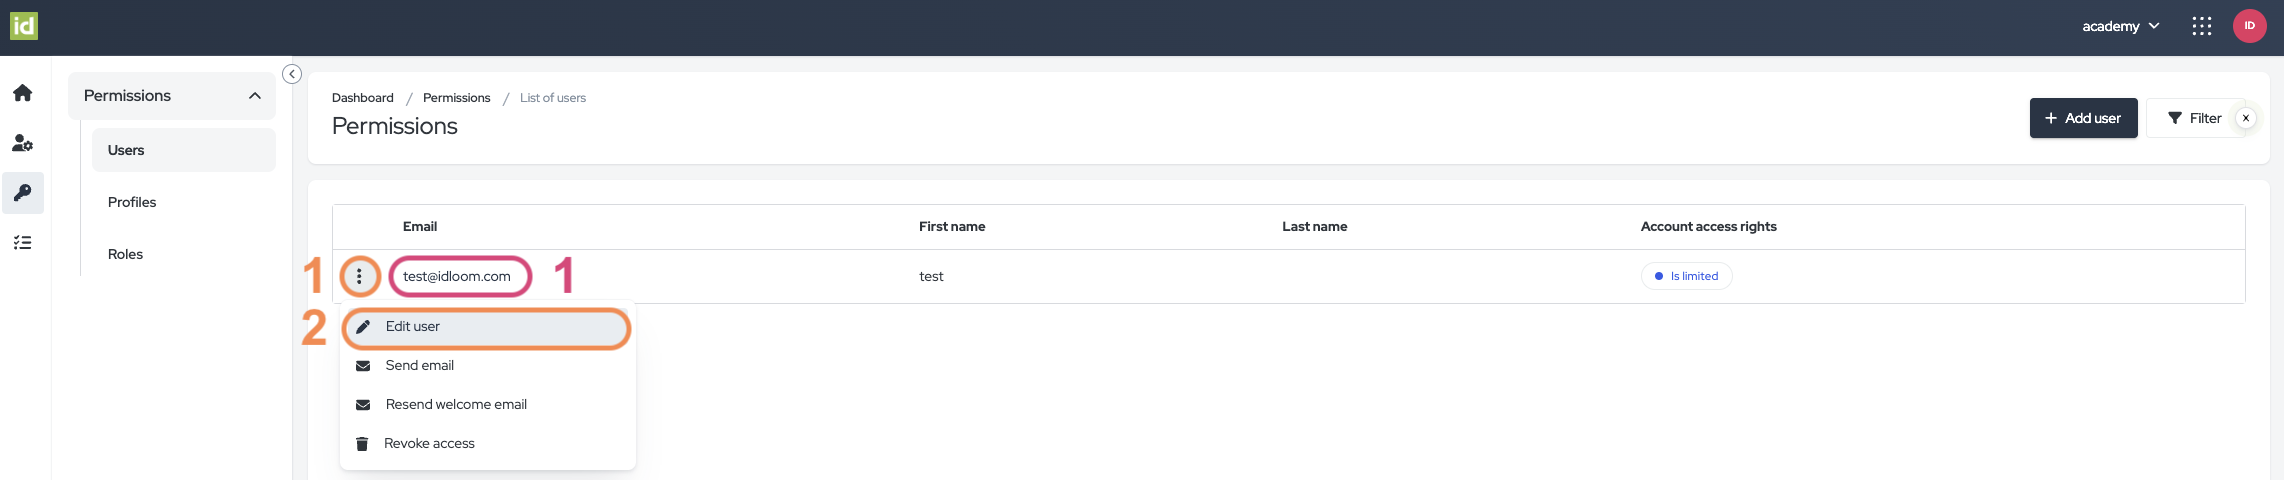
Edit Users
Navigate to the Permissions > Users section of the Identity Module.
- Click on the User’s email.
OR
- Click on the three-dots menu.
- Select “Edit user”.
-
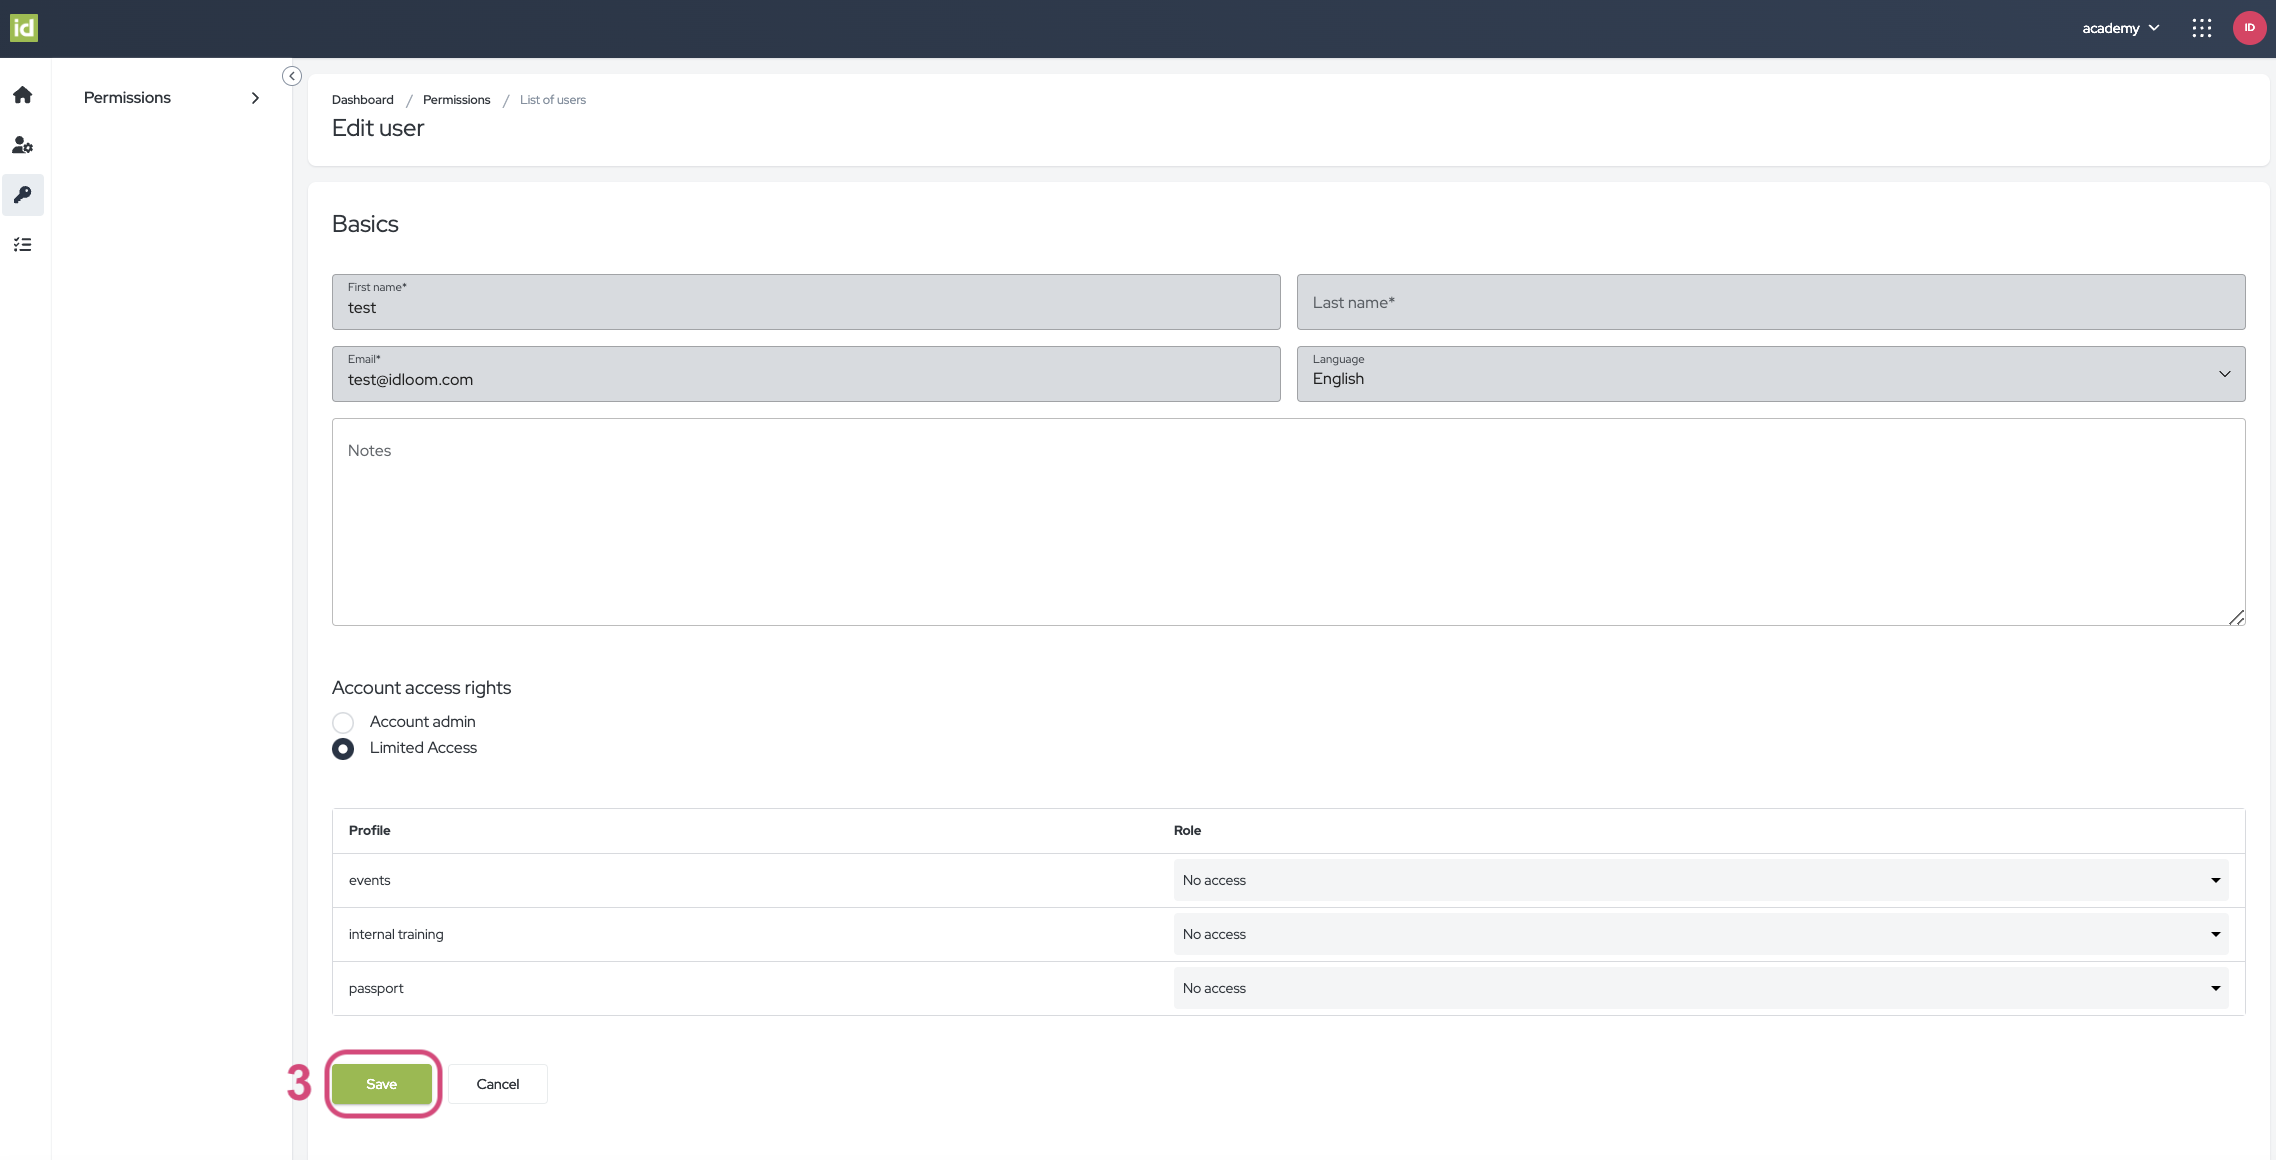
If you edit your own User, you will be redirected to your details section. Otherwise, depending on your Role in the Profile, you can view the contact details of the User:
-
First Name
-
Last Name
-
Email
-
Language
-
-
If you are an administrator on the account, you can:
-
Edit the Notes
-
Modify the type of access right
-
-
- Click on the “Save” button, once the changes have been applied.
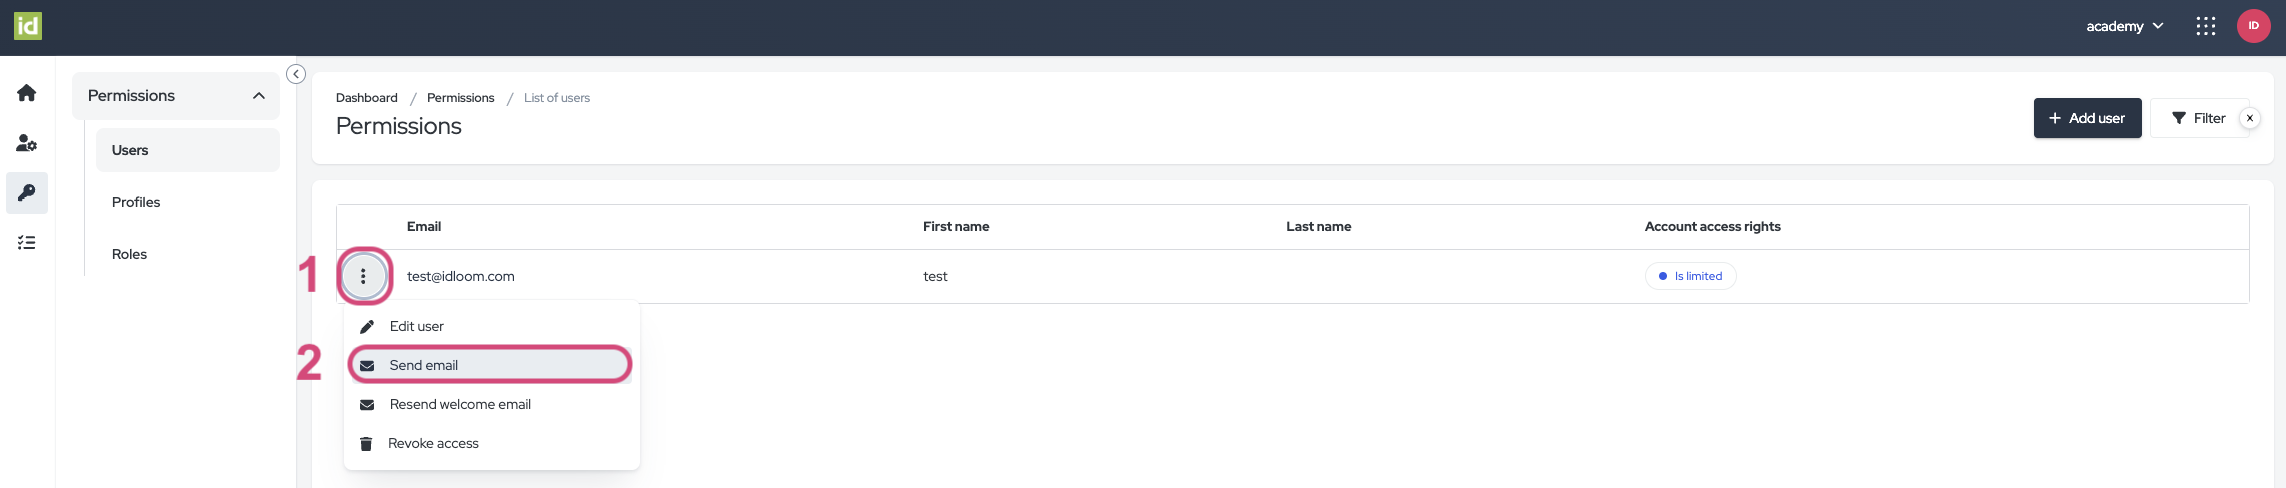
Send Emails to Users
Navigate to the Permissions > Users section of the Identity Module.
- Click on the three-dots menu.
- Select “Send email”.
You will be redirected to your Outlook, where you will be able to send an email to the User.
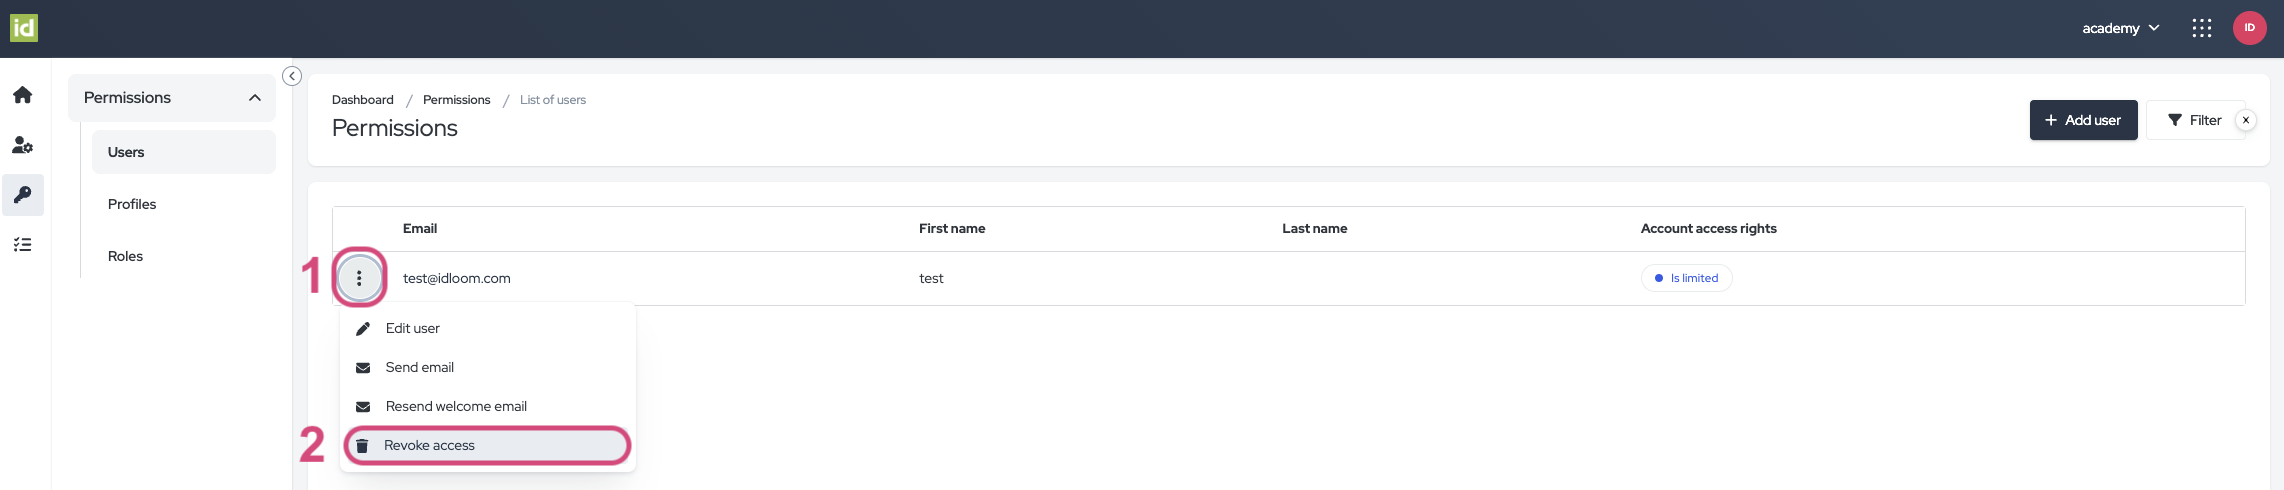
Revoke Access to the Profile
Navigate to the Permissions > Users section of the Identity Module.
- Click on the three-dots menu.
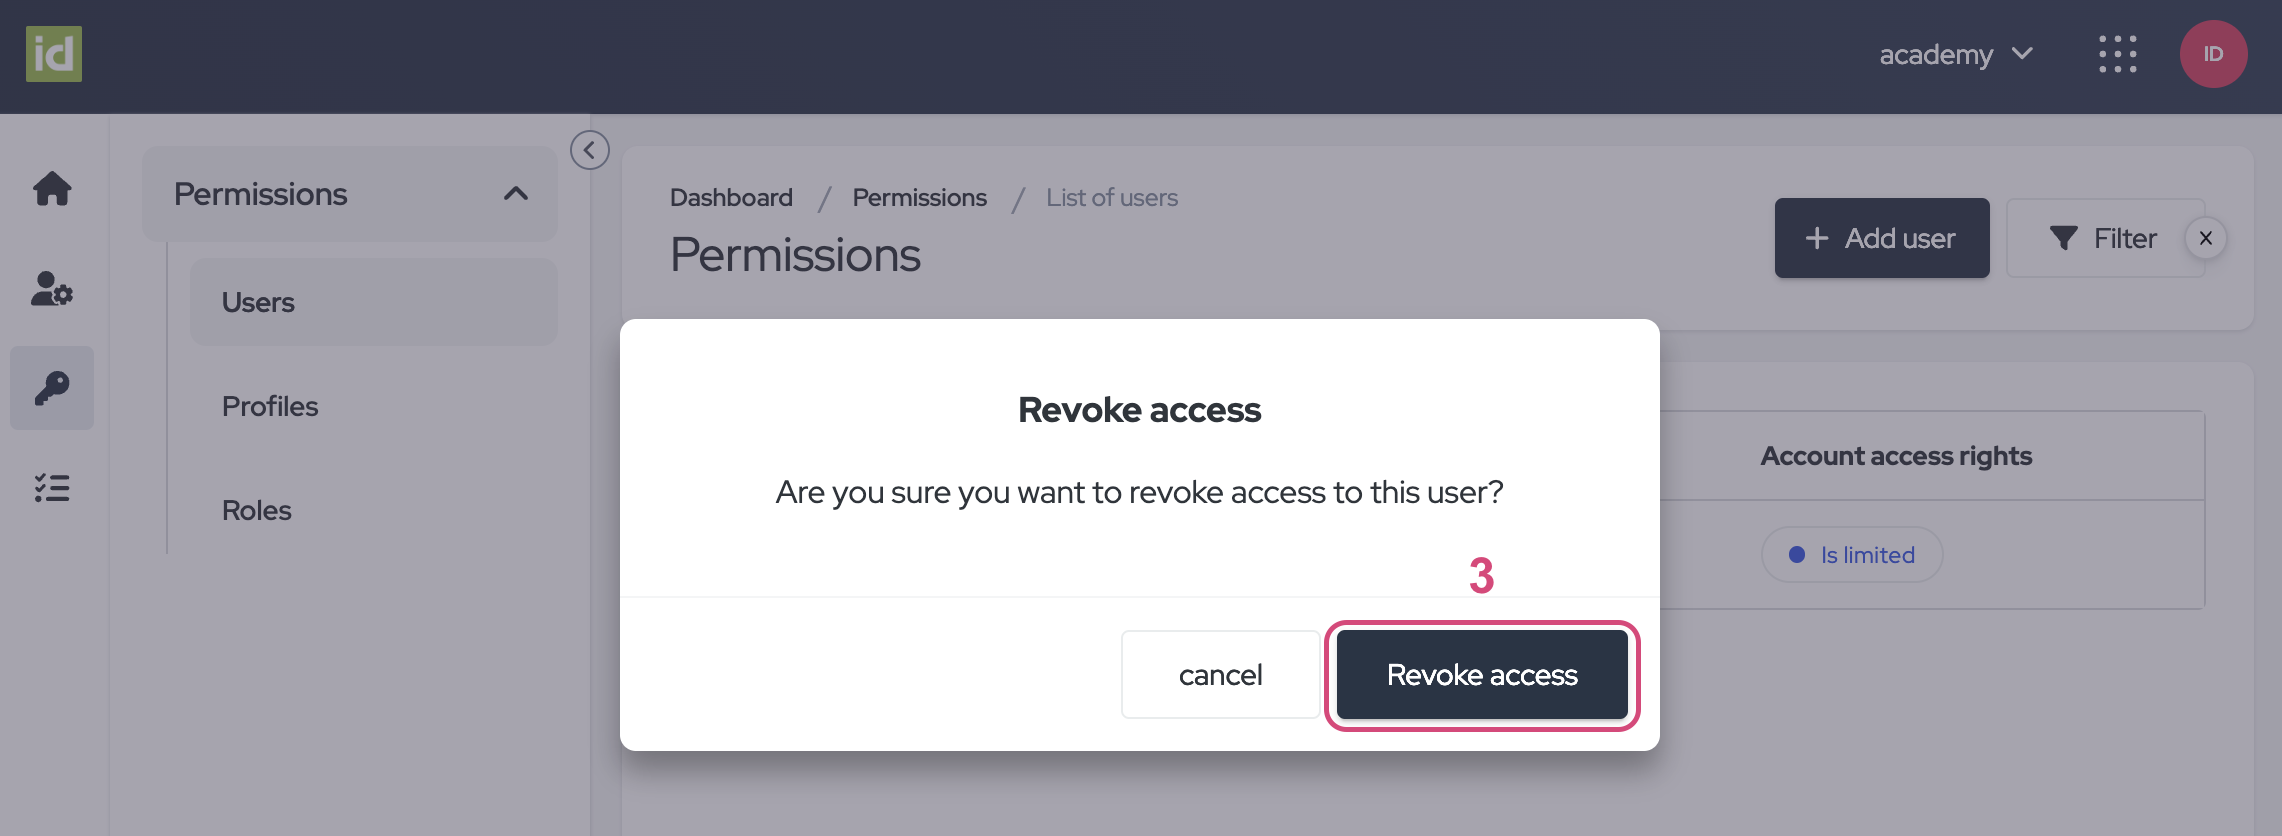
- Select “Revoke access” from the list.
- Click on the “Revoke access” button to confirm.
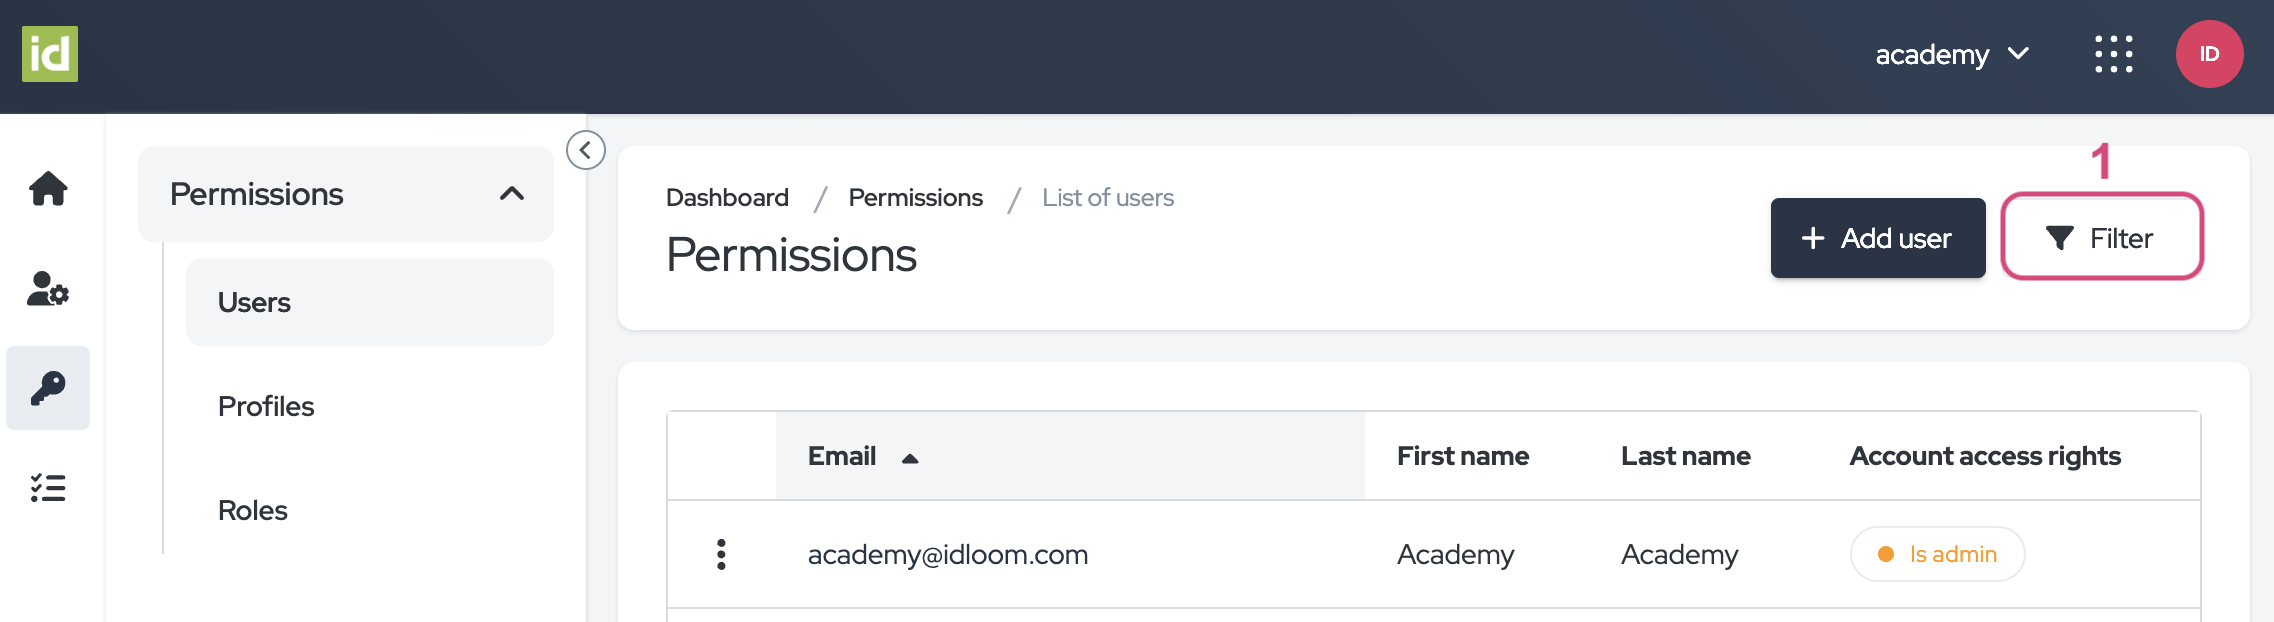
Filter on Users
Navigate to the Permissions > Users section of the Identity Module.
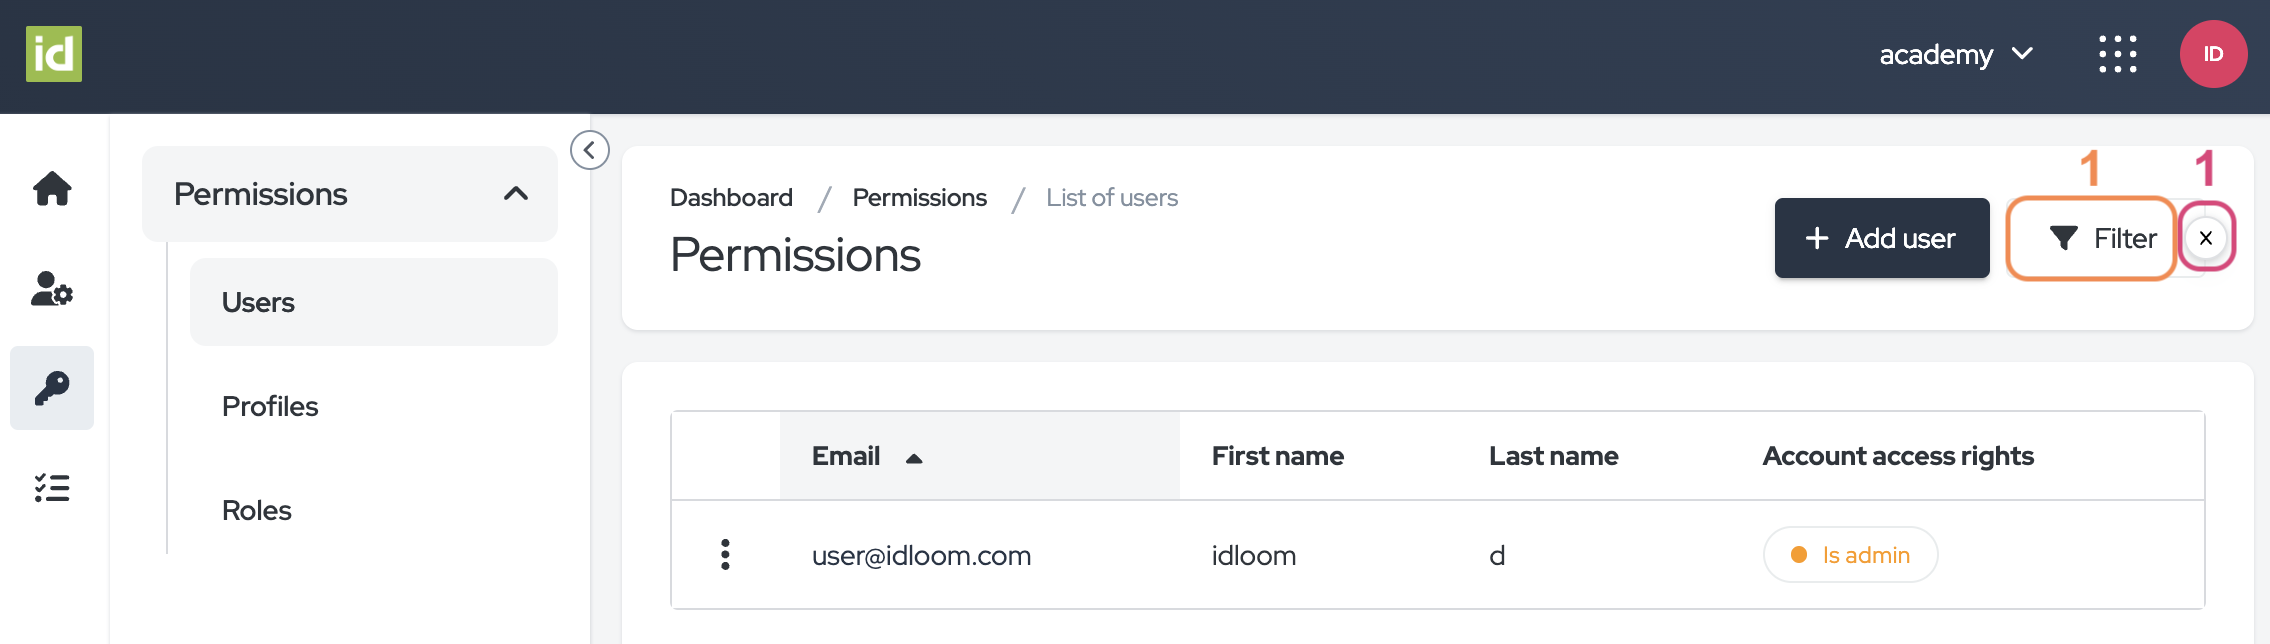
- Click on the “Filter” button.
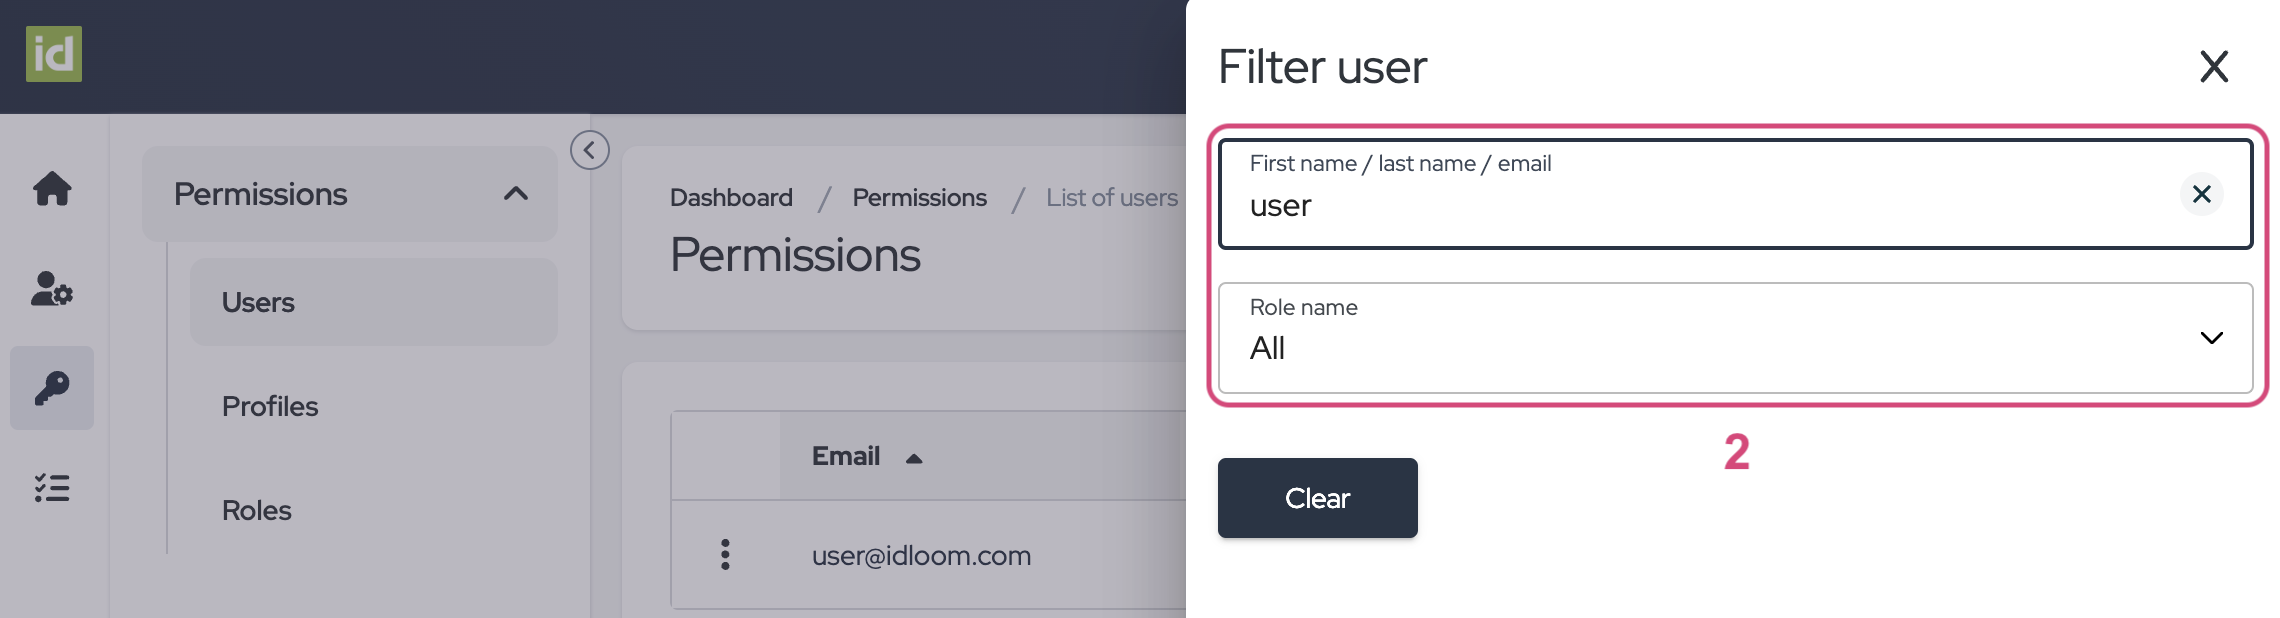
- Specify what criteria you would like to filter on. You can filter on one or multiple criteria.
- First name / last name/email - this allows you to filter the contact details of the user. This is a free field, meaning that you can type in letters for your research.
- Role name - this allows you to filter the Roles of the Users.
No need to save, your changes are directly applied.
Remove filters
- Click on the cross next to the filter button.
OR
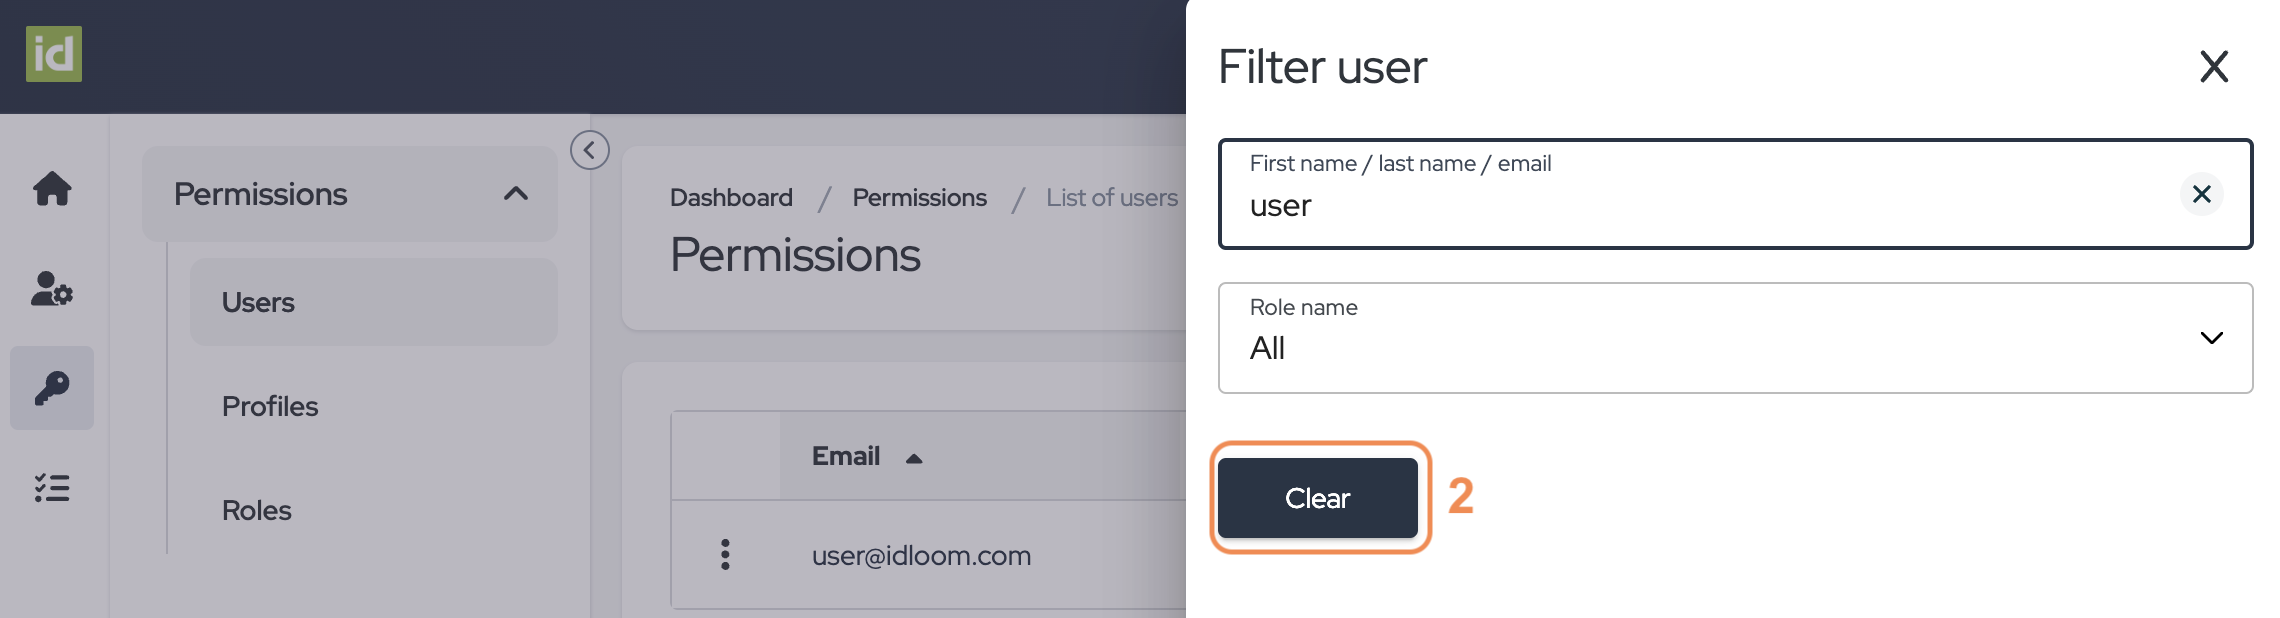
- Click on the “Filter” button.
- Then on the “Clear” button to clear your filters and to display the complete list of Profiles.
Profiles
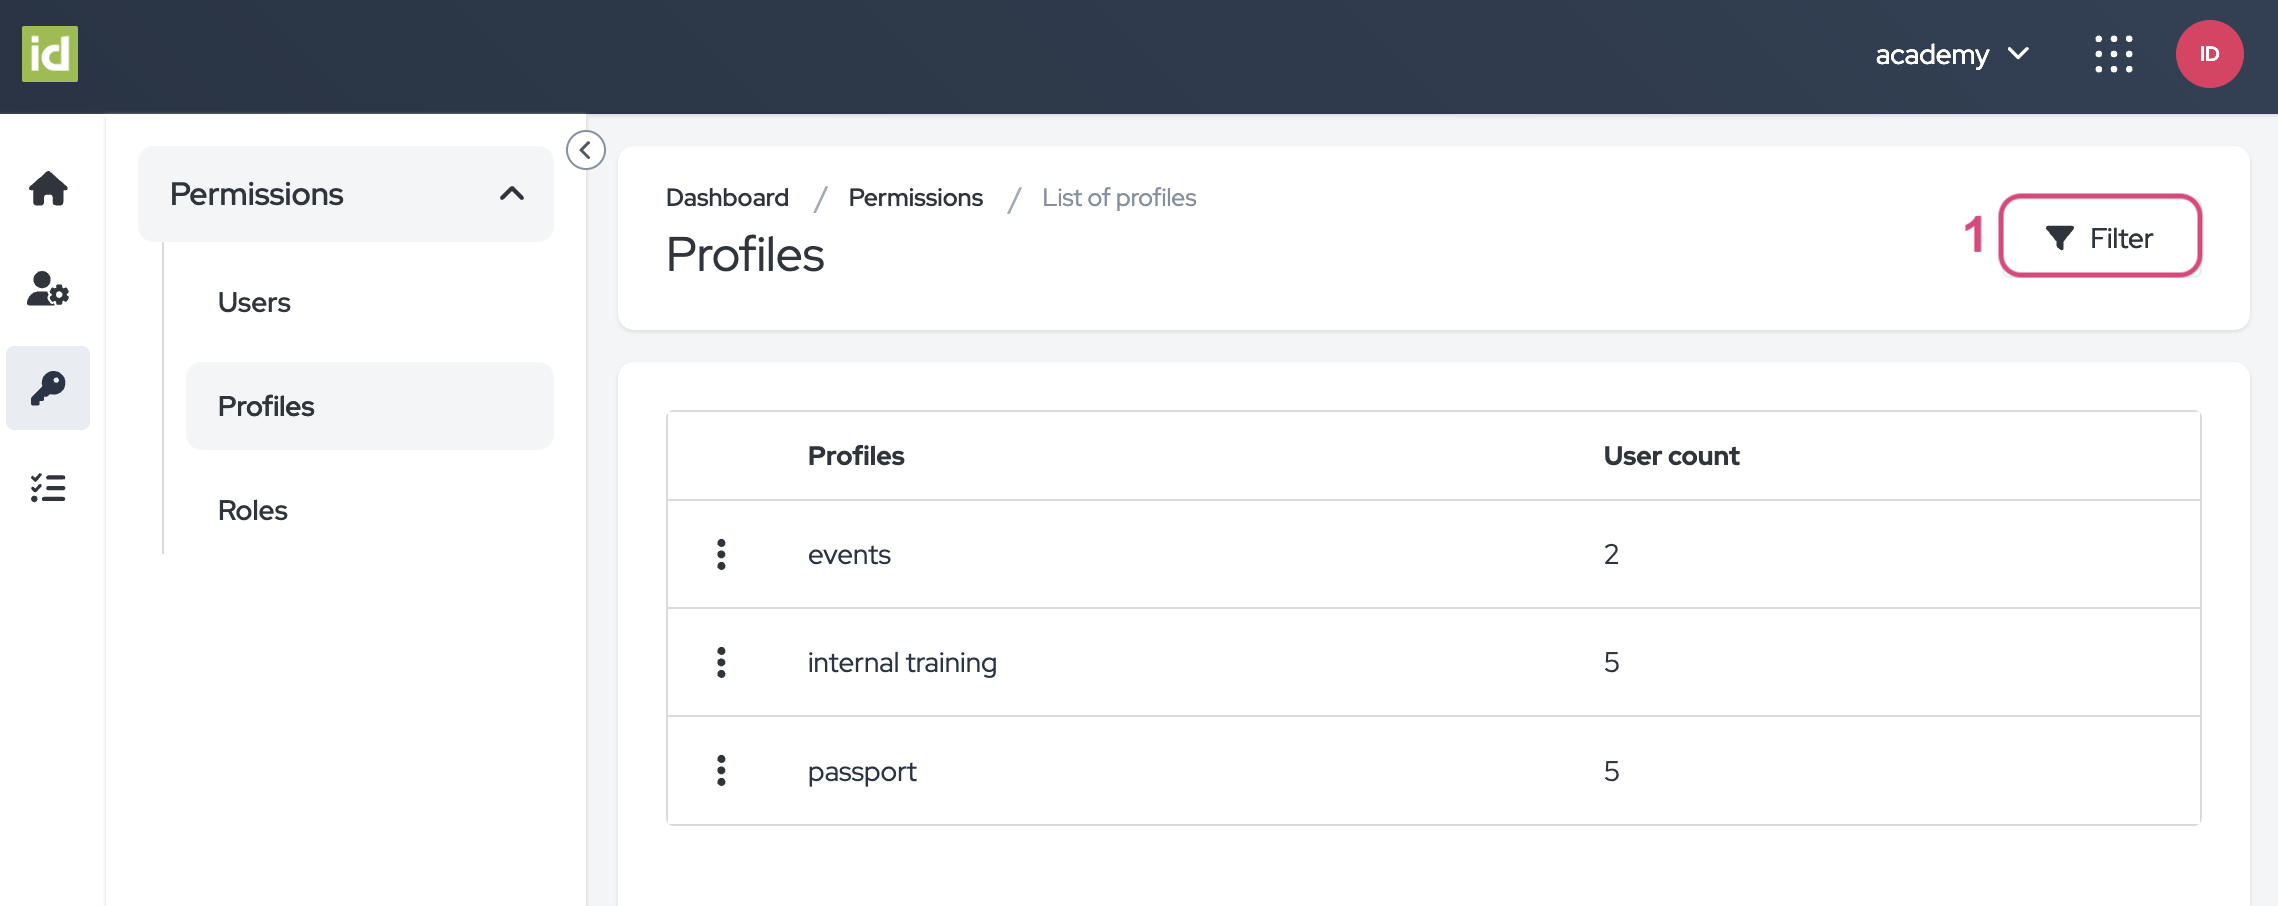
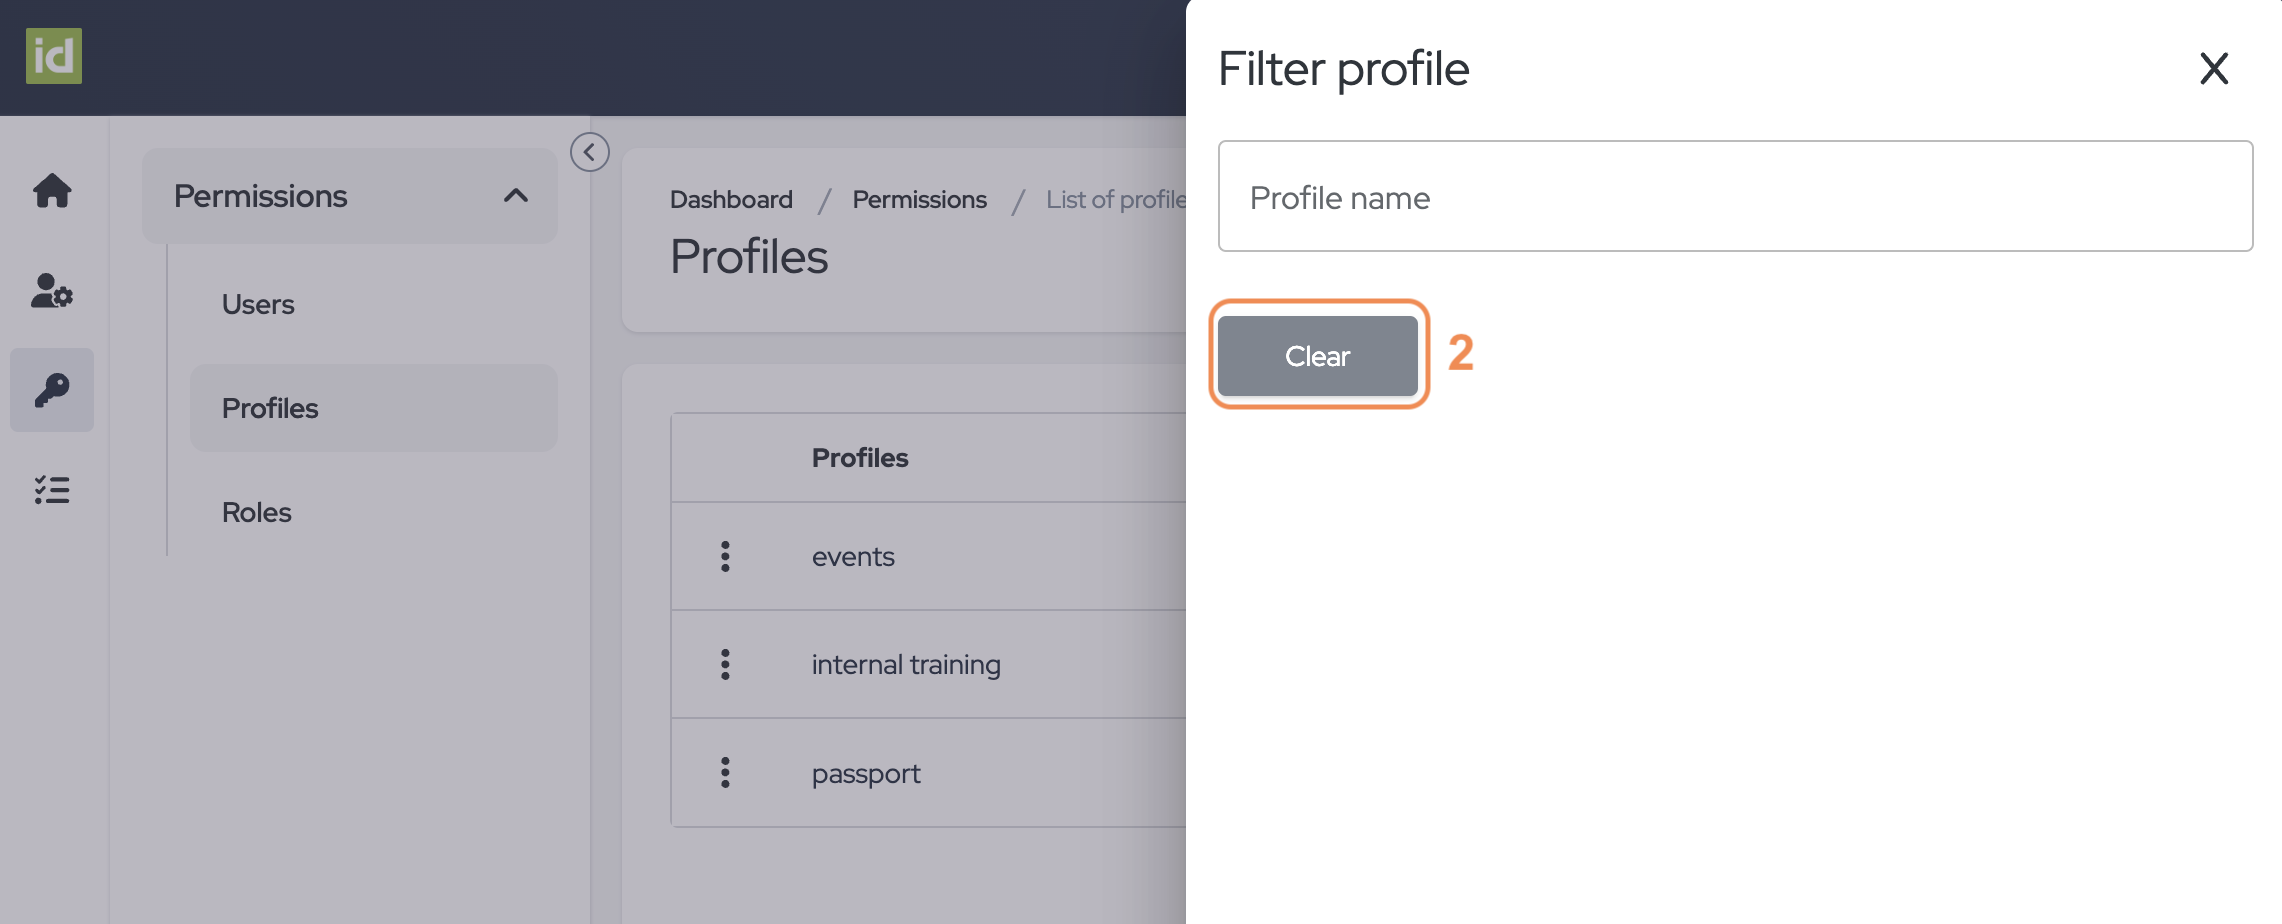
Filter on Profiles
Navigate to the Permissions > Users section of the Identity Module.
- Click on the “Filter” button.
- You can type in letters to filter on the name of the Profile as this is a free field.
No need to save, your changes are directly applied.

Remove filters
- Click on the cross next to the filter button.
OR
- Click on the “Filter” button.
- Then on the “Clear” button to clear your filters and to display the complete list of Profiles.

Roles
Creating and managing your Roles is key to allocating the correct access to every user. In idloom, you can create custom Roles to best match your needs.
Navigate to the Permissions > Roles section of the Identity Module.
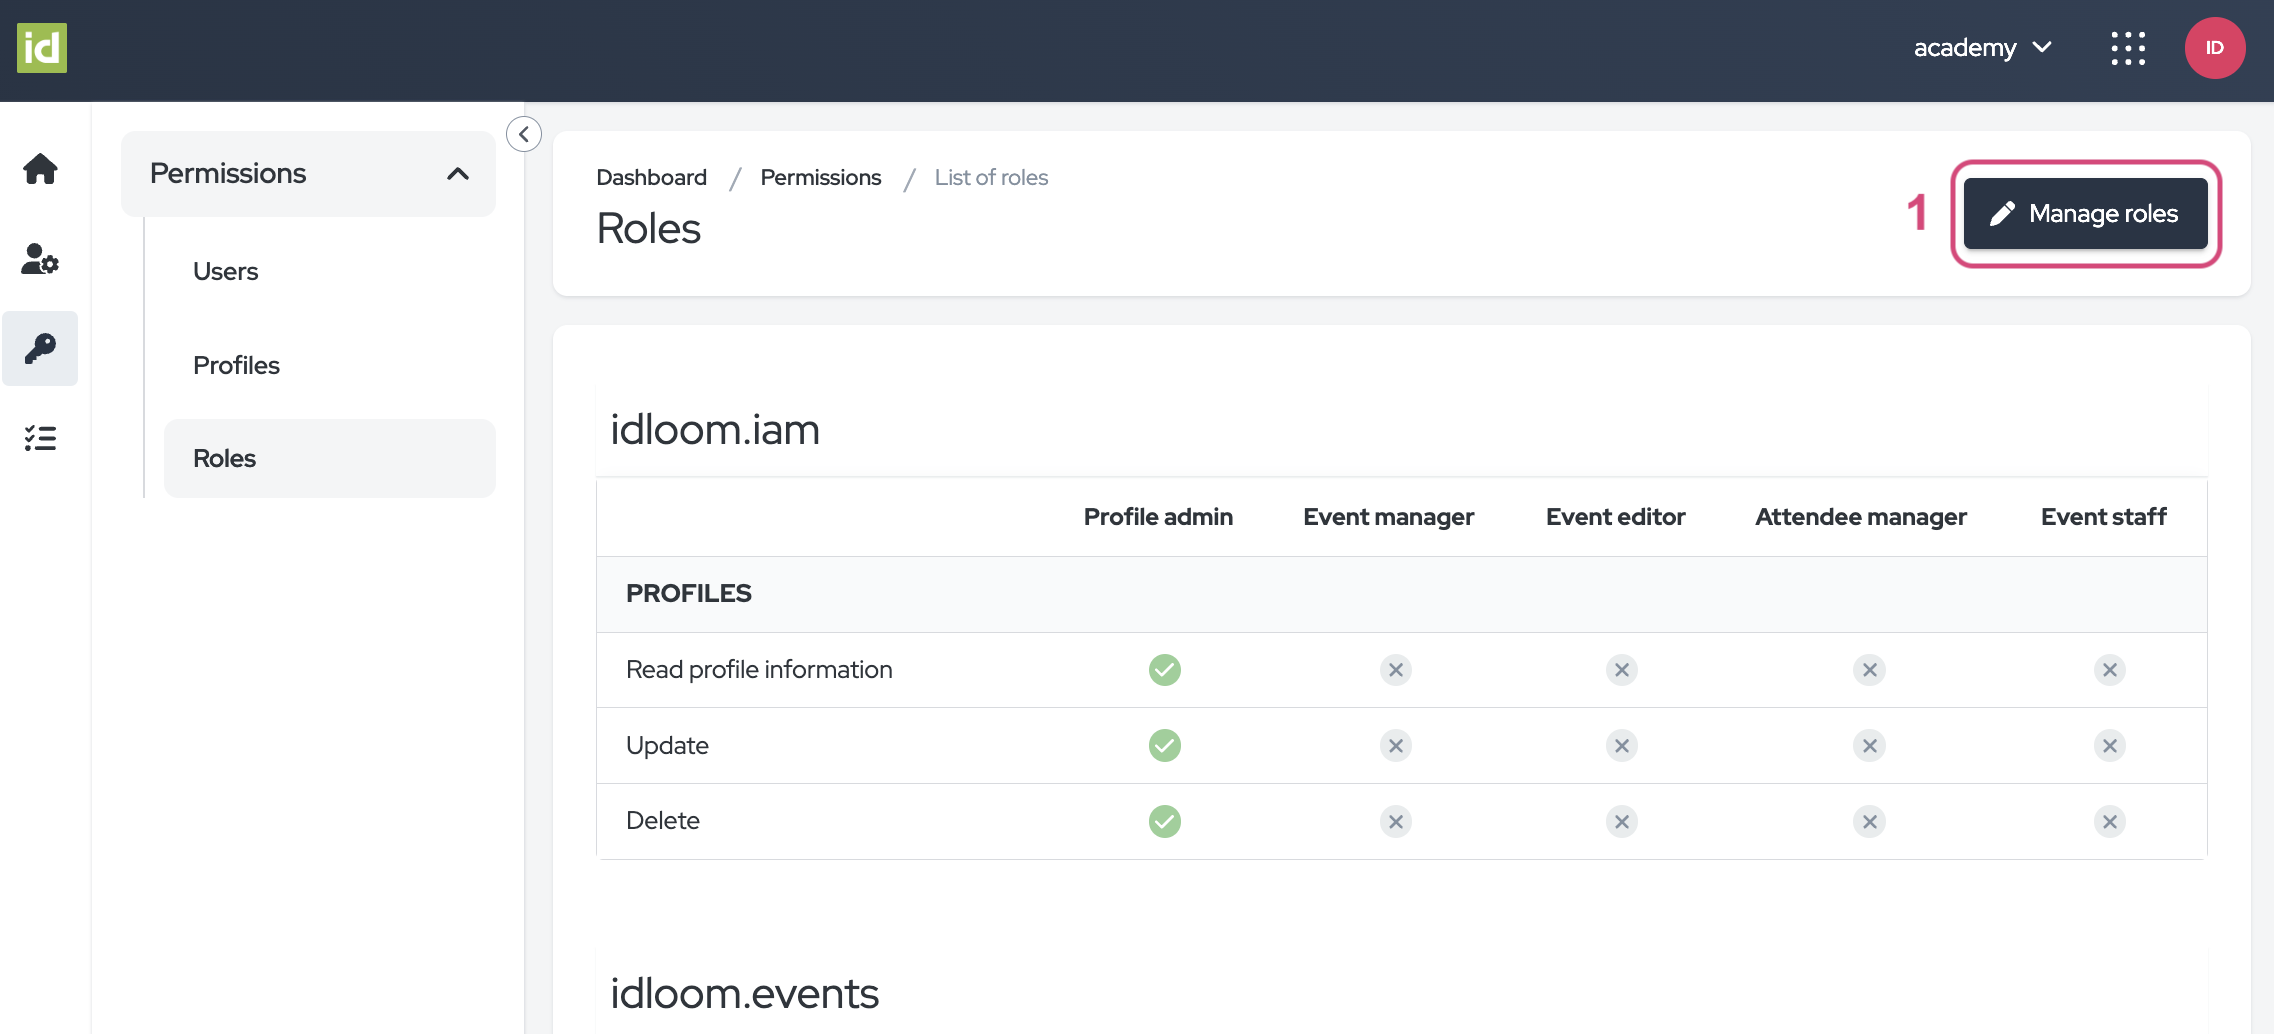
This page provides an overview of all the roles within your profile for each module, including IAM, Events, and Invoices.
By default, you have the following Roles available on your Profiles:
- Profile admin: A profile admin has the same rights as an account admin but only for a specific profile (Multiple profiles are only available from the Corporate subscription).
- Event manager: An event manager can access and edit all the events but cannot edit the Profile settings.
- Event editor: An event editor can only edit content on an event but cannot make any change on the list of attendees (e.g. update registration status).
- Attendee manager: An attendee manager can edit the list of attendees and modify attendees status but cannot edit the event content.
- Event staff: Event staff can only view the list of attendees, view the statistics, and manage the check-ins.
- No access: The user cannot perform any action on the profile selected.
You can modify or delete the default Roles, but also create new ones.
The rights granted to users with a specific role are denoted with a green checkmark, while the rights they lack are represented by a grey cross.
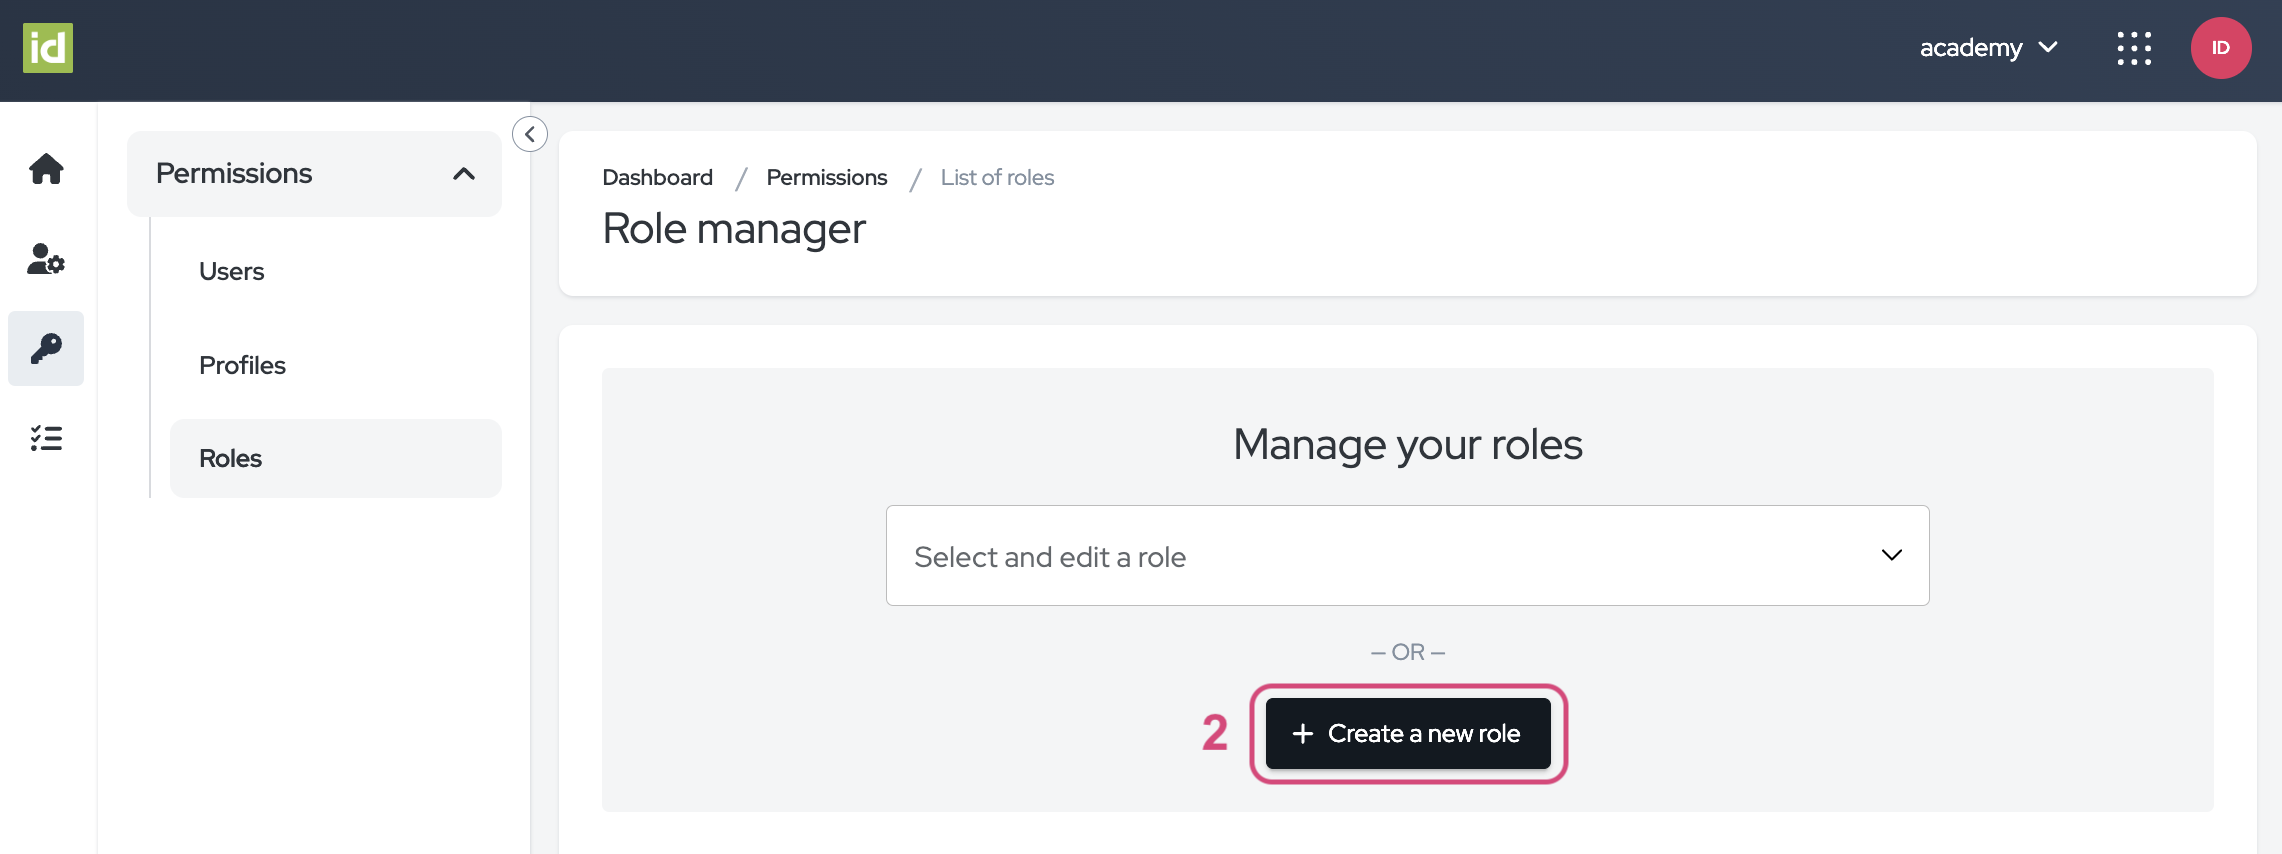
Create New Roles
Navigate to the Permissions > Roles section of the Identity Module.
- Click on the “Manage roles” button.
- Click on the “Create a new role” button.
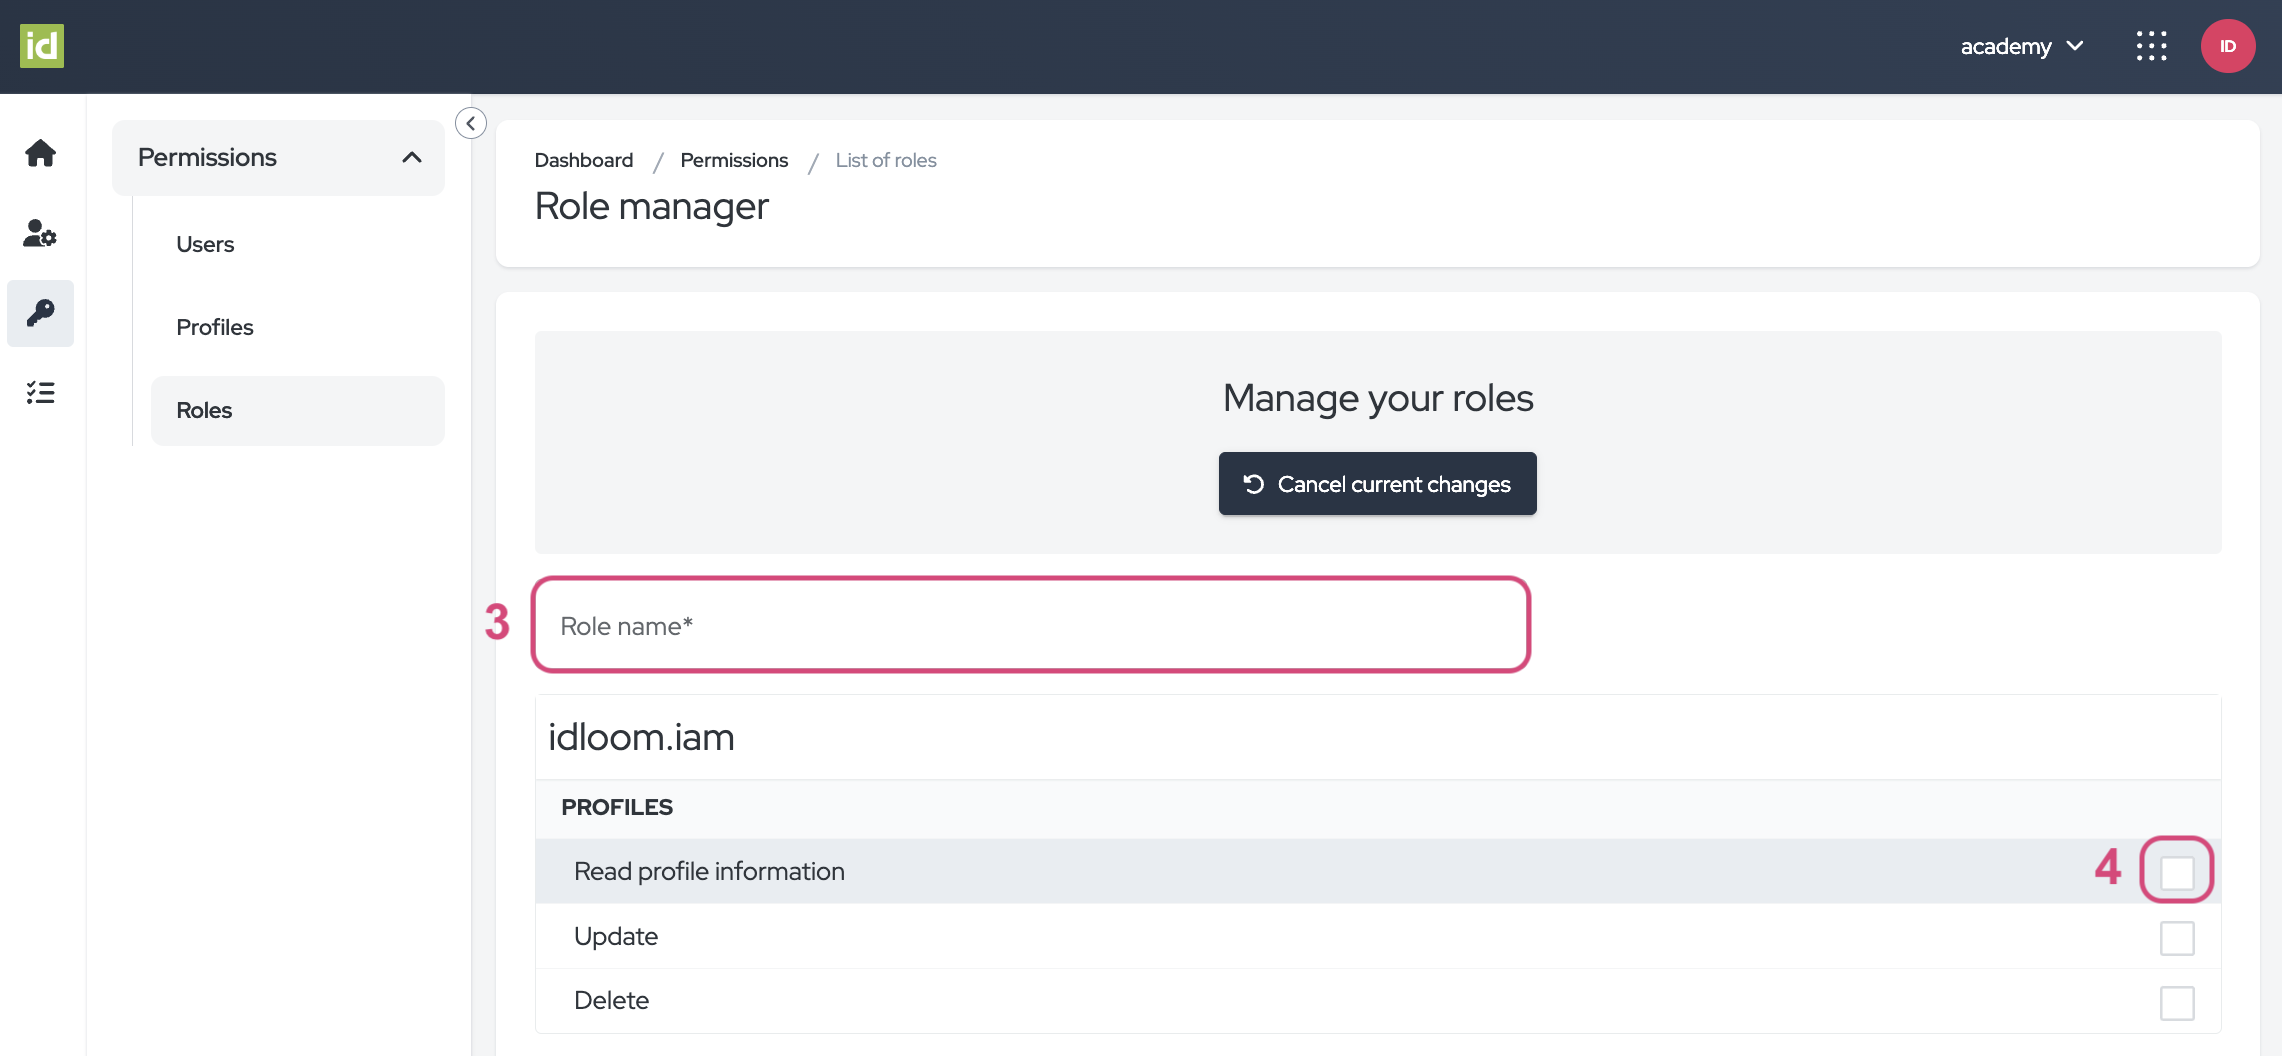
- Enter the name of your new Role. This Role will be available for the entire Profile.
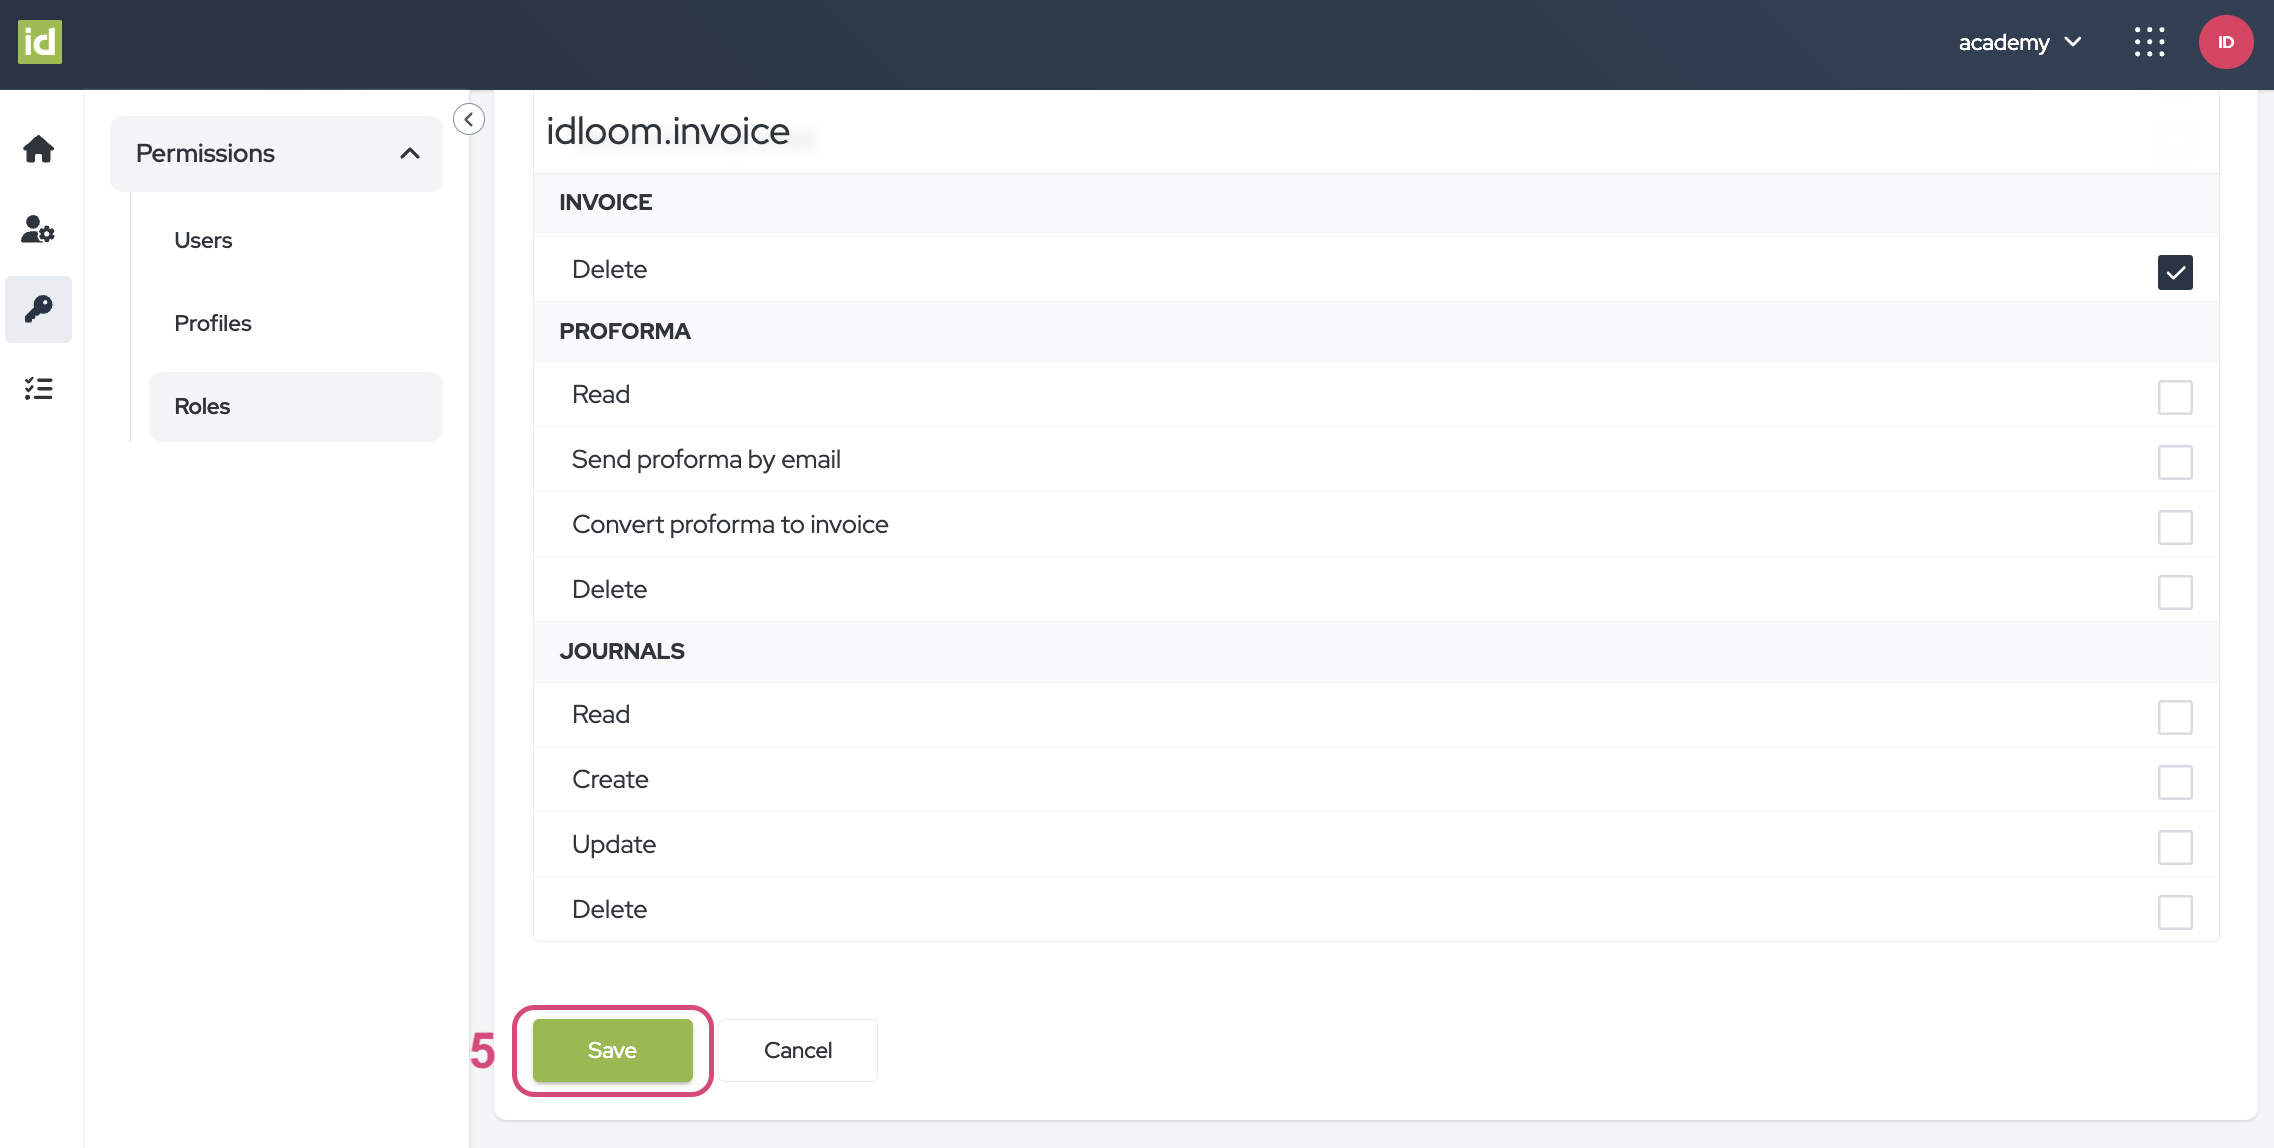
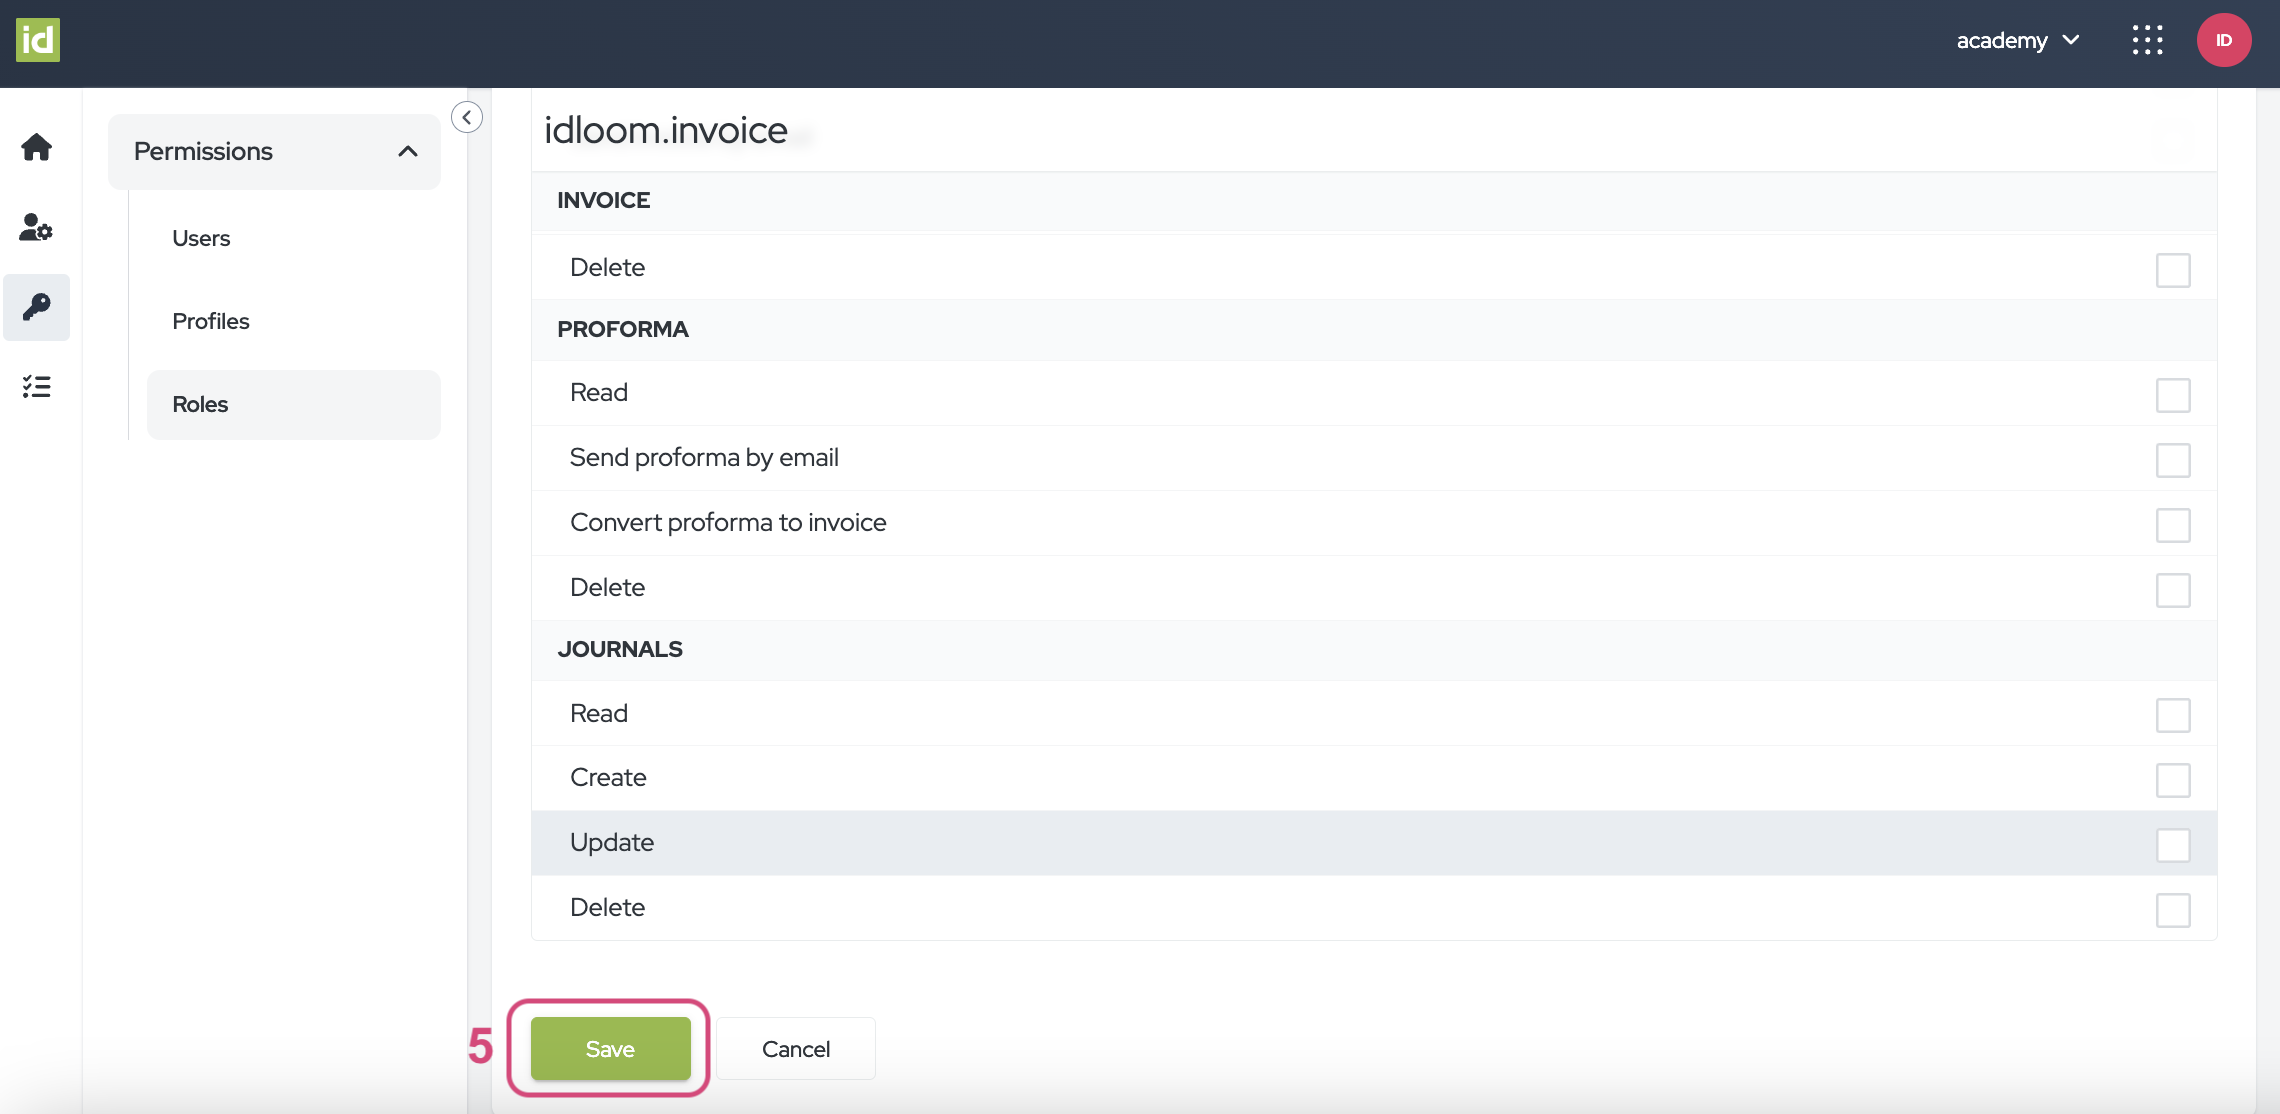
- Select the checkboxes next to the rights you would like to activate for this new Role.
- Click on the “Save” button.

Edit your Roles
Navigate to the Permissions > Roles section of the Identity Module.
- Click on the “Manage roles” button.
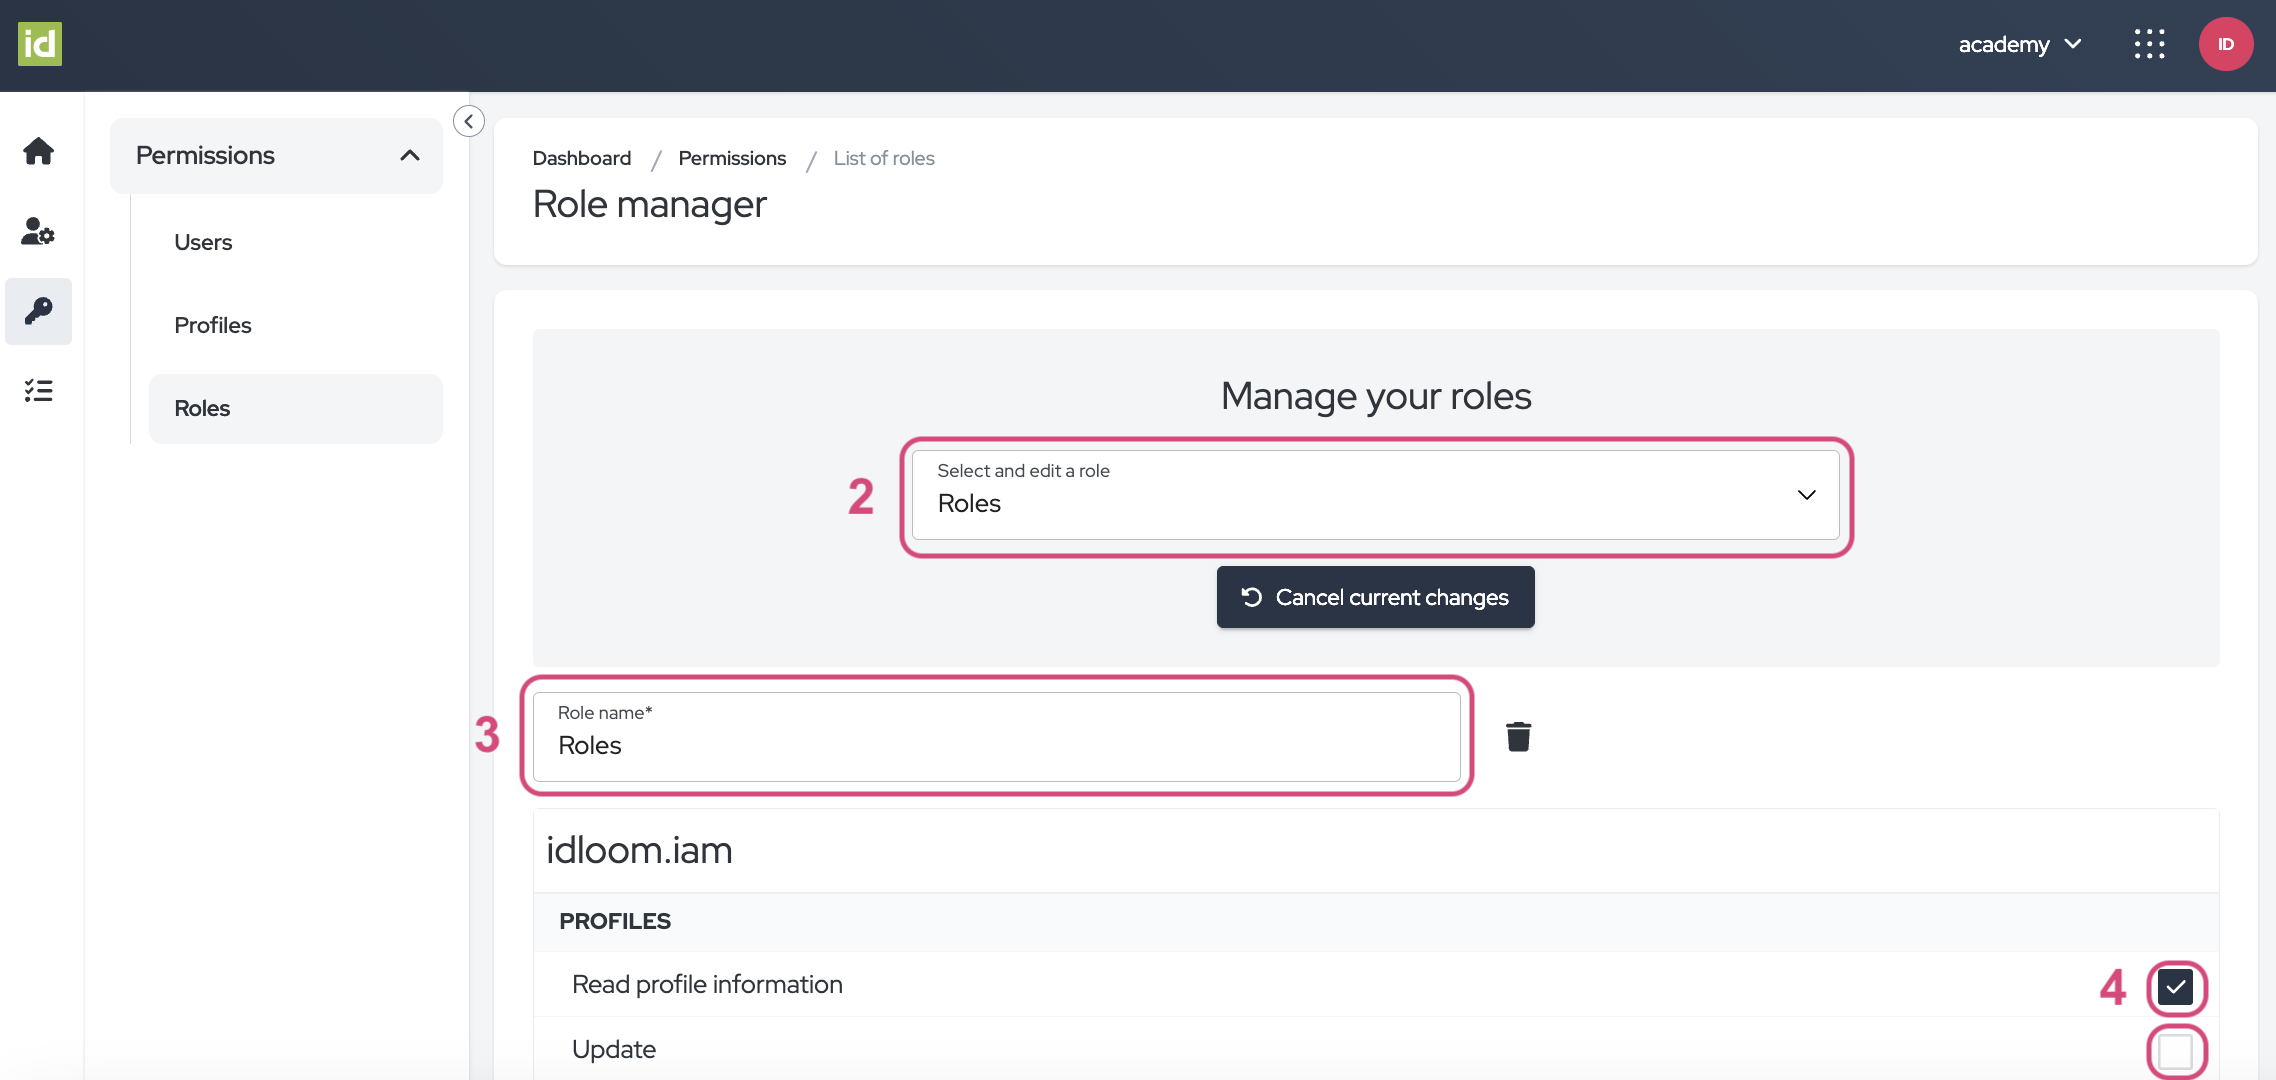
- Select the desired Role from the “Select and edit a role” list.
- Modify the name of your Role or the rights linked to it by clicking on the related checkboxes.
- Click on the “Save” button.

Delete Roles
Navigate to the Permissions > Roles section of the Identity Module.
- Click on the “Manage roles” button.
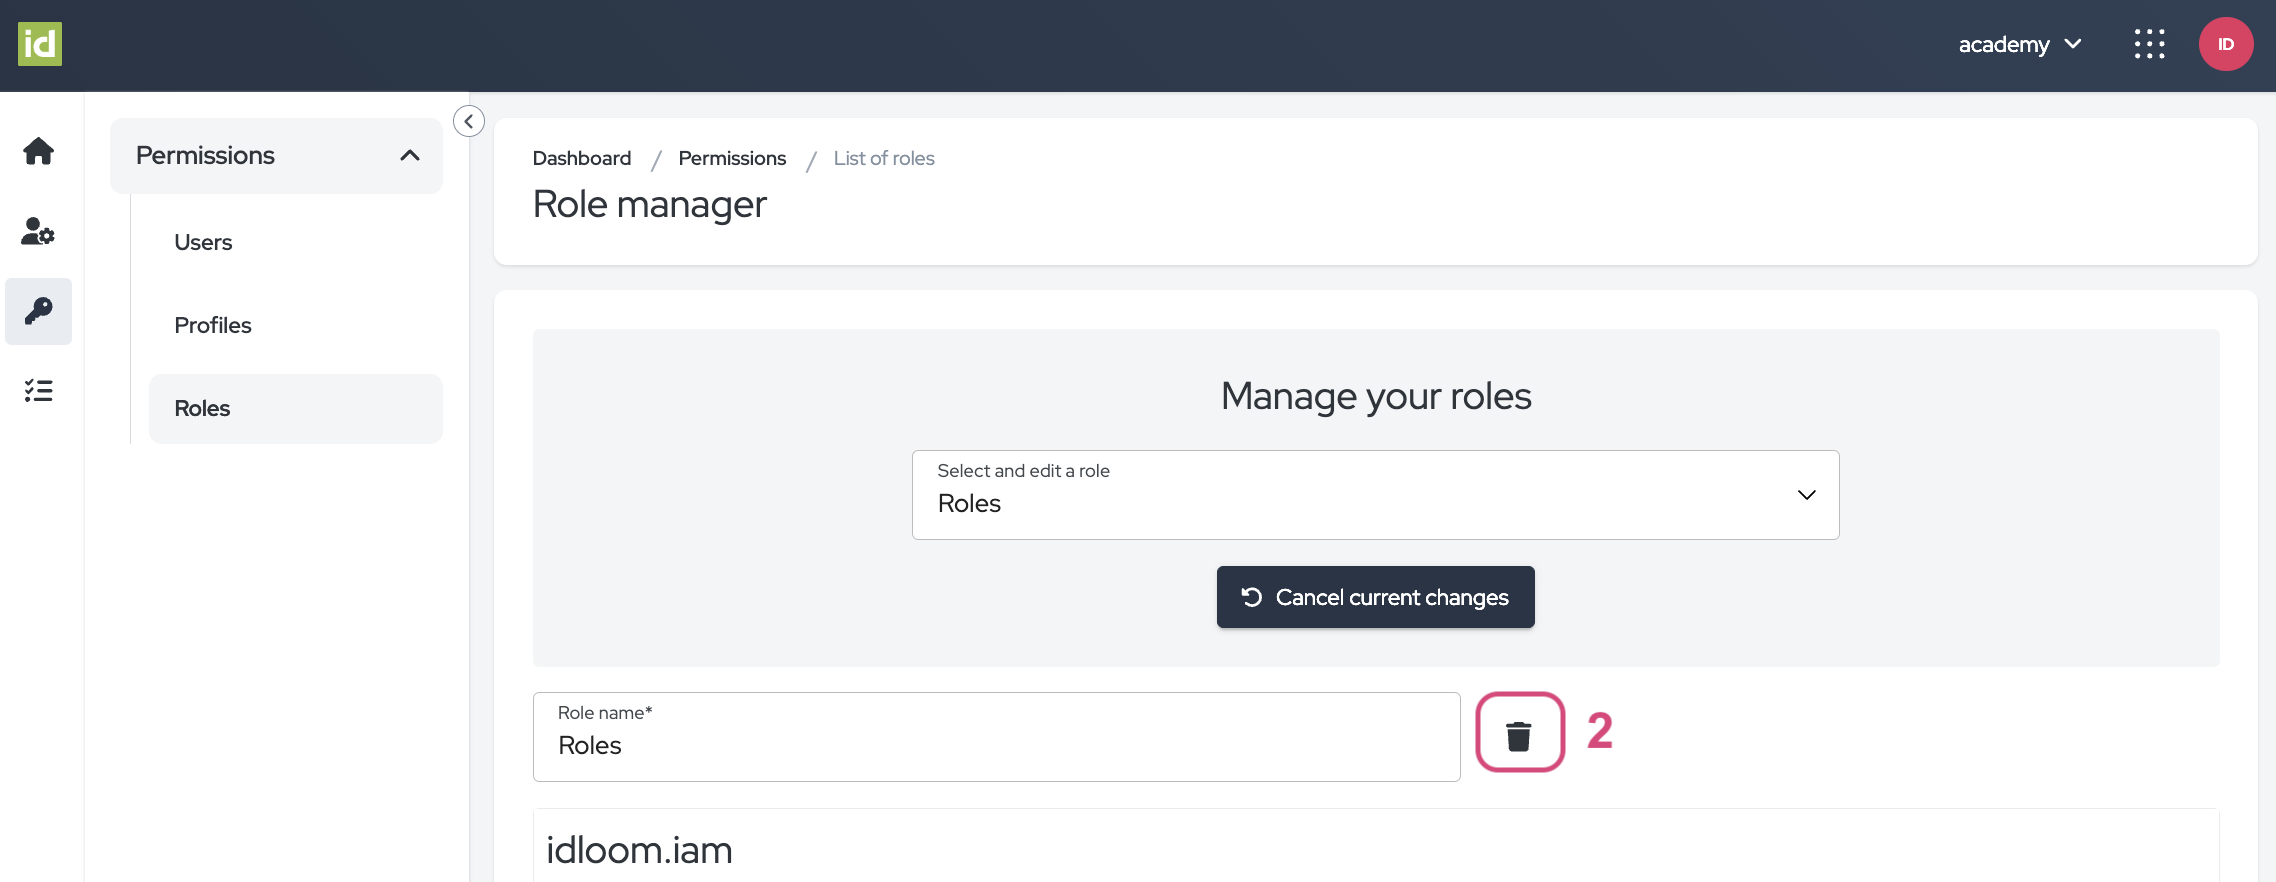
- Select the desired Role from the “Select and edit a role” list.
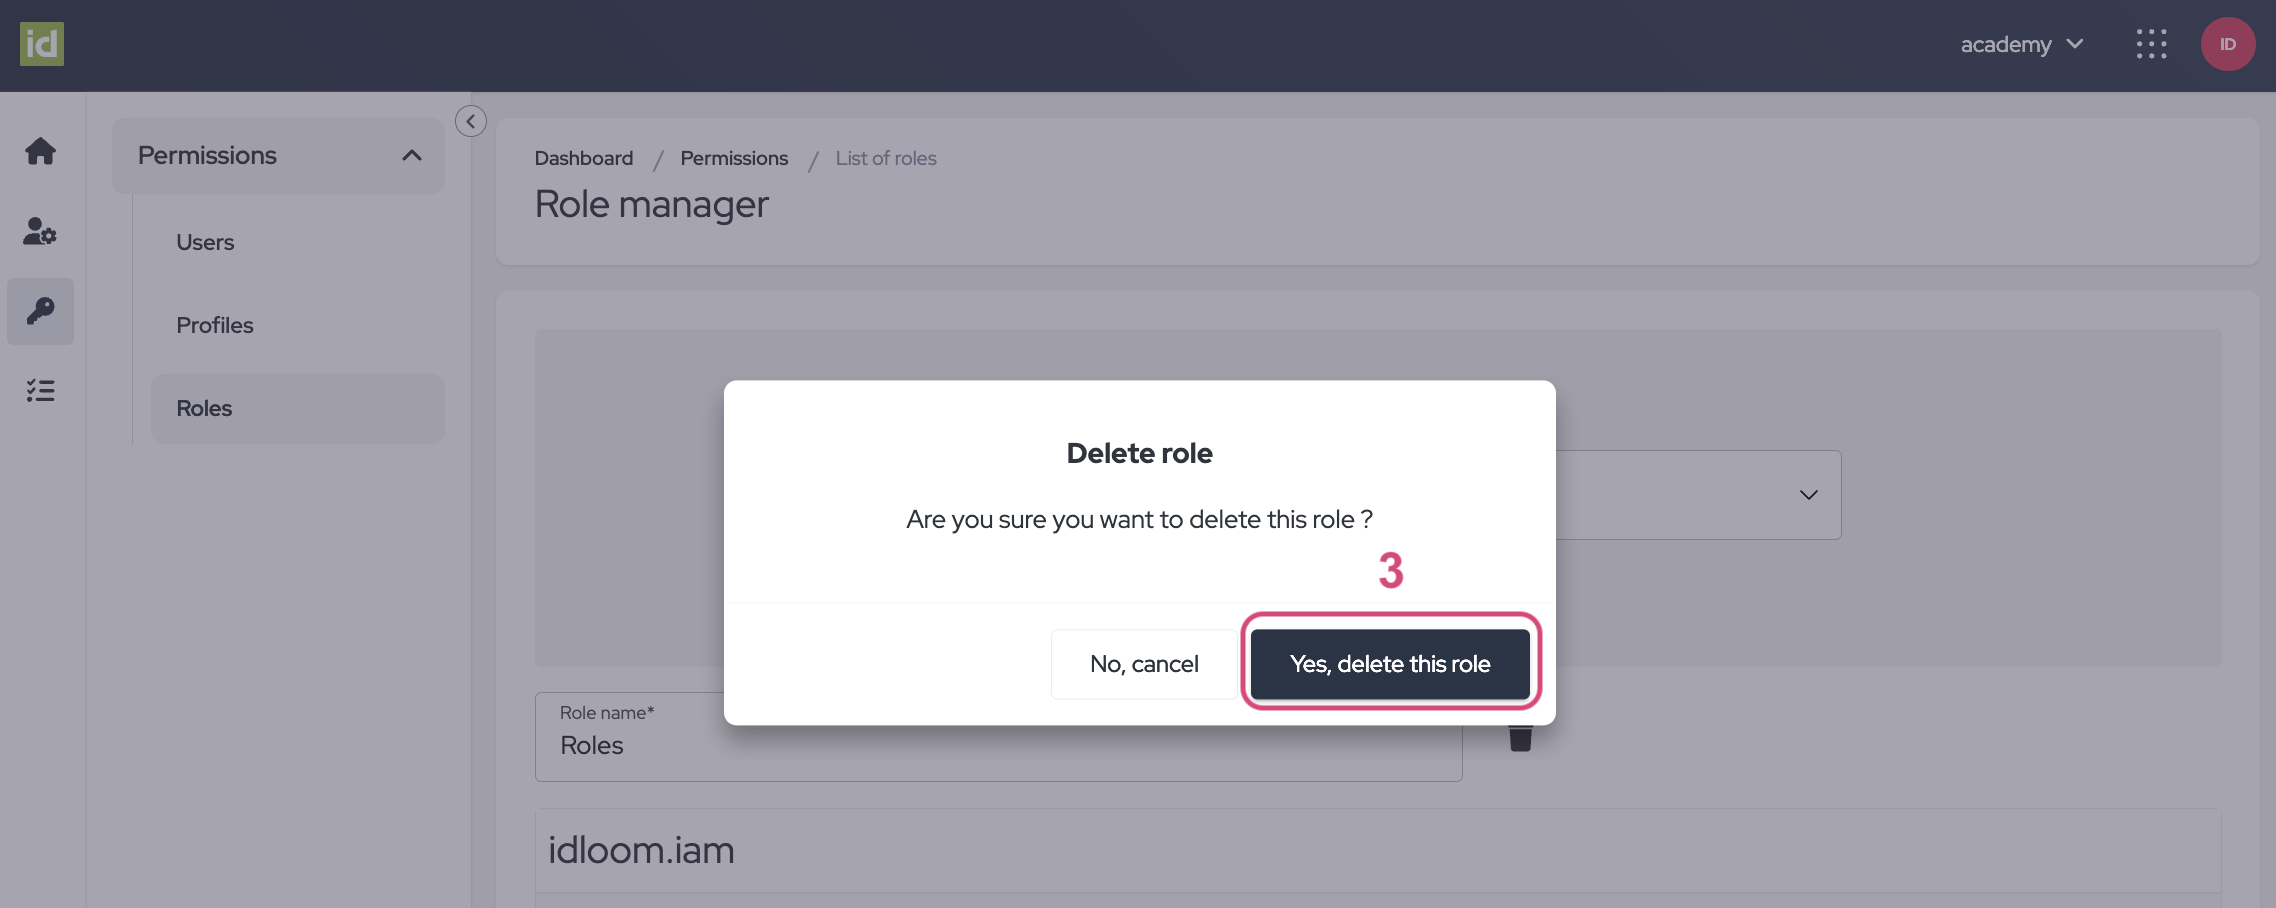
- Click on the “Delete this role” button.
- Confirm by clicking on “Yes, delete this role”.
Keep your Permissions under control with idloom!
Discover related user guides. You might also be interested in…
Identity - Module navigation and Identity management
Identity - Profiles and Subscriptions
The idloom.events team