


Email domain filters, code-restricted registration forms, guest information pre-fill !
Do you have guidelines as to who can or cannot register to your events, and need to prevent undesired registrants from registering? idloom.events lets you restrict registrations in multiple ways: with email domain restrictions or with code restrictions. The restricted registrations module is available from the Premium plan.
Email domain restriction
The simplest way of restricting who can register to your events is to define the list of email address domains that are allowed to register.
Go to Registration > Form and edit the field Email. Simply enter the domains (starting with @) that are accepted in the Allowed domains field, separated by “;” and Save. This feature is useful for internal events, for which you only want email addresses from within the organization to be able to register.
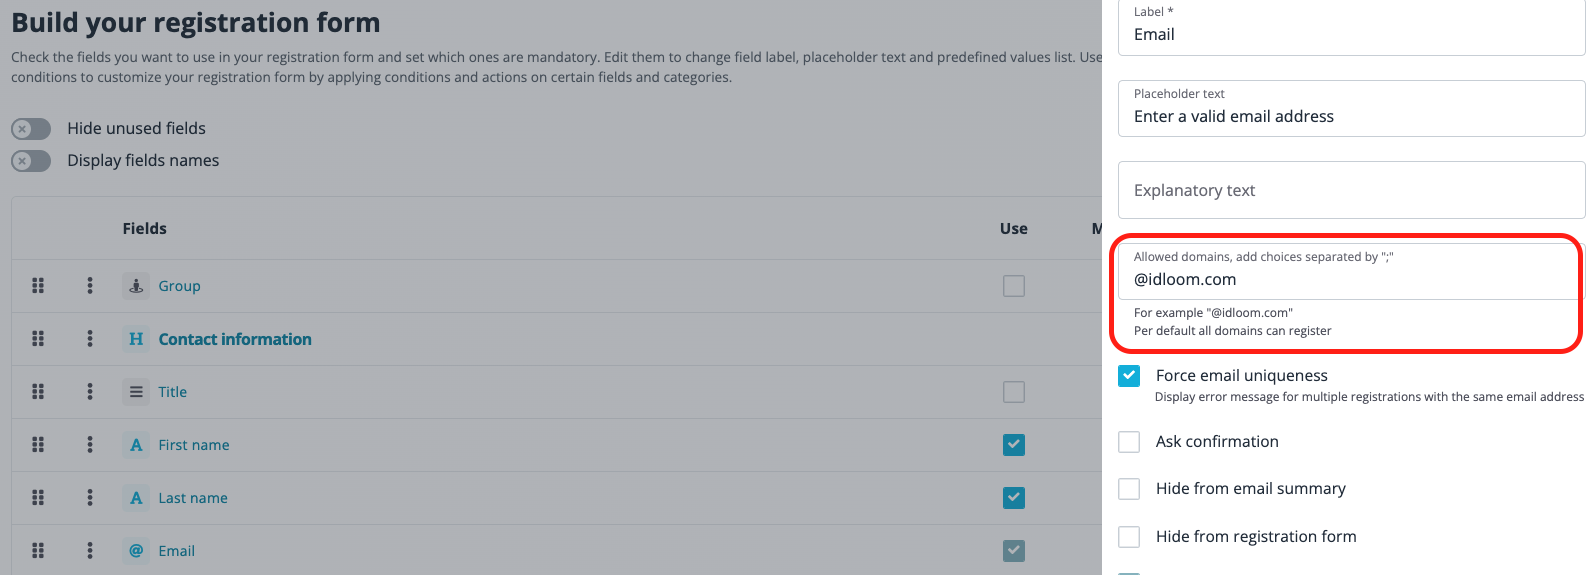
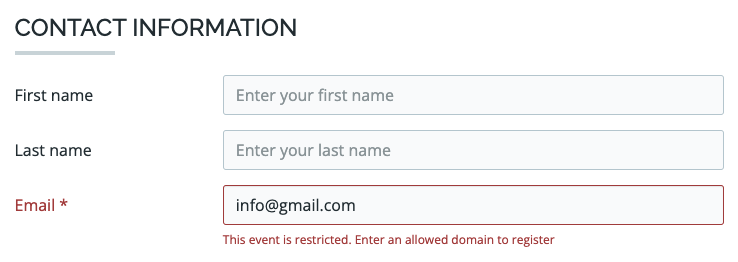
As a result, only the allowed domains will be able to register to the event.
Code restriction using the same code for all registrants
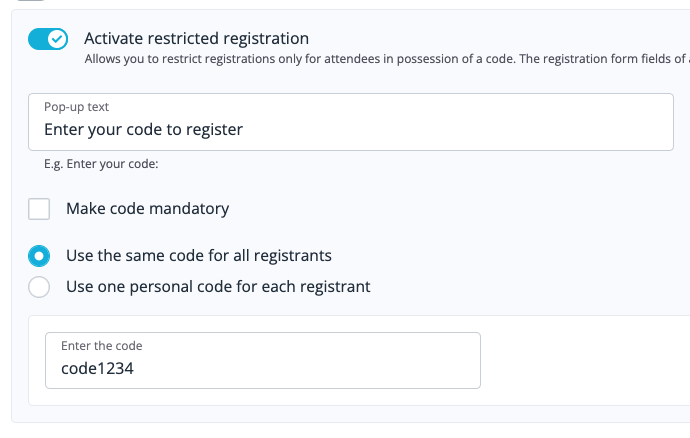
The second way of restricting registrations to your events goes further, and lets you define a unique access code for all registrants to access the form.
Go to Registration > Settings > Activate restricted registration, select Use the same code for all registrants and save. Registrants will need to enter the code to be able to register. It’s simple and effective!
In Pop-up text, enter the text you want to appear when people are prompted to enter their code. Make the code mandatory and define the code you need.
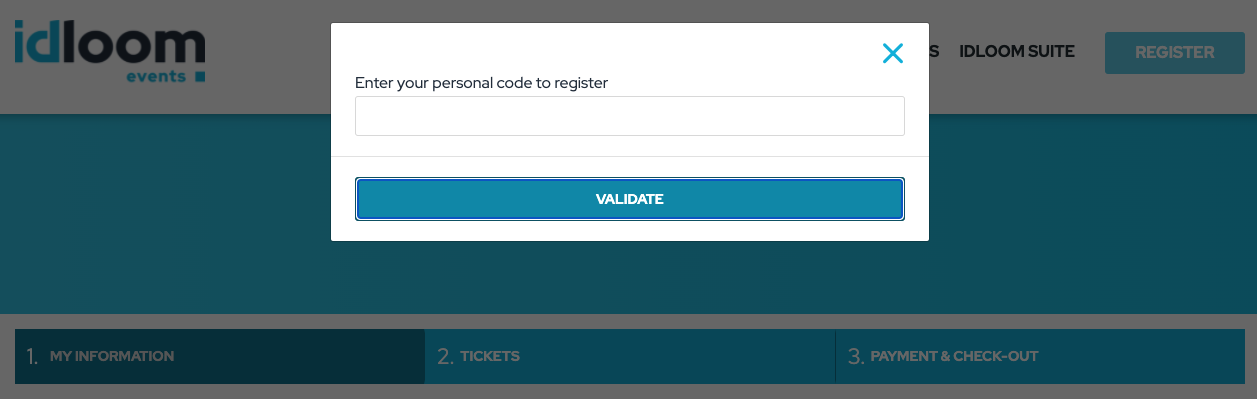
As a result, only people with the code will be able to register to the event.
Code restriction using one personal code for each registrant
If you want to go even further and restrict registrations in a more personalized way, you can upload a list of people in the backend and define a unique code which is individual to each of them.
Go to Registration > Settings > Activate restricted registration, select Use one personal code for each registrant and save. Registrants will need to enter their own code to be able to register.
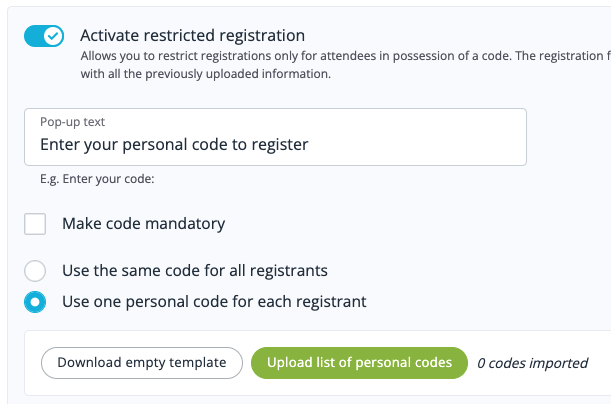
In Pop-up text, enter the text you want to appear when people are prompted to enter their code. Make the code mandatory or not (if you also want to let people register without any code).
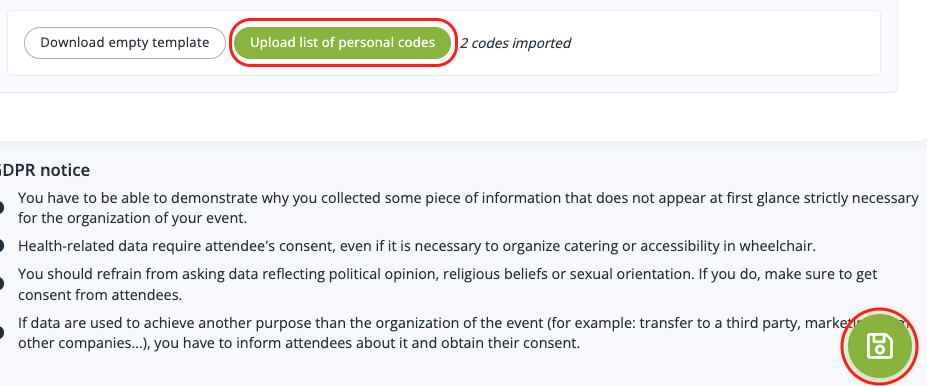
- Click on Download the empty template. The spreadsheet matches precisely all the fields created in the Form and the Categories & Options defined.

- Fill out at least the guests personal code (in column A - Registration code) and their email address. You have the choice to fill out more information if you need.

- You can also pre-select categories and/or options for each guest by filling the column with a 1 in the required field(s).

- Once all data has been inserted, save your document. Click on Upload the list of personal codes to import your spreadsheet and Save. There will be a notification on the top right corner of your screen “The import will start soon. You’ll be notified by email when it is done.” You will receive an email once your codes have been imported.
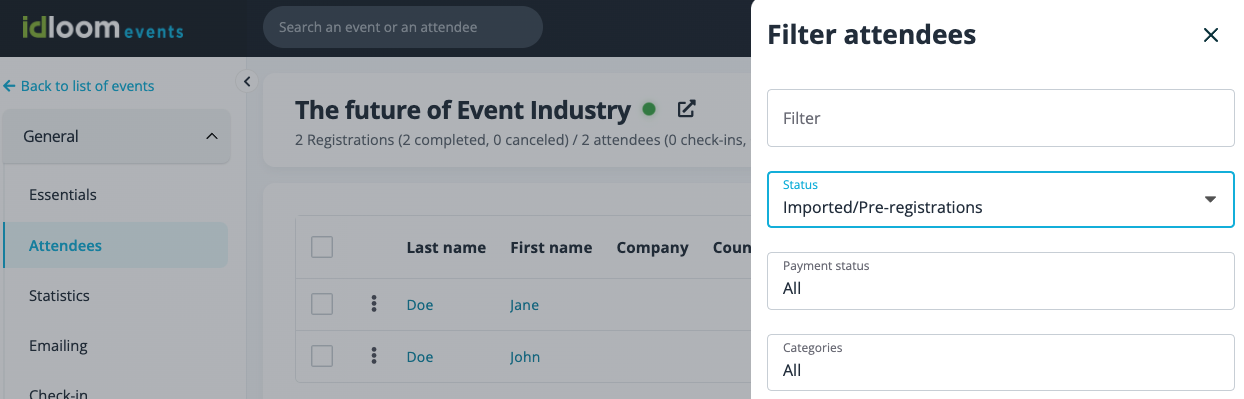
- The imported guests are automatically added to the List of attendees (General > Attendees) under the status Imported / Pre-registrations. Filter your List of attendees on this status to see your imported guests.
All registrants entering their codes will have their form prefilled with the data previously inserted. Once they’re registered, their status will automatically be changed from Imported / Pre-registrations to Registration complete. The personal code can be used only once.
If registrants do not have a code, they will not be able to register if the code is mandatory. They’ll only be able to register if it is not mandatory, but in this case the form won’t be prefilled with their information.
Tips:
- A unique code can be anything – email address, badge number, student ID, etc.
- All you have to do is communicate the code to your invitees when you send out invitations
- From the imported codes, you can generate custom URLs directly opening the pre-filled form without having to enter the code first
- It’s a great way to distribute a fixed number of seats for a select group of people (i.e. 10 tickets available to a given company).
Restricting registrations by linking with third-party software
Because of idloom’s extensive set of API features, you can also restrict registrations by systematically matching registrants email addresses to whitelisted contacts in your CRM system. This does however require some setup. Don’t hesitate to contact us if you need any assistance with this.
As you can see, there are multiple ways of managing registration restrictions in idloom.events. Don’t hesitate to contact us if you need any assistance with this!
The restricted registrations module is available from the Premium plan.
Good luck with your future events!
Enjoy!
The idloom.events team