Give your attendees one place to find it all.
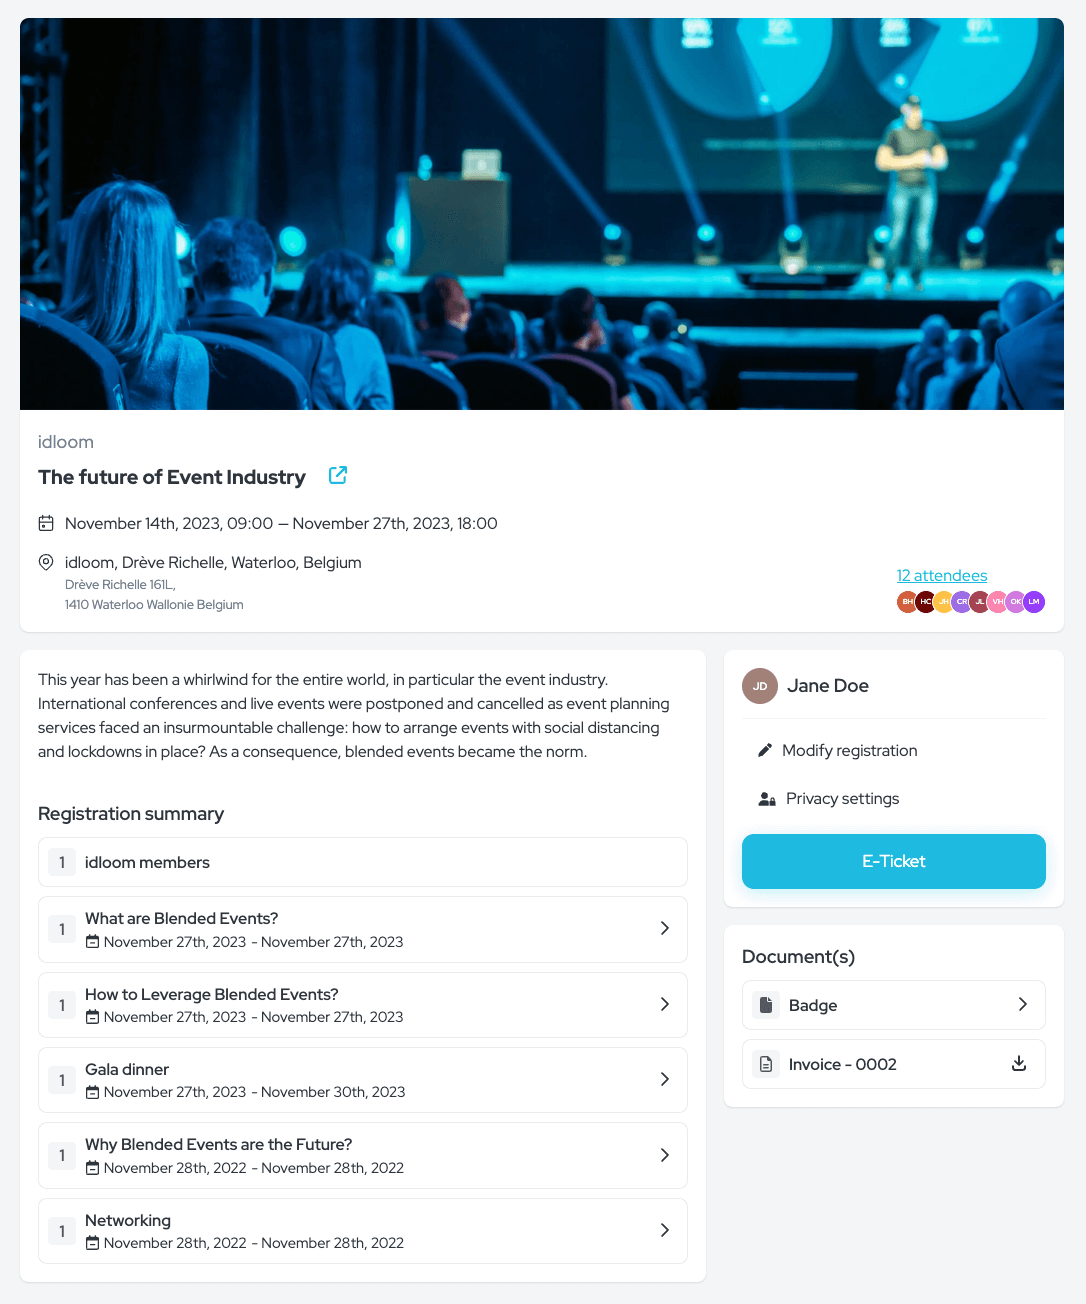
With the Attendee Hub, they can instantly access everything they need: event details, registered sessions, tickets, badges, invoices, and more. No searching, no stress.
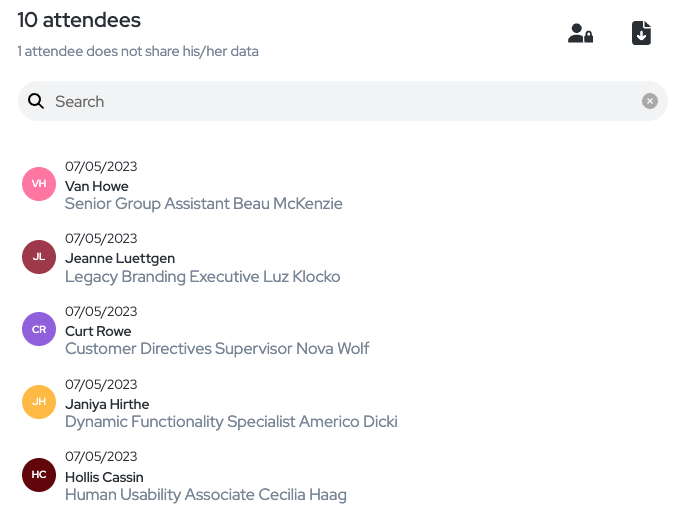
They can also connect with others through the interactive attendee list — because great events are built on great conversations.
All in one place. All fully under control.
Getting started
The Attendee Hub is a personal event page, tailored to each participant. It’s activated by default on your account, but you choose whether or not to share the access link — so you stay fully in control.
The hub goes live automatically when your event is online, and it’s hidden when your event is offline. Simple as that.
How to share the Attendee Hub
Granting access to the Attendee Hub is simple: each attendee has their own personal link. You just need to choose how and when to share it.
Here are your options:
Automatically:
-
On the confirmation page:
Go to Content > Registration process and enable the “Attendee Hub” button. This lets attendees access their hub immediately after registering. -
In confirmation emails:
Head to Content > Automatic emails and activate the Attendee Hub button, so participants can access their personal hub directly from their email. -
Using a merge field:
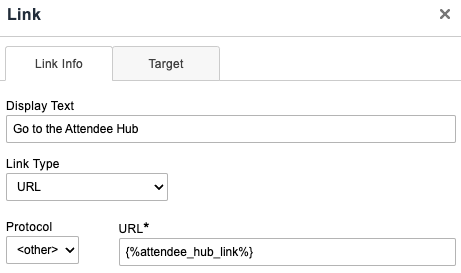
In any email, insert the Attendee Hub Link merge field using the text editor.
Tip: Want to simplify the display? Edit the link text, choose <other> under “Protocol,” and paste {%attendee_hub_link%} as the URL.

Manually:
-
From the List of attendees, click on a participant’s name, go to the Essentials tab, and copy their Attendee Hub link to share directly.
-
You can also click the three-dot menu next to any attendee’s name to open their Attendee Hub instantly.
Attendee Hub Content
The Attendee Hub gives each participant a personalized view of their event experience. Here’s what’s included by default — and how to adjust it if needed:
- Event information
The General event description is displayed by default. Want to show something different just for attendees? Use the Attendee Hub & App description under
Content > Promotion > Promotion texts (activate “more promotion texts”).
- Registered sessions
Attendees automatically see a summary of the sessions they’ve registered for—no setup required.
- Modify registration
If enabled in Registration > Settings, attendees can update their registration directly from the Attendee Hub.
- E-ticket
Includes registration details + a QR code, and is shown by default. To hide it, go to Content > Automatic emails and disable the QR code display.
- Badge
Only appears if the attendee is part of a segment with an active badge setup.
- Foldable ticket
Shown by default. To remove it from the confirmation page and the Attendee Hub, disable the “Print your ticket” button under Content > Registration process > Confirmation page.
- Invoices, credit notes & pro forma
These documents appear in the Attendee Hub only if enabled in: Money > Receipts and invoices.
The Attendee List
Make networking easier by sharing a searchable, downloadable list of participants—directly in the Attendee Hub.
How it works
The list is disabled by default. To activate it, add the “I consent to share my data” checkbox in Registration > Form.
![]()
Customize:
-
The label and GDPR description
-
Which fields are shared (e.g. company, job title, LinkedIn)
Attendees can choose to opt in or out during registration. They can update their sharing preferences anytime from the Privacy Settings in their Attendee Hub.
Even attendees who opt out can still view the list — only those who opt in are shown.
Features of the list
-
Becomes searchable once you hit 8+ participants
-
Updates in real time as people register or change preferences
-
Can be downloaded in Excel if enabled

Need to add a new shared field later?
No problem:
-
New registrants will see it automatically
-
Existing attendees will only see it if a value is already filled in
Example:
You add "Company sector" as a shared field. If it’s blank for someone, they won’t see it — unless they update their registration or you manually add the data.
Effortless Management for Multiple Registrations
For attendees juggling several bookings—whether an executive assistant coordinating travel for a team, a department head overseeing group bookings, or a delegate attending a multi-event series—the Attendee Hub offers a powerful optional multi-registration feature.
This feature consolidates every registration under a single login. Attendees can view, edit, and access documents for all their different event entries in one central place, eliminating the need to track separate confirmation emails or login credentials.
Learn more about Multi-Registration
A single space to connect, discover, and personalize the attendee experience.
Now that’s what we call event-ready.
