


General event check-in
From any mobile device, open your web browser (Google Chrome is recommended) and log in to your idloom.events account.
Note that the check-in feature is compatible with any mobile device, whether smartphone, tablet, or phablet, operating under any mobile OS: Android (Android Market), iOS (AppStore), Windows, BlackBerry, etc. Checking attendees in can of course also be performed from a computer.
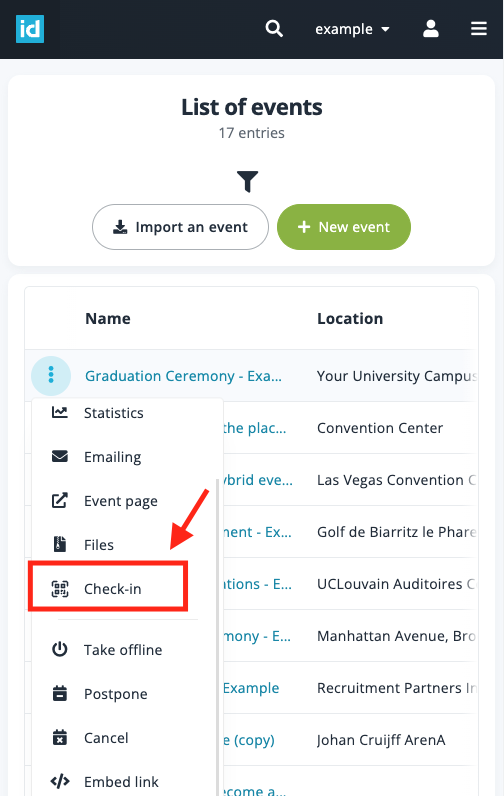
Select your event in the List of events and, tap on the 3-dots button next to the event's name and tap on Check-in. Our check-in tool is also accessible from the General > Check-in section of the event.
You will then access the check-in page, where you will be able to check in attendees by simply scanning the QR code they would have received in their confirmation email.
If an attendee does not have his QR code at disposal – he may have forgotten to bring his ticket or deleted the email – simply enter his name in the Search attendee field to proceed with his check-in.
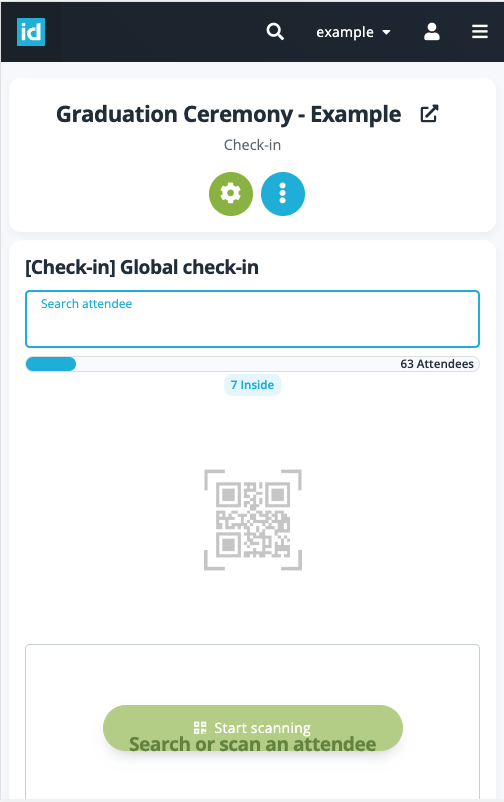
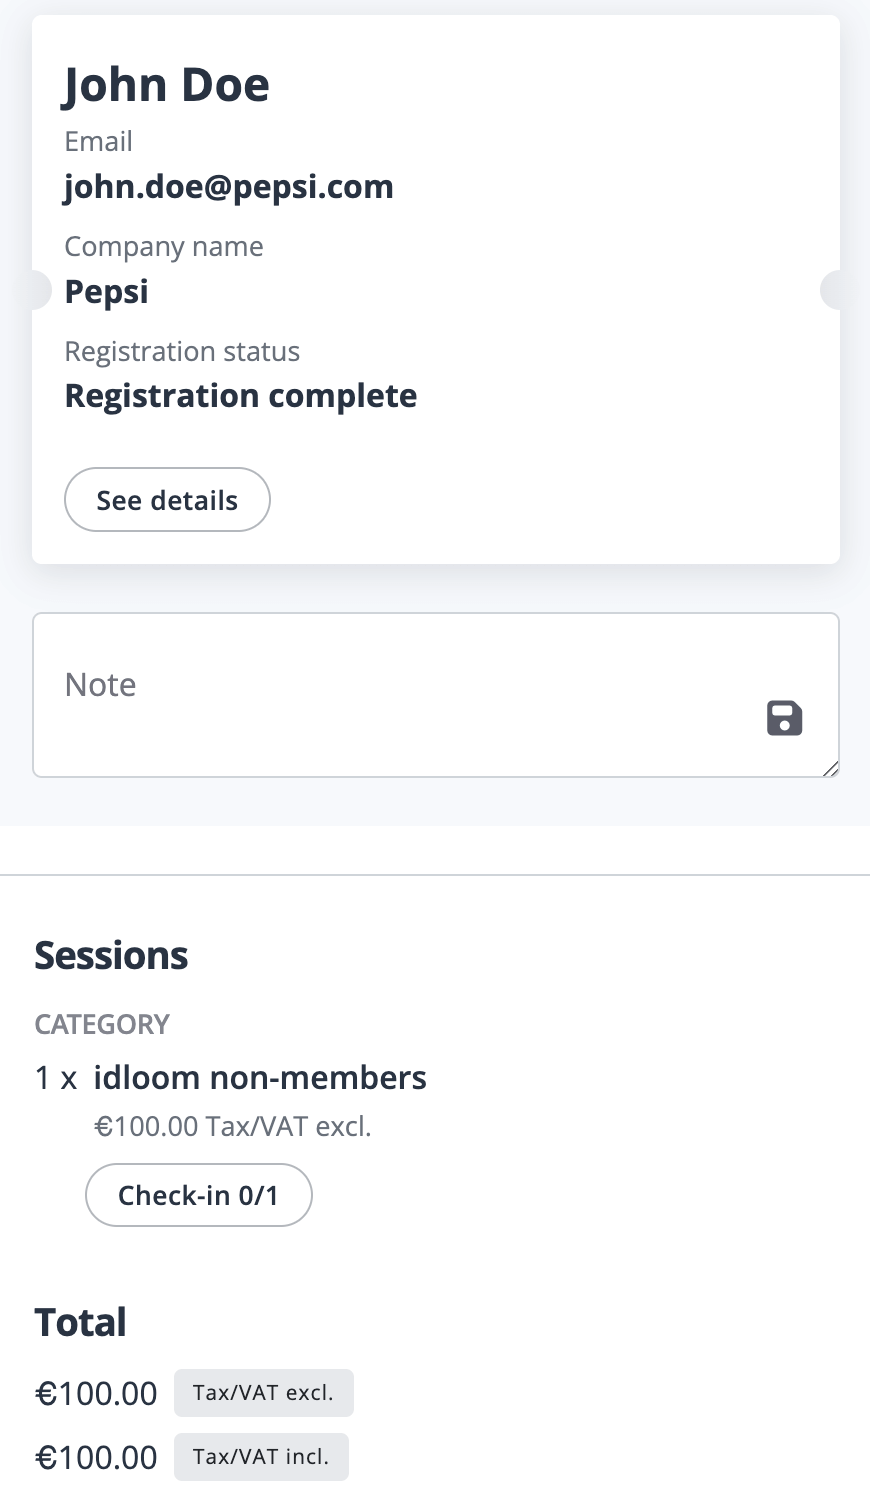
When checking attendees in, the system will display the attendee's information, his registration status and warn you if he has not paid yet.
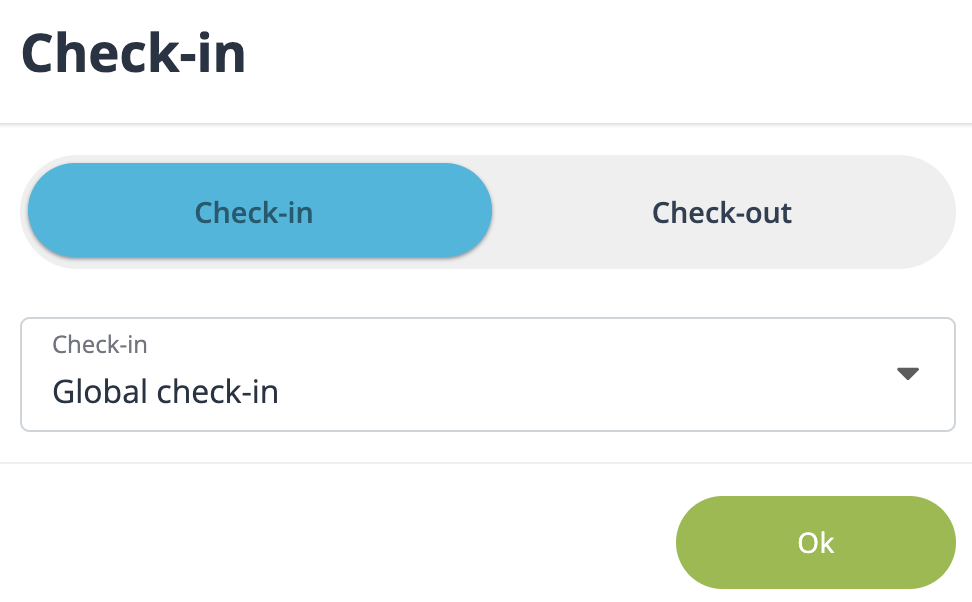
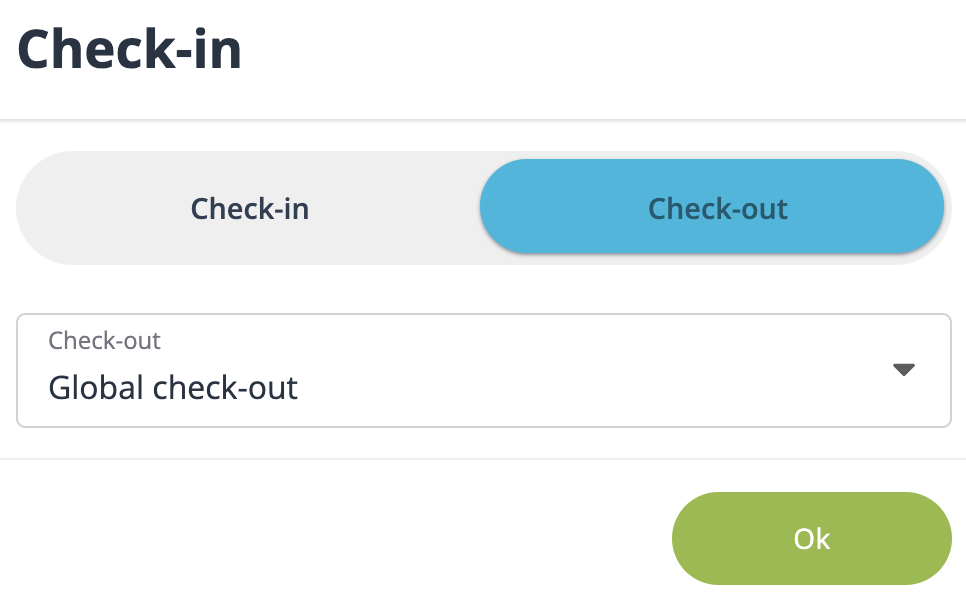
The platform lets you also check your attendees out. Simply flip the check-in / check-out switch and start scanning again for check-out.
Monitoring the data
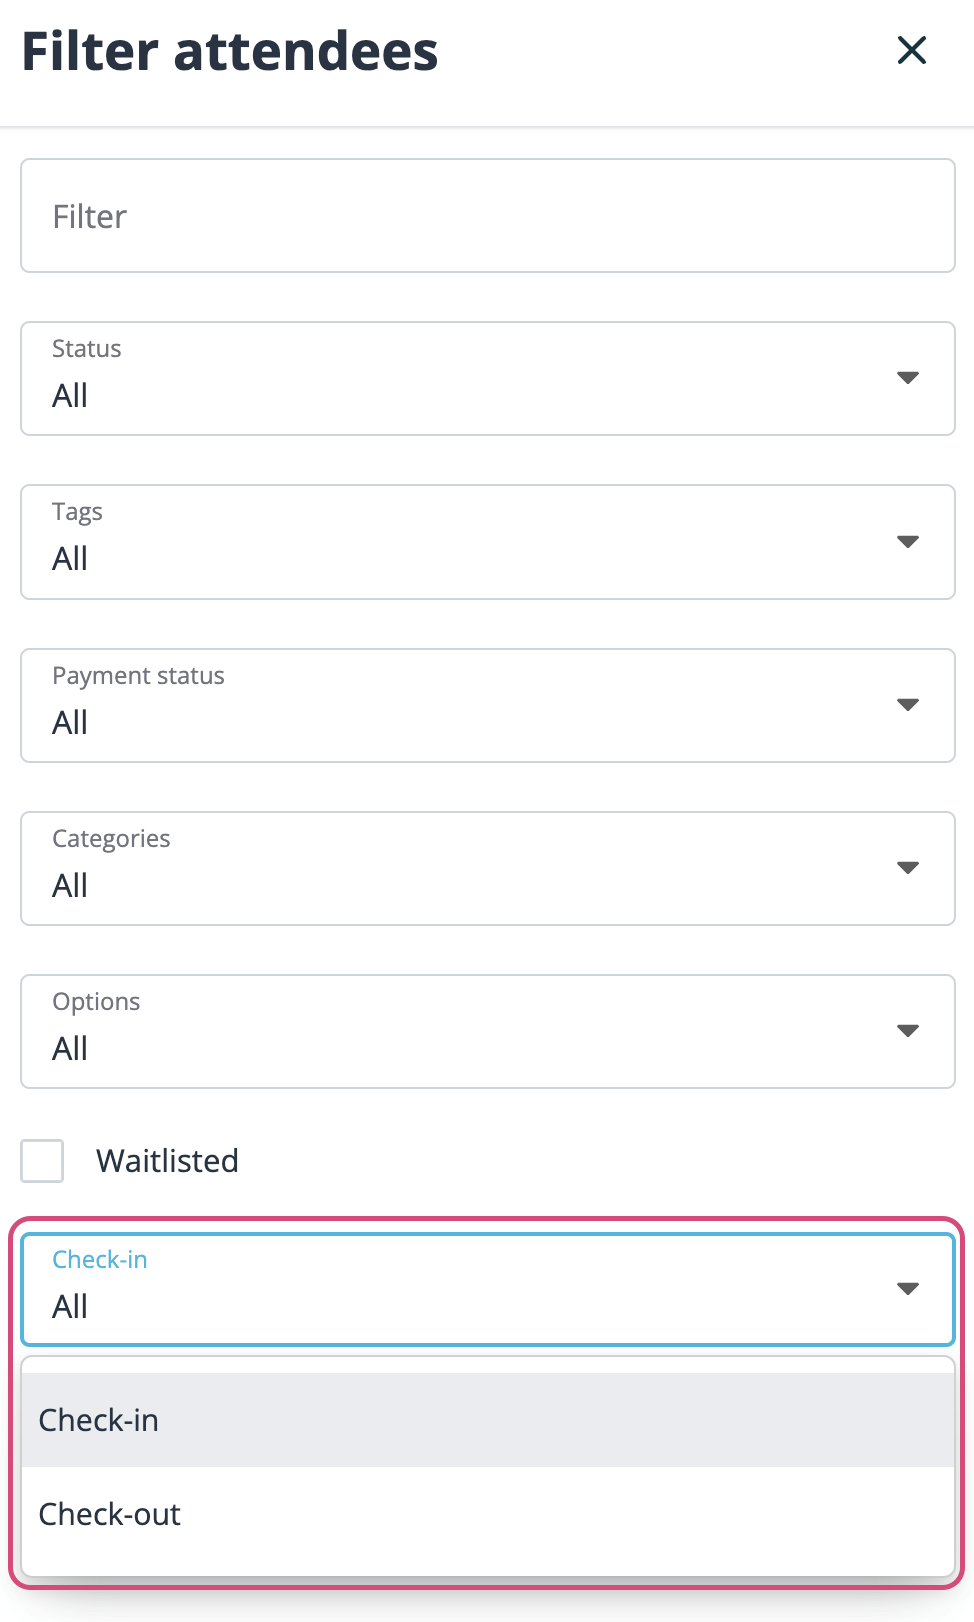
In your List of attendees, quickly find out who came to your event by filtering the attendees by Check-in status.
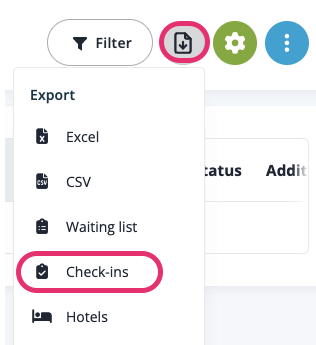
Easily export your attendees check-in information in a .xls file. The export will include the precise time attendees performed their check-in/out.
Check-in your attendees per session
- Available from Premium subscription -
You can also check your attendees in per session. From the Check-in page, choose if you want to start checking attendees in or start checking attendees out. Then select the category or option you want to start checking for.
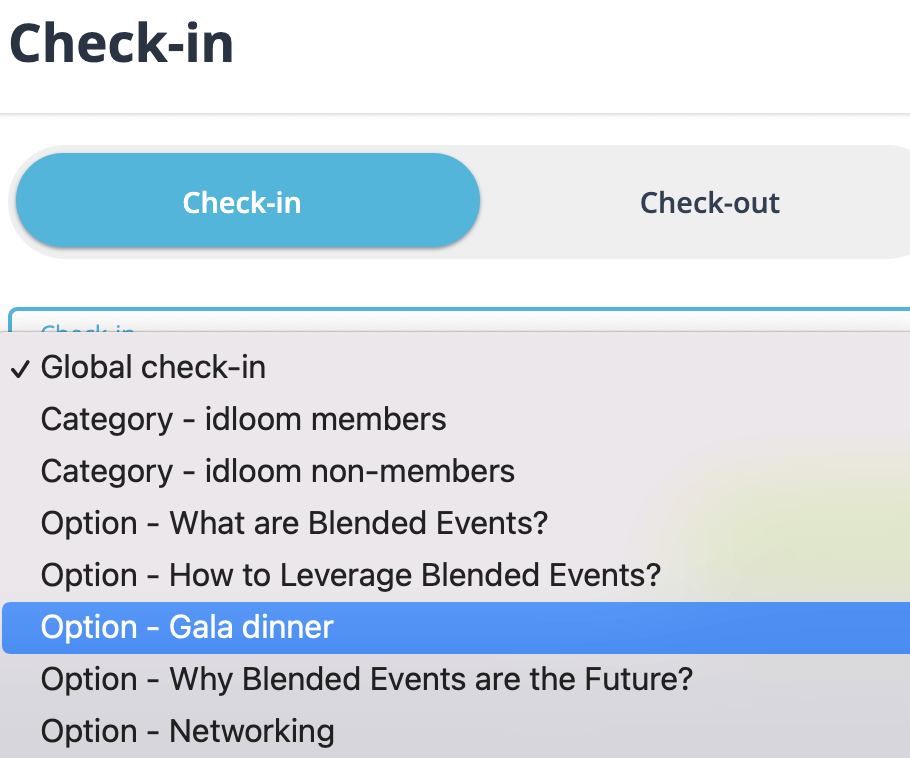
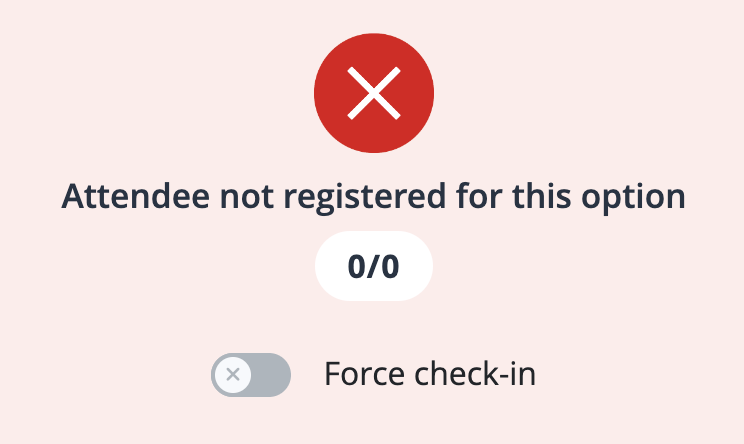
Of course, only attendees having registered for these individual sessions will be allowed to check-in. If they have not registered to the category and/or option, you will see error message (Attendee not registered for this option).
Connect your external scanning device
idloom.events offers you the ability to connect an external scanning device to our check-in tool via Bluetooth.
Go in the settings of your smartphone or tablet to activate the Bluetooth. Select your barcode scanner that you will have previously switched on.
The connection between the scanner and the smartphone or tablet is straight forward. There is nothing to be installed, you just need to switch it on. If you have any troubles with this, check out the user manual instructions first or let us know the type of scanner you are using.
Scan the QR-code of the attendee’s confirmation email. You will see a URL appearing on the Search attendee field, which will eventually be converted into the attendee’s UID and check the attendee in.
If you see a URL with strange characters, ending up to “no matching attendee” instead of the attendee’s name, make sure that your scanner is correctly configured and that the keyboard on your smartphone or tablet is the same as the scanner’s one.
We wish you success and pleasure with all your events!
The idloom.events team